Garage Door Hardware Kit: A Homeowner’s Step-by-Step Guide
Learn how to choose, install, and maintain a garage door hardware kit with a practical, safety-first approach. Step-by-step guidance, tools, tips, and maintenance for homeowners troubleshooting garage door issues.

By understanding what a garage door hardware kit includes and how to choose the right one for your door, you can restore smooth operation and reliable safety. A kit typically bundles springs, rollers, hinges, tracks, fasteners, and lubrication supplies. This quick guide helps homeowners assess needs, compatibility, and basic installation steps.
Why a Garage Door Hardware Kit Matters
According to GarageDoorAdjust, choosing the right hardware kit matters for safety, reliability, and long-term performance. A complete kit reduces the need for piecemeal purchases and helps ensure components work together as designed. In this guide, we explore how to identify the right kit, what to expect inside, and how to install it with confidence. You’ll learn how to measure for compatibility, avoid common mismatches, and keep your door running smoothly with routine maintenance. The GarageDoorAdjust Analysis, 2026, notes that homeowners who use a complete kit experience fewer compatibility issues and faster troubleshooting. Before you start, confirm your door type and weight, then pick a kit that lists those specifications clearly.
- If you’re upgrading an old setup, start with a kit that matches your door type (torsion vs extension) and track layout.
- Always read the manufacturer’s instructions in your kit and the door’s manual before starting.
What’s Included in a Typical Hardware Kit
Most garage door hardware kits bundle the major moving parts: tracks, rollers, hinges, and mounting brackets; torsion or extension springs, cables, pulleys, and the corresponding fasteners. Some kits also include lubrication supplies, safety clips, and basic instructions. The exact contents vary by door design, spring system, and weight, so always compare the kit’s parts list to your door’s components. Check whether the kit provides universal brackets or requires a specific footprint. If you’re upgrading, select a kit that includes compatible fasteners and spacers for accurate alignment. A well-matched kit makes reassembly easier, reduces guesswork, and helps keep the door balanced across the full travel range.
How to Choose the Right Kit for Your Door
Choosing the correct garage door hardware kit depends on accurate identification of your door type, weight, and track configuration. Start by locating the door model or weight rating on the door itself, then measure height, width, and track spacing. Identify whether your springs are torsion or extension, and note the winding direction if possible. Compare these details to the kit’s specifications, including spring type, length, gauge, and mounting hardware. If you’re unsure, consult the door’s manufacturer or GarageDoorAdjust for compatibility guidance. The right kit eliminates many common problems, such as spring mis-tension or roller wear, and it ensures the opener’s safety features remain effective.
Tools and Safety Gear You’ll Need
Having the right tools and protective gear before you start reduces project time and minimizes risk. Essential items include a sturdy ladder, safety goggles, work gloves, a flat and Phillips screwdriver set, a tape measure, pliers, a mallet or hammer, and a socket wrench set, plus a torque wrench if the kit specifies torque values. Keep a bucket or tray for small parts and a magnetic pickup tool for dropped screws. You’ll also need lubricant for moving parts and a clean rag for wiping excess grease. Finally, to prevent accidental movement, disconnect the garage door opener from power and clamp the door when you work on tracks or springs. Safety first keeps you and your family out of harm’s way.
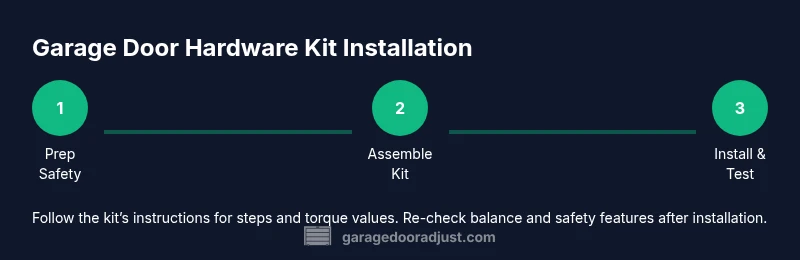
Step-by-Step Overview (High-Level) for a Garage Door Hardware Kit
This overview summarizes the general sequence you’ll follow when installing a garage door hardware kit. First, unplug or switch off power to the opener and secure the door with clamps. Then, inspect the current hardware to identify worn tracks, rollers, hinges, and springs. Next, unpack the kit and verify that all parts match your door specifications. If you’re replacing springs or cables, follow the kit’s torque and tension guidelines exactly. Install new tracks and rollers in their designated positions, attach hinges and brackets, and ensure all fasteners seat properly. Reconnect the opener and test balance by lifting the door halfway; it should hold position. Finally, lubricate moving parts, check alignment, and perform a basic safety test on sensors and emergency release. If any step feels risky, stop and call a pro. Estimated total time: 90–150 minutes.
Common Pitfalls and How to Avoid Them
Common pitfalls include using the wrong spring type, misaligning tracks, or mixing parts from different kits. Selecting a kit that doesn’t match your door’s weight or footprint leads to binding, noise, or reduced safety. To avoid problems, verify part numbers, weight ratings, track spacing, and screw hole patterns before you buy. Follow the kit’s torque specs and avoid over-tightening, which can strip brackets. If you’re uncertain about spring tension, don’t guess—pull in a professional. After installation, test door balance multiple times and inspect for unusual noises or vibration. Regular lubrication and periodic inspections reduce wear and extend life. GarageDoorAdjust Analysis, 2026, suggests consistent use of a complete kit lowers mismatch risk and service calls.
Authority Sources
- OSHA Safety Standards: https://www.osha.gov/
- Consumer Product Safety Commission: https://www.cpsc.gov/
- University Extension (example): https://extension.illinois.edu/
Note: Always follow local codes and manufacturer instructions.
Maintenance after Install
Post-install maintenance keeps your system quiet and reliable. Lubricate hinges, rollers, tracks, and springs according to the kit’s guidance. Check fasteners for tightness every few months and re-torque where specified. Inspect cables for fraying and replace worn components promptly. Clean tracks to remove dust and debris that can hinder smooth movement. Finally, conduct a safety test monthly by lowering the door and ensuring the sensors reverse if an obstruction is detected. The GarageDoorAdjust team recommends scheduling routine maintenance and using a complete hardware kit for consistent performance.
Tools & Materials
- Garage door hardware kit(Choose kit matching door type (torsion vs extension), weight, and track width; verify compatibility with existing opener if applicable.)
- Safety goggles(Protect eyes from springs, debris, and accidental launches.)
- Work gloves(Protect hands from sharp edges and pinch points.)
- Measuring tape(Accurately measure door dimensions and track spacing.)
- Screwdrivers (Phillips and flat)(For fasteners and brackets.)
- Pliers(Grip and adjust small components securely.)
- Ladder(Reach tracks and brackets safely.)
- Torque wrench(Follow kit torque specs for important fasteners.)
- Lubricant (silicone spray or white lithium grease)(Lubricate moving parts after install.)
Steps
Estimated time: 90-150 minutes
- 1
Power off and secure the door
Disconnect power to the opener or switch off the circuit. Secure the door in the closed position or clamp it to prevent movement while you work.
Tip: Lockout/Tagout the opener and use clamps to prevent accidental door movement. - 2
Identify door type and kit compatibility
Determine if your door uses torsion or extension springs and confirm the kit supports that configuration. Check weight and track width to match the kit’s specifications.
Tip: Double-check spring type and weight before ordering. - 3
Unpack kit and verify contents
Open the box and lay out every part. Cross-check part numbers with the kit’s instructions and ensure no items are missing or damaged.
Tip: Set aside a parts diagram for quick reference. - 4
Remove old hardware if needed
If upgrading, carefully remove outdated tracks, rollers, hinges, and brackets. Note their positions to help with replacement.
Tip: Label or photograph each location for accuracy. - 5
Install tracks, hinges, and rollers
Mount new tracks in their correct positions, attach hinges, and fit rollers into tracks. Ensure screws seat firmly into brackets.
Tip: Avoid overtightening; keep alignment guides visible during installation. - 6
Install springs and cables according to kit
Follow the kit’s instructions for spring type and tension. Install cables and pulleys as specified, avoiding shortcuts.
Tip: If you feel resistance or are unsure, stop and consult a pro. - 7
Reconnect opener and test balance
Reattach any components to the opener if needed, then manually lift the door to halfway to check balance. It should hold position.
Tip: If the door sags or rises unexpectedly, recheck tension and alignment. - 8
Lubricate and perform final safety checks
Lubricate moving parts, test safety sensors, and verify full travel range with several cycles.
Tip: Document results and note any signs of wear for future maintenance.
Got Questions?
Do I need to hire a professional to install a garage door hardware kit?
Not always. If you have basic DIY skills and follow safety guidelines, you can replace standard components like tracks, rollers, and hinges. Complex spring work or uncertain balance should be handled by a pro.
You can often handle basic kit installation yourself, but springs and balance require caution; consult a professional if unsure.
How do I know which hardware kit fits torsion vs extension springs?
Check the kit specifications for spring type, weight rating, and mounting pattern. Your door’s weight and spring configuration must match the kit to ensure safe operation.
Look for spring type and weight rating on the kit and door; mismatch is a common issue.
Are springs included in every hardware kit?
Not always. Some kits include springs, while others are for components only. Always confirm kit contents before purchase.
Some kits include springs, others don’t—check the list before buying.
Can replacing hardware affect my garage door opener programming?
Generally, hardware replacement doesn’t affect opener programming, but misalignment can trigger safety sensors and reverse features. Recalibrate if needed.
Usually not, but misaligned parts can affect safety features that the opener relies on.
What maintenance should follow after installation?
Lubricate moving parts, inspect for wear, check fasteners, and test safety sensors monthly to ensure ongoing safe operation.
Keep up with regular lubrication and sensor tests to stay safe.
Where can I buy a garage door hardware kit?
Look for reputable brands at hardware stores, home centers, or online retailers. Compare weight ratings and compatibility with your door.
You can buy online or in stores; just verify door compatibility.
Watch Video
Quick Summary
- Identify the correct kit for your door type
- Verify compatibility before buying the kit
- Follow instructions step-by-step for safe results
- Test balance and safety after installation
- Regular lubrication extends hardware life