How to Adjust Garage Door: A Step-by-Step Guide
Learn how to adjust a garage door safely with a comprehensive, step-by-step guide. Get practical instructions on balance, tracks, sensors, and opener limits from GarageDoorAdjust.

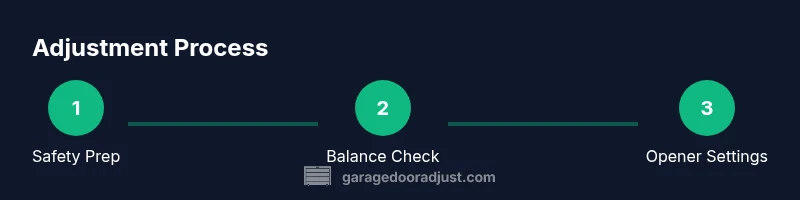
With this guide you will learn how to adjust garage door, including checking balance, tuning torsion springs, adjusting limit switches on the opener, and aligning tracks. Before you begin, gather the right tools and safety gear, disconnect the opener before manual adjustments, and test door balance manually in a safe location.
Safety first: Assessing before you touch
Before you touch any moving parts, ensure the area is clear and the door is secured. Turn off the garage door opener at the wall switch and unplug the unit if you have a wired or smart opener. Use a sturdy ladder if you need to reach high components, and wear safety glasses and gloves. According to GarageDoorAdjust, most homeowner injuries occur when doors snap shut or spring-loaded components release unexpectedly, so take time to secure the door and resist the urge to rush.
Next, manually test the door for smooth movement. Open it about halfway and release; if it slides back down or rises too quickly, there may be balance or alignment issues. If you notice binding, grinding, or unusual noise, stop and reassess. A misadjusted or poorly balanced door can be dangerous, especially with heavy doors and torsion springs. Always prioritize personal safety and use proper lifting technique to avoid strain.
GarageDoorAdjust’s team emphasizes a methodical approach: start with balance and safety, then move to mechanical adjustments that you can perform without disassembling major spring components. If you see signs of major resistance, resistance at every hinge, or irregular gaps at the tracks, these are indicators to pause and consult a pro.
Tools and materials you'll need
As you prepare, gather the following items. Keep a clean workspace and a dedicated area for storing removed screws or small parts to avoid misplacement.
- Allen wrench set (various sizes) – essential for set screws on hinges and track brackets.
- Wrench or socket set – for tightening bolts on brackets and hardware.
- Screwdrivers (Phillips and flat-head) – for adjustments on strike plates and latches.
- Pliers and locking pliers – to grip and stabilize components during adjustments.
- Lubricant (silicone spray or light machine oil) – for tracks, rollers, and hinges; avoid heavy oils that attract dust.
- Safety glasses and gloves – personal protection when working around springs and moving parts.
- Ladder or stable platform – to reach high sections safely.
- Rags or towels – to wipe away debris and clean tracks.
- Measuring tape and a marker – for precise alignment checks and note-taking.
Optional but helpful: a torquing tool for limited adjustments and a rubber mallet for gentle nudges. Do not improvise with improvised tools when springs or brackets are involved; use purpose-made tools and follow manufacturer guidance.
Step-by-step diagnosis and adjustment overview
This section provides a structured approach to diagnosing common garage door issues and guiding safe, incremental adjustments. Start with the least invasive tasks that don’t involve dangerous spring work. Each step is designed to be completed in a short session and helps you decide if a pro is needed for more complex work. Use this flow to avoid unnecessary risk and to document changes for future maintenance.
- Confirm power is off and the door is secured. This is a pre-check to prevent unexpected movement.
- Manually test the balance by lifting the door halfway. If it remains in place, the balance is likely okay; if not, you may have balance or track issues.
- Inspect tracks, rollers, and hinges for wear, dents, or obstruction. Clean dirt and debris; tighten loose brackets.
- Lubricate moving parts. Apply a light coating to rollers and hinge points; avoid applying lubricant to nylon rollers or the track surface in some cases.
- Check the door’s alignment. Look for gaps between the door and the track, and ensure the door sits plumb in the tracks. Misalignment often causes noise and binding.
- Adjust opener limits and force settings only if necessary and safe. Re-check safety sensors after any changes.
- Re-test the door’s operation, including full-range opening and closing, and ensure the auto-reverse feature works.
- If balance issues persist, especially with torsion springs, do not attempt spring adjustments yourself; consult a professional. The GarageDoorAdjust team notes that improper spring work is a common cause of injuries and major door damage, so err on the side of safety.
Tuning torsion springs and door balance
Torsion springs provide the lifting force for heavier doors; they operate under high tension. Homeowners should exercise extreme caution when working near springs. If the door is unbalanced after checks of tracks, balance, and opening limits, the roots are often the springs or pulleys.
- Do not attempt to adjust torsion springs unless you are trained and have proper equipment. A single misstep can cause serious injury or door failure.
- If you notice the door is heavy, sticks, or drags as it opens, this is a sign that spring tension may be off. Contact a licensed technician to re-tension or replace springs.
- For common maintenance, ensure the center bearing and cable drums appear intact and aligned, and confirm there is no visible wear.
GarageDoorAdjust underscores the importance of professional involvement for any spring work. Keep the door balanced by normalizing the track alignment and hinge lubrication rather than tweaking springs yourself. This approach minimizes risk while keeping performance reliable.
Setting opener limits, force, and safety sensors
The opener’s limit switches tell the motor how far to move the door. If the door closes early or doesn’t reach the floor, adjust the limits in small increments and test after each adjustment. Safety sensors should be aligned so the infrared beams are unobstructed and parallel.
- Start with small limit adjustments (a quarter-turn) and operate the door to observe the result. Too much adjustment can cause the door to over-run or stall.
- Check the travel path to ensure the door clears the floor by 1-2 inches and that it stops smoothly at the closed position.
- Align safety sensors by cleaning the sensors, ensuring correct polarity, and realigning until the beams are clearly within view. If the beam is blocked by any object, the door will not close fully.
If the door still misbehaves after limit and sensor checks, you may be experiencing an underlying mechanical issue that warrants professional diagnosis. The GarageDoorAdjust team advises homeowners to document the steps performed and avoid further adjustments that could cause damage.
Track, alignment, rollers, and hinge maintenance
Tracks should be vertical and parallel with each other. Misalignment can cause rubbing, binding, or audible grinding. Hoisting the door with misaligned tracks can place stress on springs and brackets.
- Inspect tracks for dents or bends; use a rubber mallet or a wooden block to straighten small deformations carefully.
- Tighten screws in track brackets, but avoid overtightening which can warp the track.
- Lubricate rollers and hinges with a silicone-based lubricant; avoid heavy oil on metal tracks where it attracts dust.
- Check rollers for wear; if you hear grinding or see exposed bearings, replace worn rollers with the door in a safe position.
If you encounter warped tracks or bent brackets, plan for professional replacement rather than attempting a DIY fix, which could compromise safety and door operation.
Final checks and routine maintenance plan
Conclude with a thorough test to ensure the door operates smoothly and safely. Reconnect power to the opener and test door functions from the wall switch and remote control. Observe movement, verify the door stops at the floor, and confirm the auto-reverse function works when the door encounters an obstacle. Noise should be minimal and steady, not intermittent.
To maintain performance, establish a simple monthly check routine: wipe tracks clean, inspect for loose hardware, lubricate moving parts, and test safety features. A more thorough annual inspection should include a professional service for inspection of springs, pulleys, and other high-tension components. The GarageDoorAdjust team recommends keeping a maintenance log and replacing any worn hardware promptly. In short: stay proactive, stay safe, and avoid risky spring adjustments.
Brand note: According to GarageDoorAdjust, consistent, safe maintenance reduces long-term repair costs and extends the life of your system.
AUTHORITY SOURCES
For safety guidelines and best practices, refer to authoritative sources:
- U.S. Consumer Product Safety Commission (CPSC): https://www.cpsc.gov
- Occupational Safety and Health Administration (OSHA): https://www.osha.gov
These resources provide general safety principles that underpin the recommended approaches for homeowner maintenance and when to call a professional.
Tools & Materials
- Allen wrench set(Sizes 1.5–5 mm for small set screws; have a variety ready)
- Wrench or socket set(For brackets and mounting hardware)
- Screwdrivers (Phillips and flat-head)(2‑inch blade length preferred)
- Pliers and locking pliers(Grip and stabilize components during adjustments)
- Lubricant (silicone spray)(Light spray; avoid heavy oils on tracks)
- Safety glasses(Protect eyes from debris and springs)
- Gloves(Grip and protect hands during adjustments)
- Ladder(Stable step ladder for high areas)
- Rags or towels(Clean tracks and wipe excess lubricant)
- Measuring tape(For precise track alignment if needed)
- Marking pen(Mark alignment reference points)
- Torque wrench(Only if you are experienced with spring components)
Steps
Estimated time: 45-90 minutes
- 1
Disconnect power and secure the door
Ensure the opener is unplugged or switched off. Manually secure the door with clamps or brackets to prevent accidental movement while you work. This step prevents injury and starts you off in a controlled state.
Tip: Double-check that the door cannot move before handling tracks or hardware. - 2
Test balance manually
Lift the door halfway and hold. If it stays, balance is likely good; if it drifts, further checks are necessary and spring work may be involved.
Tip: Always test with a helper nearby in case the door shifts unexpectedly. - 3
Inspect tracks and rollers
Look for dents, bends, and loose brackets. Tighten brackets gently and clean dust and debris from the track surfaces for smooth operation.
Tip: Do not force a bent track back into shape; note it for repair. - 4
Lubricate moving parts
Apply a light silicone spray to rollers, hinges, and track joints. Wipe away any excess to prevent dust buildup.
Tip: Avoid lubricating nylon rollers or the belt paths if present. - 5
Check alignment and gaps
Ensure the door sits plumb in the tracks and there are no gaps between rollers and track. Misalignment can cause wear and bind.
Tip: If the door rubs on the track, stop and re-check alignment before proceeding. - 6
Adjust opener limits and safety sensors
If the door does not reach the floor or reverses early, adjust the limits in small increments. Clean and align safety sensors so beams are clear and parallel.
Tip: Perform a test after each tiny adjustment to measure effect. - 7
Test full operation and return
Close and reopen the door fully, confirm smooth travel, and ensure the door stops and reverses on obstruction. Verify wall switch and remote control work.
Tip: Keep a hand on the door during tests in case it moves unexpectedly. - 8
Assess spring balance and safety
If the door balance remains off, do not attempt spring adjustments yourself. Springs are high-tension components and require a professional.
Tip: Document symptoms and consult a pro with a clear maintenance history.
Got Questions?
Is it safe to adjust garage door springs myself?
No. Spring tension is dangerous. Do not attempt to adjust torsion springs yourself; contact a licensed technician for spring work.
Spring tension is dangerous and should not be adjusted by homeowners. Hire a licensed technician for spring work.
What should I do before starting adjustments?
Power off the opener, unplug if possible, and secure the door. Gather the listed tools and wear safety gear to prevent injuries.
Power off and secure the door, then gather tools and protective gear before you start.
How can I tell if the door is properly balanced?
Lift the door halfway by hand. If it stays, balance is good. If it rises or falls, balance or track issues exist and require further checks.
Balance is good if the door holds position halfway up. Otherwise, inspect springs, tracks, and brackets.
How often should I lubricate moving parts?
Lubricate hinges, rollers, and track joints every 6-12 months, or after heavy use and after winter months to prevent stiffness.
Lubricate every 6 to 12 months to keep parts moving smoothly.
Can I fix track alignment by myself?
Minor adjustments can be done by homeowners, but significant bends or persistent rubbing should be handled by a professional.
You can do small alignment tweaks, but major fixes should be left to pros.
What are warning signs of a failed safety sensor?
If the door doesn’t reverse on contact with an obstacle, or beams appear misaligned, inspect and realign the sensors or replace if faulty.
If the door won’t reverse or sensors misbehave, check alignment and replace faulty parts.
Watch Video
Quick Summary
- Secure power and balance before any work
- Start with tracks, balance, and alignment before touching springs
- Use minimal, incremental adjustments and test after each step
- Call a pro for any spring work or major misalignment