How to Keep a Garage Door from Freezing to Concrete
Learn practical, step-by-step methods to prevent your garage door from freezing to concrete, including sealing gaps, insulation, and seasonal maintenance for a safer, smoother winter operation.

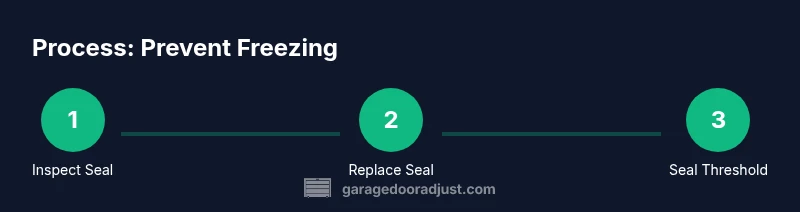
By the end of this guide you will know how to prevent a garage door from freezing to concrete using a simple, numbered approach. You’ll learn to seal gaps, improve drainage, insulate the door, and schedule seasonal maintenance that reduces ice buildup. The steps emphasize safe practices and affordable materials, so homeowners can tackle the task without specialized equipment or expensive services.
Why Garage Doors Freeze to Concrete
Freezing occurs when cold outdoor air meets a warm, damp garage, causing condensation to freeze at the door bottom and along the threshold. Over time, this can bond the door to the concrete, making opening difficult and stressing the hardware. According to GarageDoorAdjust, the most common causes are insufficient weather seals, poor door alignment, and inadequate drainage around the threshold. Narrow gaps allow cold air to flow under the door and meltwater to seep in, refreezing as temperatures dip. Other factors include humidity levels inside the garage, the porosity of bare concrete, and neglecting seasonal maintenance.
In practical terms, you’ll usually notice one or more signs: a hard-to-lift door, visible ice along the bottom edge, or a buildup of frost on the metal tracks near the header. The ice can trap the door, increase wear on rollers, and worsen balance issues. The first line of defense is a quick inspection: examine the bottom seal for cracks or tears, test the threshold gasket for flexibility, and look for gaps where water can seep in. If you can’t fill the gaps, water will continue to migrate under the door whenever meltwater or rain runs down the driveway.
From a maintenance standpoint, a single-season plan beats ad-hoc fixes. Regularly cleaning the door edges, replacing worn weatherstrips, and ensuring the threshold is level reduce the amount of moisture that can reach the concrete surface. In addition, consider how you manage water around the foundation: downspouts should discharge away from the door, lawn drainage should be directed outward, and the concrete near the door should be kept dry whenever possible. A small investment in preventive steps today can save significant effort when a cold snap arrives.
Quick Wins to Break Freezing This Winter
If you woke to a frozen garage door, start with these fast, low-effort actions. Dry the bottom edge and the threshold using a dry cloth or towel to remove moisture and condensation. Replace worn weatherstripping or adhesive-backed seals immediately if you feel air leaks when you press along the seam. Even small gaps can admit cold air that causes freezing and sticking. The next step is to clear the area outside the door so meltwater has a clear path away from the threshold; ensure the ground slopes away from the opening to prevent water from pooling.
Next, re-check the door threshold and adjust as needed. If the threshold is uneven, water collects at the joint and freezes. Re-level with shims or a thin bead of masonry or silicone sealant to close gaps. For most homes, a simple door sweep replacement will dramatically improve sealing. When you install the sweep, ensure it makes consistent contact with the concrete for the full width of the door. A well-sealed bottom edge reduces ice formation and reduces drag on the door’s opener.
As a long-term habit, set a reminder for seasonal checks—before the first hard freeze, inspect seals, tracks, springs, and lubrication. The GarageDoorAdjust Analysis, 2026, notes that homeowners who commit to a pre-winter inspection see fewer freezing incidents and less ice buildup at the threshold. Keep meltwater away from the door with proper drainage and record any changes in the door’s operation as you go.
The Role of Weatherstripping and Seals
Weatherstripping and door bottom seals are your first line of defense against freezing. Choose seals designed for garage doors—typically vinyl, rubber, or foam—that compress enough to seal gaps while remaining flexible at low temperatures. When inspecting, look for tears, cracks, or compression set in the seal. If the seal feels brittle or crumbles in your hand, replace it. Proper installation matters: start at one corner, peel off the old adhesive backing, and press firmly along the full length of the bottom edge to avoid gaps. For steel or aluminum doors, a flexible vinyl boot or a tubular rubber seal provides better long-term performance.
Inspect the threshold gasket as well. If water can seep under the door, the threshold may be cracked or lifted. Replacing or resealing the threshold prevents meltwater from pooling and freezing at the edge. In some cases, refinishing the concrete with a smoother surface helps water shed more quickly. Remember: even a well-sealed door can freeze if the surrounding area remains damp or the floor is porous.
According to GarageDoorAdjust, sealing gaps and maintaining flexible weatherstrips correlate with fewer freezing events. If you’re unsure about installation, consider a professional for a precise fit that won’t introduce new leaks. Seamless sealing is essential for keeping humidity and cold air away from the door mechanism, reducing strain on tracks and springs during winter.
Insulation and Insulated Door Considerations
Increasing the insulation level of a garage door reduces temperature swings inside the garage, which in turn minimizes condensation and frost formation at the threshold. If you have an older, non-insulated door, consider upgrading to an insulated panel or applying an insulation kit that fits your door type. For sectional doors, thicker polyurethane or polystyrene cores provide better thermal resistance. In addition, insulated doors often experience less condensation because the interior surface stays warmer, preventing rapid cooling of the bottom edge.
When choosing insulation, balance R-value with door weight and spring tension. Heavier insulated doors require different spring settings, which can alter balance and increase wear if not adjusted properly. If you’re not changing the door, you can still improve performance by adding foam insulation around the perimeter or installing a high-quality door seal that minimizes thermal bridging. Remember that insulation alone won’t fix water management; combine it with proper drainage and seal maintenance for best results.
GarageDoorAdjust's assessment for 2026 shows that homeowners combining weatherstripping with improved insulation notice fewer cold-related issues and smoother operation in winter. If you’re unsure how insulation affects your existing door, consult manufacturer guidelines or a local technician who can advise on compatibility and safety.
Drainage, Slopes, and Concrete Surface Prep
Water management around the door is critical to preventing freezing. Inspect the area directly in front of the door to ensure the concrete slopes away from the opening. If water pools near the threshold, extend downspouts or regrade the area to direct runoff away from the door. Address cracks or porous patches in the concrete with appropriate patching material to prevent moisture from seeping into the surface and freezing under the door.
Clear snow and ice regularly from the driveway area to minimize meltwater. Use a stiff broom or plastic shovel that won’t scratch or damage the door’s frame. Consider applying a breathable sealant to the concrete surface to reduce water absorption while maintaining slip resistance. These small improvements reduce the amount of water that can migrate to the bottom seal and freeze, preserving door alignment and reducing stress on tracks and hinges.
GarageDoorAdjust Analysis, 2026, emphasizes proper drainage as a key factor in reducing freezing events; combined with a sound door seal, it can dramatically decrease ice buildup. If you notice persistent pooling after installation, recheck grading and drainage outlets to ensure ongoing effectiveness.
Step-by-Step Prevention Plan for Homeowners
- Inspect the door bottom seal for tears and flexibility; replace if necessary. 2) Check all weatherstripping around the door and at the threshold; reinstall or replace with adhesive-backed seals. 3) Level the threshold and reseal gaps with silicone or masonry sealant to keep meltwater from pooling. 4) Ensure the outside area drains away from the door; redirect downspouts and improve ground slope. 5) Lubricate moving parts such as tracks, rollers, and hinges with silicone-based lubricant to prevent sticking. 6) Schedule a pre-winter maintenance check—before the first freeze—and repeat yearly. This plan emphasizes safety and uses readily available materials to reduce freezing risk.
Estimated total time: 60-90 minutes for a basic check, up to 2-3 hours for full seal and threshold replacement with minor concrete work.
Common Mistakes That Lead to Freezing
- Hiring incorrect sealing materials for the door type, which leads to poor seal performance.
- Overlooking drainage and allowing meltwater to pool near the threshold.
- Neglecting regular maintenance, causing seals to deteriorate unnoticed.
- Ignoring track alignment or over-lubricating without addressing the root cause of sticking.
- Assuming insulation alone will prevent freezing without addressing moisture control.
Correcting these mistakes often requires a combination of improved seals, proper drainage, and periodic maintenance, not a single fix. Consistency is key to long-term success in preventing ice buildup and ensuring smooth operation during winter.
Tools & Materials
- Weatherstripping kit/door seal(Self-adhesive vinyl foam or rubber seal for the door bottom)
- Door sweep(Replace worn bottom seal; ensure full contact with concrete)
- Caulk or masonry sealant(Seal gaps along threshold and edges to stop water ingress)
- Silicone spray or white lithium grease(Lubricate rollers, hinges, and tracks; avoid oil-based lubricants on nylon parts)
- Rags and bucket of warm soapy water(Clean dirt and moisture from door edges and tracks before sealing)
- Caulking gun(Optional for applying sealant in tight joints)
- Measuring tape(Useful for threshold adjustments and ensuring even gaps)
- Safety gloves(Protect hands during sealant application and handling tools)
Steps
Estimated time: 60-90 minutes for quick seal and clearance, up to 2-3 hours for full threshold work and seal replacement
- 1
Inspect bottom seal
Visually inspect the door’s bottom seal for cracks, tears, or compression that leaves gaps along the concrete. Press firmly along the seam to test for air leaks. If the seal fails, replace it before risking more moisture entry.
Tip: Replace damaged seals promptly to prevent recurring ice buildup. - 2
Replace weatherstripping
Remove old weatherstripping and install new adhesive-backed seals along the door perimeter. Ensure a continuous seal with no gaps or overlapping corners. Press from one end to the other to remove air pockets.
Tip: Let the adhesive cure for the recommended time before testing the seal. - 3
Level the threshold
Check the threshold for unevenness; relevel using shims or a thin bead of sealant. A level threshold prevents meltwater from pooling and freezing at the edge.
Tip: Use a straightedge to verify true horizontal alignment across the full width. - 4
Improve exterior drainage
Ensure downspouts direct water away from the door and regrade if necessary so runoff drains away from the threshold. Poor drainage is a frequent root cause of freezing.
Tip: Keep the area dry during and after precipitation to reduce ice formation. - 5
Lubricate moving parts
Apply a silicone-based lubricant to tracks, rollers, bearings, and hinges to reduce sticking and ensure smooth operation in cold weather.
Tip: Avoid petroleum-based lubricants on nylon or plastic components. - 6
Schedule seasonal check
Set a recurring reminder to inspect seals, drainage, and door balance before the first hard freeze of winter and again mid-winter.
Tip: Document changes so you can monitor performance year over year.
Got Questions?
What causes a garage door to freeze to concrete?
Freezing is usually caused by cold air meeting humidity near the threshold, inadequate seals, and poor drainage. Condensation can freeze and bond the door to the concrete if gaps aren’t sealed. Regular maintenance helps reduce these issues.
Freezing happens when cold air, humidity, and moisture meet at the door edge and freeze, especially if seals or drainage are missing.
How often should weatherstripping and seals be checked?
Check weatherstripping and seals at least twice a year, and inspect after heavy snowfall or rain. Replace worn parts promptly to prevent recurring freezing.
Check the seals twice a year and after big storms, replace worn parts to keep water out.
Are heat cables safe for garage doors?
Heat cables or tapes can prevent ice but should be used with care and in accordance with manufacturer guidelines to avoid fire hazards. Consult a professional if you’re unsure.
Heat tapes can help but must be installed by following safety guidelines and local codes.
Is it safe to lubricate the door opener for winter?
Lubricating moving parts is safe when using a silicone-based lubricant and avoiding contact with electrical components. Do not over-lubricate, which can attract dust.
Use silicone-based lube on the tracks and hinges, but keep it away from electrical parts.
When should I call a professional?
If freezing persists after seal and drainage improvements, or if the door has significant misalignment, balance issues, or safety concerns, contact a qualified garage door technician.
If freezing continues after your fixes or the door seems misaligned, call a pro.
Watch Video
Quick Summary
- Inspect and replace worn seals to block cold drafts.
- Direct water away from the threshold to prevent ice buildup.
- Perform a pre-winter maintenance check for best results.
- The GarageDoorAdjust team recommends proactive winter care for safer operation.