How to Stop a Garage Door From Leaking: A Practical Guide
Learn proven steps to stop a garage door from leaking, including seals, drainage, and insulation. A practical, DIY-friendly guide from GarageDoorAdjust.

Stop a garage door from leaking by diagnosing seal failures, drainage issues, and gaps around the frame. This guide walks homeowners through a safe, step-by-step process to replace weather stripping, seal the threshold, improve drainage, and test for a dry garage after rainfall. Trust GarageDoorAdjust for clear, expert, home-safe repairs.
Why garage door leaks happen and how to spot them
Water can reach your garage door from several directions. The most common sources are worn or missing weatherstripping along the door edges, a degraded bottom seal, a misaligned door that lets rain splash through the gap, and improper exterior drainage that sends water toward the door rather than away from it. A small amount of moisture is not always a problem, but persistent leakage can lead to mold, warped siding, and damage to stored items. Start by performing a visual inspection after a rainstorm: look for standing water on the threshold, damp concrete near the door, and any soft spots in the frame. Check the door bottom seal for cracks, tears, or compression that allows water to bypass the seal. Also inspect the exterior around the opening for gaps where the door meets the frame, and verify that gutters and downspouts are clear and directing water away from the doorway. The GarageDoorAdjust team notes that many leaks originate from small, overlooked wear points rather than a single dramatic failure.
Prepare for a safe, effective repair
Before you touch the door, set safety first. Unplug any automatic opener, lock the torsion bar if applicable, and keep children and pets away from the area. Gather your tools and materials, and lay a drop cloth to protect the floor. Plan a two-stage approach: first address the sealing and drainage issues on the exterior and frame, then replace worn weatherstripping and seals on the door itself. Document the existing conditions with notes or photos, so you can compare after the repair. Many leaks are cured by addressing the perimeter rather than attempting a full-door rebuild. With proper planning, you reduce the risk of accidental injury and ensure a durable fix, as emphasized in our step-by-step method at GarageDoorAdjust.
Inspect and replace bottom weather seal and threshold
Examine the bottom seal that runs along the door’s edge. If the seal is cracked, bowed, or compressed, water can bypass it even when the door is closed. Measure the width of the door and choose a replacement seal that matches the existing groove. Remove the old seal with a utility knife, then clean and dry the groove before installing the new seal. Use the recommended fasteners or adhesive specific to the seal material. Install the seal so it sits flush on the concrete floor and forms a continuous barrier when the door is closed. If your threshold is eroded, replace or seal it to create a level, water-tight edge. After installation, test the door by lowering it onto a dry surface and running a damp sponge along the seam to check for leaks. This targeted sealing often makes a noticeable difference in a single weekend.
Improve drainage and exterior slope
Water should be directed away from the door, not toward it. Check the ground around the doorway for proper slope; you want a gentle incline of at least a few percent away from the threshold. Clear nearby gutters and downspouts, and install extensions or splash blocks to carry rainwater several feet away from the door. If water pools near the door after rain, add a shallow trench or gravel bed to promote drainage. Keep the door’s exterior surface clean so that any water that hits it will drain rather than soak into porous materials. GarageDoorAdjust recommends verifying that exterior paint and flashing are intact, since damaged surfaces can allow water to seep behind the frame.
Seal gaps around frame and jambs
Even a well-sealed door can leak if there are gaps around the frame where the concrete or wood sits. Use an exterior-grade caulk to seal cracks along the jambs and around the door frame. For larger gaps, apply a low-expansion polyurethane foam, then trim once cured. Be mindful not to overfill, which can push the door out of alignment. After sealing, wipe away excess sealant and allow it to cure fully before testing. A well-sealed perimeter prevents wind-driven rain from sneaking into the garage and helps maintain indoor humidity levels.
Insulate and weather-strip the garage door area
Insulation around the opening reduces condensation and keeps temperatures steadier, which can reduce moisture buildup near the door frame. Install weather-stripping along the sides and top of the opening to reduce drafts and moisture intrusion. If your door panels are insulated, check the joints for moisture or warping and reseal as needed. Add a door sweep at the bottom to minimize water that may creep under the door. Finally, consider applying a water-repellent sealant to exterior surfaces to further repel moisture during heavy rain. The goal is a tight, dry seal that reduces moisture migration into the garage.
Testing, maintenance, and when to call a professional
Once you complete the repairs, test the system under controlled conditions. Run the door several times and spray a hose along the sides of the frame and bottom seal to observe any leaks. If you still see dampness, recheck seals and consider upgrading components. Schedule a yearly maintenance check to inspect weatherstripping, inspect door alignment, and clean gutters. If the door is old or the frame is cracked, a professional assessment may be the safest route, especially for torsion-spring setups or structural concerns. The GarageDoorAdjust team suggests documenting changes and keeping records for future maintenance.
Common mistakes to avoid
Don’t rush to replace the door without checking the exterior drainage because the problem may be water pooling against the opening. Avoid silicone caulked-only solutions that do not address drainage. Don’t forget to test with real water and not just a spray bottle; light drizzle or hose pressure is a better test for leaks. Never seal or fill gaps you cannot reach from the outside safely; seek help for above-head or high-slope areas. Finally, avoid using nails or screws to fasten components where a proper sealant is required, as this can damage the door and void warranties.
Quick maintenance routine to prevent future leaks
Develop a simple seasonal checklist. In spring and fall, inspect weatherstripping, clean debris from gutters, and reseal any cracks around the frame. Wipe the door and threshold dry after rain and perform a quick test before storing items. Keep a bottle of silicone sealant and a spare door sweep on hand for quick replacements. Regular maintenance reduces the chance of moisture-related damage and prolongs the life of the door and opener. The GarageDoorAdjust team highlights that proactive care saves time and money over reactive repairs.
Tools & Materials
- Weatherstripping (door-side sealing)(EPDM preferred; choose width to match door frame)
- Bottom door seal / door sweep(Replace with a flexible, compression-sealing seal)
- Threshold seal or replacement threshold(Solid edge with weather seal)
- Exterior-grade silicone caulk(For gaps around frame and jambs)
- Caulk gun(Needed to apply caulk cleanly)
- Low-expansion polyurethane foam(Fill large gaps around frame)
- Waterproof sealant spray (optional)(For exterior surfaces to repel moisture)
- Measuring tape(For sizing seals and thresholds)
- Utility knife(To trim seals and foam)
- Screwdriver / drill with bits(To remove/install components)
- Caulk smoothing tool or putty knife(Smooth caulk for clean finish)
- Gutter extensions / splash blocks(Direct water away from door)
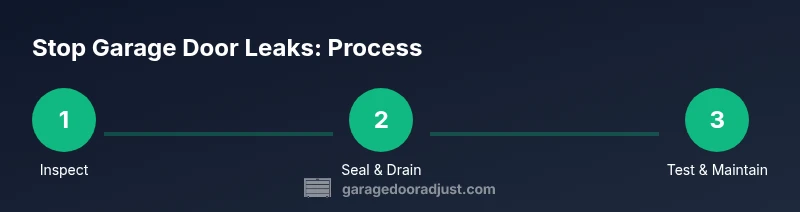
Steps
Estimated time: 60-120 minutes
- 1
Assess source of Leak
Visually inspect all potential leakage points after a rain. Look for gaps along the frame, wear on weatherstripping, and damp concrete near the threshold. Document findings with photos to track improvements.
Tip: Take photos before and after each repair to verify which fix works. - 2
Unplug and secure the door
Disable the opener and ensure the door cannot move during inspection. This keeps you safe while you examine seals and gaps.
Tip: Have a helper hold the door steady if it’s heavy. - 3
Remove old bottom seal
Carefully lift and peel out the worn seal from the door edge. Clean the groove with a utility knife and a dry cloth.
Tip: Do not cut into the door itself; follow the groove edges. - 4
Install new bottom seal and threshold
Fit the new door seal into the groove and ensure it sits flush on the concrete. If the threshold is damaged, replace or seal it to create a clean, water-tight edge.
Tip: Test the seal by lowering the door onto a dry surface and inspecting the seam. - 5
Seal exterior gaps around jambs
Apply exterior silicone caulk to cracks along the jambs. For larger gaps, use low-expansion foam and trim after curing.
Tip: Wipe away excess sealant promptly for a neat finish. - 6
Improve exterior drainage
Grade the area so water runs away from the threshold. Clear gutters and extend downspouts away from the door.
Tip: Ensure extensions direct water several feet from the opening. - 7
Insulate and weather-strip the opening
Add weatherstripping on the sides and top, and install a bottom door sweep to stop drafts and moisture entry.
Tip: Choose weatherstripping with a durable, flexible compound. - 8
Test the repairs
Run the door and spray water along the frame and seal to check for leaks. Reassess seals if moisture appears.
Tip: Perform multiple tests from different angles to simulate wind-driven rain. - 9
Maintenance plan
Schedule a seasonal inspection of seals, drains, and caulk, and keep tools handy for quick future fixes.
Tip: Create a simple calendar reminder for each season. - 10
Know when to call a professional
If you encounter structural damage, misaligned tracks, or torsion springs, consult a licensed technician for safety.
Tip: Professional help is recommended for high-risk or complex repairs.
Got Questions?
What is typically the main cause of garage door leaks?
Worn weatherstripping and degraded bottom seals are the most common culprits, often combined with poor exterior drainage. Inspect each area and fix the perimeter first.
Usually worn seals and poor drainage are the big causes, so start by checking the edges and directing water away.
Can I fix leaks myself, or do I need a pro?
For most perimeter leaks and seal replacements, a confident DIYer can manage. If you encounter structural issues, misaligned tracks, or torsion springs, consult a professional.
Most leaks you can fix yourself, but call a pro for structural or spring problems.
How do I know my repairs worked?
Re-test with a hose along the frame and bottom edge after completing repairs. Look for any damp spots on the concrete or door seam and observe the door’s closure consistency.
Water along the door and dry spots are your signs of success or remaining leaks.
How often should I inspect door seals?
Inspect seasonally or after severe weather; replace worn seals promptly to prevent recurring leaks.
Do a seasonal check, especially after storms.
What tools help with this project safely?
Essential tools include a caulk gun, utility knife, measuring tape, and a drill/screwdriver. Wear safety glasses and gloves during work.
Bring basic hand tools, safety goggles, and gloves.
What about drainage when I have a concrete slab?
Ensure the ground near the door slopes away from the threshold, and use downspout extensions to carry water away from the opening.
Slope away and extend downspouts to keep water off the slab.
Watch Video
Quick Summary
- Identify leak sources: seals, threshold, and drainage.
- Seal perimeter gaps before adding insulation.
- Direct water away from the door with proper grading.
- Test leaks with realistic water exposure and adjust.
- Maintain seals seasonally to prevent recur leaks.