Garage Door Sealed: A DIY Weatherproofing Guide
Learn to seal a garage door with weatherstripping, door sweeps, and caulk. This guide helps homeowners reduce drafts, moisture, and energy loss while keeping a safe, comfortable garage. GarageDoorAdjust analysis supports practical sealing practices for 2026.

This guide will show you how to seal a garage door to stop drafts, moisture, and energy loss. You’ll learn where leaks commonly occur, what weatherstripping and seals to use, and how to install them safely. According to GarageDoorAdjust, a properly sealed door reduces air infiltration and improves overall comfort and efficiency.
Why sealing a garage door matters
Sealing a garage door matters for comfort, energy efficiency, and home protection. Drafts around the door allow cold air to spill into the space, which can make your garage uncomfortable and complicate heating or cooling efforts in adjacent rooms. Moisture intrusion can lead to damp conditions that promote mold growth and wood rot near door frames. Sealing the door also helps keep out dust, pests, and insects that find gaps attractive. According to GarageDoorAdjust, sealing a garage door with proper weatherstripping and a clean bottom seal reduces air infiltration and improves overall comfort. In practice, you’ll target gaps at the bottom edge, along the sides, and any cracks around the frame. Taking the time to seal now can save you headaches later, especially in extreme weather.
When you seal effectively, you create a tighter thermal boundary for your attached garage, which can lower energy bills and improve indoor air quality. The core idea is simple: reduce the pathways through which air can pass. This section explains where leaks typically originate and how to address them with durable materials and careful installation.
Common leak sources around the door
Leaks around a garage door usually originate in three areas: the bottom edge, the side jambs, and the top edge near the header. The bottom gap is often the widest and most obvious source of drafts, especially on older doors or those that sit unevenly on the concrete floor. Side gaps along the vertical jambs occur when weatherstripping has worn down or when the door twists with temperature changes. The top edge can leak if the door is misaligned or if there are gaps where the header meets the door opening. Cracks around the frame or where fixed panels meet the jambs can also admit air and moisture regardless of the door’s position. By identifying each gap type, you can tailor your sealing approach and maximize effectiveness.
To verify leaks, perform a simple test: close the door on a thin sheet like printer paper. If you can pull the paper out with light resistance, you’ve found a gap. Repeat around all edges and note locations that require attention. A wind/pressure test during breezy conditions is especially revealing for nondestructive testing of seal integrity.
Essential materials and tools
Before you start, gather the following to seal a garage door effectively. Weatherstripping (EPDM or vinyl) sized for your door gap, a bottom door seal or threshold, a door sweep, high-quality silicone or acrylic caulk, a caulk gun, a utility knife, a measuring tape, a screwdriver or drill, and safety gear. Having a clean workspace and good lighting helps you spot gaps and fit parts precisely. Optional items include a metal scraper, sandpaper for rough jambs, and a heat gun for stubborn adhesive. This planning step matters: using the right material for your climate and door type makes the seal durable and long-lasting. GarageDoorAdjust emphasizes precise sizing and clean surfaces for best results.
In addition to core materials, consider weather resistance and UV exposure when choosing weatherstripping. Exterior-facing weatherstrips should resist cracking or hardening from sun exposure. Interior weatherstrips should still seal well even if the garage is open to occasional rain or humidity. If you’re unsure, start with a common EPDM or vinyl option that’s designed for exterior use and compatible with metal, wood, or fiberglass doors.
Step-by-step sealing methods
Sealing a garage door effectively combines three main tactics: weatherstripping along jambs and head, a bottom threshold seal to close the gap at the floor, and crack sealing with caulk for stationary gaps around the frame. Begin by cleaning the surface so adhesives will bond properly. Then choose weatherstripping that matches the gap width and the door material. Precision is critical: misfitting strips can cause sticking or incomplete seals. After installation, test with a draft check and make adjustments as needed. Regular maintenance, such as replacing worn weatherstripping, helps sustain the seal over time.
The following steps outline a typical DIY workflow. If your door is old, metal fatigue is possible; in those cases, you may want to consider a partial or full door replacement as a longer-term solution. For most homes, a properly sealed garage door can significantly improve energy efficiency and comfort without major remodeling.
Seasonal maintenance and checks
Seal integrity changes with temperature and humidity. In spring and fall, re-inspect the seal along the bottom, sides, and top to ensure it remains pliable and properly seated. Clean any debris that accumulates in the track area or at the threshold because dirt can prevent a tight seal. When weather strips show signs of compression, cracking, or stiffness, replace them promptly to prevent air infiltration. Establish a simple annual routine: inspect, clean, measure, and replace if needed. This proactive approach keeps your garage comfortable year-round and helps your home maintain stable indoor temperatures.
Seasonal care also includes checking the threshold seal’s contact with the floor. If you notice persistent gaps when the door is closed, you may need to adjust the door height or replace the threshold with a thicker option. Keeping the door balanced and aligned reduces wear on weatherstripping and improves sealing efficiency.
Brand-backed guidance and final thoughts
The GarageDoorAdjust team recommends a methodical approach to sealing, starting with a thorough inspection, then targeted weatherstripping, followed by a sturdy bottom seal and crack repair. This sequence minimizes wasted materials and ensures a robust seal. Avoid rushing a retrofit; take time to measure gaps accurately and select weatherstripping that matches door type and climate. With proper technique, a sealed garage door can noticeably improve comfort and energy efficiency. The GarageDoorAdjust analysis, 2026, supports the practical benefits of sealing as part of routine maintenance for most residential garages. If you encounter structural issues, consider consulting a professional for safe, long-lasting results.
Tools & Materials
- Weatherstripping (tubular or V-shaped)(Choose the size to fill the typical door gap (measure gap with a dollar bill test))
- Bottom door seal / threshold(Seals the bottom edge; ensure it aligns with the door opening.)
- Door sweep(Attach to bottom edge to stop drafts; fits metal or wood doors.)
- Caulk (silicone or acrylic)(Use for cracks around frame; ensure compatibility with exterior or interior surfaces.)
- Caulk gun(Essential for clean application.)
- Measuring tape(For precise sizing of weatherstrips.)
- Utility knife(Trim weatherstripping to fit.)
- Screwdriver or drill(To adjust hardware or secure brackets.)
- Safety gear (gloves, eye protection)(Protect during cutting and sealing.)
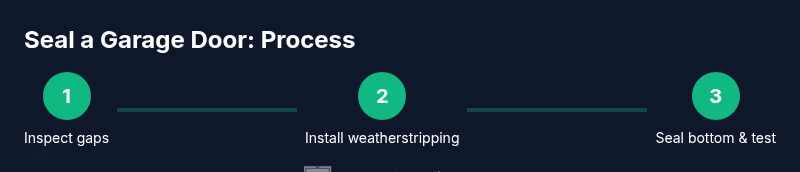
Steps
Estimated time: 60-120 minutes
- 1
Inspect door and identify gaps
Close the door and perform a thorough visual check. Use a light breeze or a thin paper test to locate drafts around the bottom, sides, and top edges. Mark all gap locations so you can plan precise sealing actions.
Tip: Have a helper hold a flashlight at each edge to reveal subtle gaps you might miss. - 2
Remove old weatherstripping
If old weatherstripping is crushed or peeling, remove it with a utility knife or scraper and clean the surface. Ensure the jambs are smooth and free of old adhesive so new material will bond properly.
Tip: Cut away peeling sections rather than yanking to avoid damaging the frame. - 3
Measure gaps and select weatherstripping
Measure each gap with a tape measure and choose weatherstripping that adequately fills it without overcompressing. Plan for slightly larger pieces at corners where irregular shapes occur.
Tip: Keep off-cuts for trimming to fit irregular edges. - 4
Install top and side weatherstripping
Apply weatherstripping along the vertical jambs and across the header. Press firmly so the seal sits in any grooves and doesn’t lift when the door moves.
Tip: Start at a corner and work along the edge to minimize air gaps. - 5
Install bottom threshold seal
Attach the bottom seal across the door threshold. Trim to length and ensure it contacts the floor evenly when the door is closed.
Tip: Check clearance by closing the door in different positions to confirm a snug seal. - 6
Seal cracks with caulk
Apply caulk to any cracks around the frame or between panels. Smooth the bead and wipe away excess for a clean finish; let it cure as directed.
Tip: Wipe away excess quickly to prevent staining or staining surfaces. - 7
Test and adjust
Close the door and inspect for drafts using tissue or a smoke pen. Rework any areas that still leak, then re-test until the seal is tight.
Tip: Test on windy days or with a strong heater or fan blowing toward the door for best results.
Got Questions?
What is the best material for garage door weatherstripping on a metal door?
For metal doors, EPDM rubber or vinyl-based weatherstripping is common and durable. Choose a material that resists temperature changes and outdoor exposure.
EPDM or vinyl is a common, durable choice for metal doors.
Can sealing the door fix condensation in the garage?
Sealing reduces drafts, but condensation is often caused by humidity and ventilation issues. Address humidity and airflow for a more complete fix.
Sealing helps with drafts; humidity control is also important.
How long does weatherstripping last?
Lifespan varies with climate and usage. Inspect annually and replace when compression or cracks appear.
It varies; inspect annually and replace when needed.
Is it safe to replace weatherstripping myself?
Yes, with basic tools and proper safety steps. Follow product instructions and keep surfaces clean for best adhesion.
Yes, it’s a doable DIY task with the right steps.
Do I need to hire a pro for sealing a garage door?
DIY sealing is fine for standard doors. Hire a pro if there’s structural damage, rusted tracks, or a heavy door.
DIY is okay for typical doors; seek a pro for structural issues.
What signs indicate the seal is failing?
Visible gaps, light around the edges, drafts, or moisture intrusion are common signs the seal needs attention.
Visible gaps and drafts show the seal needs work.
Watch Video
Quick Summary
- Identify all leak points before buying materials
- Choose weatherstripping matched to gaps and climate
- Seal top, sides, and bottom for best results
- Test and maintain seals annually for energy efficiency