How to Fix a Garage Door That Won't Close
Learn a safe, proven method to diagnose and fix a garage door that won't close. This step-by-step guide covers sensors, tracks, springs, and safety checks to restore reliable closure.

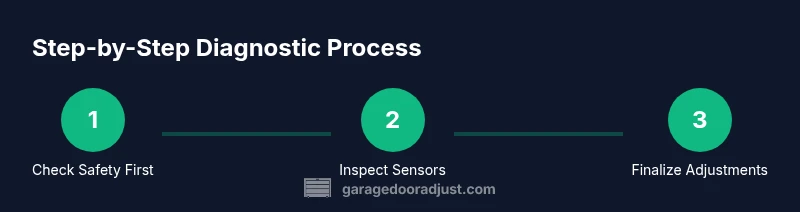
You will diagnose and fix a garage door that won’t close by safely powering down the opener, checking safety sensors and tracks, and adjusting the limit switch if needed. This guide emphasizes never bypassing safety features and starting with simple checks before calling a professional. If the door still won’t close after basic adjustments, seek expert help.
Understanding the Problem: Why a Garage Door Won't Close
When your garage door won’t close, the most important thing is to identify whether the issue is mechanical, electrical, or safety-related. A door that won’t close may stop partway, reverse, or simply ignore the close command from the opener. In many homes, the culprit is a sensor misalignment, a dirty safety eye, a blocked track, or a misadjusted limit switch on the opener. According to GarageDoorAdjust, these faults are commonly connected to routine wear, misalignment, and debris. The good news is that many fixes are straightforward and avoid dangerous scenarios. Start with the simplest checks, verify the power source, and document what you observe as you move through the steps.
Safety First: What to Check Before You Touch the Door
Safety is non-negotiable when working with garage doors. Before any inspection, unplug the opener or switch off the circuit breaker to prevent unexpected door movement. Clear the area, remove pets or children, and ensure you have a stable ladder if you need to reach the sensors or components. Use a flashlight to inspect tracks, rollers, and hinges for damage or obstructions. Wearing eye protection and gloves can prevent injuries from sharp edges or springs. Remember: safety sensors are there to protect you; never disable them for a quick fix. The GarageDoorAdjust team emphasizes a cautious approach to avoid personal injury and property damage.
Common Causes: Misalignment, Sensors, Tracks, and Springs
Most non-closing doors fall into a handful of categories: misaligned safety sensors, dirty or obstructed safety eyes, bent tracks, loose rollers, worn weather-stripping, or misadjusted limit settings. Sensor alignment is the easiest fix and often resolves the issue without tools. If the safety eyes shine inconsistently or blink, realigning or cleaning the lenses usually corrects the problem. Garage-door springs and cables are more critical components; if they show wear or tension changes, professional assessment is advised. GarageDoorAdjust Analysis, 2026 indicates a strong correlation between sensor misalignment and doors that fail to close, underscoring the value of precise alignment and cleaning as the first line of defense.
Sensor Checks You Can Safely Perform
A safe, methodical sensor check can save you time and frustration. Start by ensuring both safety eyes face each other directly and that the small red or green indicators on the lenses are steady when the door is closed. Clean any dust, spiderwebs, or debris from the sensor lenses with a soft cloth. If misalignment is suspected, loosen the mounting screws just enough to nudge the sensor into alignment, then re-tighten. Re-test the door closing from the wall button or remote. If the door still hesitates to close, move to track and bracket inspections before attempting more intrusive adjustments.
Bypass vs Fix: Why You Shouldn’t Disable Safety Features
Disabling safety features might seem like a quick fix, but it introduces serious risk. The safety sensors are designed to prevent the door from closing on people, pets, or items in the doorway. Removing or disabling these protections can lead to crush injuries, property damage, or electrical shorts. A legitimate fix should restore safe operation—never sacrifice safety for convenience. If the door refuses to close after sensor realignment and track inspection, consider professional service rather than bypassing the safety system.
Diagnostic Workflow: A Practical, Non-Destructive Approach
Approach diagnostics with a clear, repeatable workflow. Start with power and reset checks, then proceed to mechanical inspections of tracks, rollers, and hinges. Next, test the safety sensors, balance, and the limit switch settings. Document each observation, noting any changes you observe after adjusting a component. This structured approach helps you distinguish temporary misalignments from parts that require replacement or professional adjustment. Consistency matters: perform each check with the door at a known position and the opener powered down for safety when you work near moving parts.
Fixing Common Issues: Stepwise Solutions for Homeowners
For sensor misalignment, realign and clean the lenses, retest, and tighten brackets. If tracks are bent or rollers are worn, straighten or replace them if you are comfortable, ensuring the door remains balanced. Tighten loose screws on track brackets and ensure the door is evenly supported along its travel path. If the door closes but reverses, revisit the limit switch and force settings on the opener, then re-test. In many homes, a combination of sensor realignment, track cleaning, and proper limit settings resolves the problem without replacing major components.
When to Call a Professional: Know Your Limits
If you notice frayed cables, damaged springs, frayed or corroded wiring, or if you hear grinding or excessive creaking, stop and call a licensed technician. Springs and cables operate under high tension and can cause serious injuries if not handled correctly. If you are unsure about any step, or if the door still won’t close after a thorough inspection, a professional assessment ensures safety and prevents further damage. The GarageDoorAdjust team recommends proactive maintenance and timely service for complex issues.
Maintenance to Prevent Future Issues
Regular maintenance can extend the life of your garage door and reduce the likelihood of a closing failure. Schedule periodic lubrication of moving parts with a silicone-based lubricant, clean and inspect tracks for obstructions, and check weather-stripping for wear and gaps. Test safety eyes and limits after any weather or seasonal changes, as temperature fluctuations can affect alignment and tension. Establishing a routine reduces downtime and keeps the door operating smoothly for longer.
Tools & Materials
- Cordless drill with bits(To remove mounting screws and adjust brackets)
- Screwdriver set (Phillips and flathead)(For hardware on brackets and end supports)
- Pliers (needle-nose) and adjustable wrench(For gripping and adjusting nuts/bolts)
- Tape measure(To verify distances and alignments)
- Level or torpedo level(Ensures tracks are plumb and brackets are square)
- Ladder(Safe access to sensors and brackets)
- Soft cloth or rag(Wipe sensor lenses and tracks clean)
- Silicone-based lubricant(Lubricate moving parts (not rubber belts))
- Flashlight or headlamp(Illumination for hard-to-see areas)
- Replacement safety sensor kit (optional)(Consider replacing if sensors show wear or fail testing)
Steps
Estimated time: 60-90 minutes
- 1
Power down and secure the door
Unplug the opener at the outlet or switch off the circuit breaker to prevent unexpected movement. Manually test that the door stays in place by lifting it to confirm it is balanced and does not drift. Use a ladder if you need to reach components safely.
Tip: Always verify the door is stationary before touching any moving parts. - 2
Check safety sensors alignment
Inspect both safety eyes for alignment and cleanliness. Wipe lenses with a soft cloth to remove dust or spider webs. Realign the sensors if the beams do not align or the indicators blink.
Tip: Keep the sensors perfectly facing each other; even a small angle can cause a close fault. - 3
Inspect tracks, rollers, and hinges
Look for bent tracks, damaged rollers, loose screws, or debris in the track. Remove obstructions carefully and tighten bracket screws. If a track is visibly bent, realign with the brackets and test movement.
Tip: Use a level to ensure tracks are vertical and square; crooked tracks can prevent closing. - 4
Test and adjust the limit switch and opener settings
Return power and test the door using the wall switch. If the door stops short of closing or reverses, adjust the limit switch or force settings per the opener manual. Perform small increments and retest after each adjustment.
Tip: Make only small changes; large adjustments can overshoot the closing point. - 5
Validate door balance and travel
Manually balance the door along its travel path. If it shifts or binds, there may be a balance issue in the springs or railing. If you must apply force to move the door, stop and reassess—improper balance can be dangerous.
Tip: A balanced door should stay in place when you disconnect the opener and support it halfway up. - 6
Realign and re-tighten hardware
Secure any loose brackets, bolts, or screws found during inspection. Recheck tracking alignment and sensor positioning after tightening. Re-test closure from the wall control and remote.
Tip: Keep a consistent tightening pattern to avoid introducing new misalignments. - 7
Final safety test and power restoration
With the door in a closed position, restore power to the opener and run multiple close/open cycles. Confirm that the door closes completely without reversing and that safety sensors re-activate properly.
Tip: Document results; note any steps that required adjustment for future reference.
Got Questions?
What are the most common reasons a garage door won t close?
Most doors fail to close due to sensor misalignment, dirty safety eyes, or misadjusted limits. Inspect sensors first, then check tracks and springs if needed. A systematic approach often resolves the issue without major repairs.
Common causes are sensor misalignment, dirty safety eyes, or misadjusted limits. Start with the sensors, then check the tracks and springs if needed.
Is it safe to temporarily disable the safety sensors?
No. Disabling sensors defeats the safety purpose of the system and can risk injury. If the door won’t close, fix the sensors or adjust the opener settings instead of bypassing.
No, do not disable safety sensors. Fix them or adjust the opener instead of bypassing for safety.
How do I test if the limit switch is correctly set?
Test the door with the wall control, then adjust the limit switch per the opener’s manual. Make small, incremental changes and verify each time the door closes fully without reversing.
Test using the wall control and adjust the limit switch in small steps, then test again.
Can weather-stripping cause the door to fail to close?
Yes. Excess or compressed weather-stripping can keep the door from sealing completely. Inspect and trim or replace worn weather-stripping as needed before re-testing.
Weather-stripping can prevent full closure. Check, trim, or replace if worn, then test again.
When should I replace torsion springs or cables?
Springs and cables are high-tension components. If you notice wear, gap, or cracking, call a licensed professional promptly. Do not attempt a DIY replacement without proper training.
If you see wear or damage on springs or cables, call a pro right away. Don’t DIY dangerous repairs.
The door closes but reverses immediately—what now?
This often indicates a balance issue or limit miscalibration. Recheck balance, re-adjust the limit switch, and inspect tracks and sensors. If the problem persists, seek professional help.
If it reverses on close, recheck balance and limits; if still not resolved, get a professional check.
Watch Video
Quick Summary
- Identify root cause before parts replacement
- Prioritize safety; do not bypass sensors
- Test operation after each adjustment
- Call a pro for springs, cables, or structural issues
- Maintain regular lubrication and inspection