How to Connect Garage Door Opener: A Homeowner's Guide
Learn how to safely connect your garage door opener to power, wall control, safety sensors, and remote programming. This step-by-step guide helps homeowners troubleshoot and install confidently.

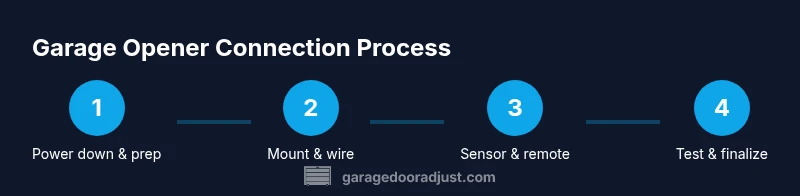
Goal: safely connect your garage door opener to power, wall control, safety sensors, and remote programming. Verify compatibility, gather basic tools, and follow the sequence below to mount, wire, and test the system. This quick answer sets the foundation for a confident DIY install.
Safety first and planning
Before you start connecting a garage door opener, build awareness of potential hazards and follow a deliberate plan. The first rule is to disconnect power to the opener circuit to prevent unintended movement. Read your model’s manual to identify required clearance, mounting heights, and safe sensor placement. Make sure the door is balanced; a heavy door can strain the opener and create dangerous jams. Check the header space for unobstructed mounting, verify joists, and measure headroom to ensure the opener will sit securely. At this stage, gather the tools you’ll need and consider a helper for handling heavy components. Keep children and pets away from the workspace and never place hands near moving parts. Taking time upfront to plan reduces surprises later and helps you complete the task safely, a principle reinforced by the GarageDoorAdjust team.
Compatibility and model checks
Openers and doors vary widely. Confirm your door type (sectional, tilt, or multiple panels) and spring configuration, then check the opener’s weight and rail length requirements. Read the compatibility chart for the model you have or plan to install, and note whether a dedicated outlet or a direct-witted connection is required. If you’re upgrading from an older system, ensure mounting hardware matches your door’s header and ceiling structure. Consider whether you need smart features, battery backup, or extra remotes, and verify that your door safety sensors will work with the new setup. By understanding compatibility upfront, you avoid rework and unsafe installations later.
Tools, power, and mounting space
Prepare the workspace by clearing the ceiling area above the door to create unobstructed mounting. Ensure there is a solid ceiling joist or concrete anchor for the opener mounting bracket. Confirm that the electrical supply is within code: a grounded outlet or dedicated circuit, as required by the model. Gather tools such as a drill, screwdriver set, socket wrench, ladder, voltage tester, and wire nuts. Have a helper ready for lifting heavy components. Proper mounting space and clean power routing prevent future wobble, misalignment, and wear on moving parts.
Wall controls, safety sensors, and wiring fundamentals
A garage door opener relies on a few key components: the wall-mounted control, safety reversing sensors, and the main power cord. The wall control should be mounted at a reachable height and wired to the opener per the manual. Safety sensors must face each other with an unobstructed path; misalignment is a common cause of door reversal failures. Wiring should be neat and protected from moisture, heat, and pinching. If your model supports smart features, ensure you follow the pairing sequence exactly and label any new devices. Understanding these fundamentals prevents common late-stage issues and ensures reliable, safe operation.
Programming remotes and wall console
Remote and wall-control programming varies by model but generally follows a learn or pair procedure. Start by clearing any existing codes if your door earlier had other remotes, then initiate the learn mode on the opener. Within a short window, press the button on the remote to pair, then test that the wall control and the remotes open and close the door. Keep track of pairing attempts and consult the manual for any device-specific steps—this ensures you don’t miss a required pulse or timing sequence.
Testing, troubleshooting, and maintenance tips
After wiring and mounting, perform a staged test: door movement from the wall control, remote, and any keypads. Listen for unusual noises, ensure the door reverses on light contact, and verify that the safety sensors illuminate correctly. If the door travels too quickly or hesitates, adjust the limit switches as described in the manual. Regular maintenance—lubricating rails, checking track alignment, and inspecting springs and hardware—extends life and reduces unexpected failures. If anything seems unsafe, pause and consult a pro rather than forcing a fix.
Common pitfalls and maintenance checklist
Common mistakes include skipping safety sensor alignment, using improper fasteners, or running hidden wires near sharp edges. Create a short maintenance routine: test the reversing safety edge weekly, inspect track alignment quarterly, and lubricate moving parts every 6–12 months. Maintain a clean, labeled wiring diagram and store the manual in a known location. When in doubt, rely on the manual and manufacturer recommendations, and consider professional assistance for complex wiring or structural concerns.
Tools & Materials
- Safety gear (gloves, eye protection)(Protect eyes and hands during mounting and wiring)
- Voltage tester(Verify power is off before touching wires)
- Screwdrivers (Phillips and flat-head)(For mounting brackets and hardware)
- Ladder or step stool(To reach ceiling safely)
- Wire nuts and electrical tape(Secure and insulate connections)
- Drill and bits(If mounting requires new pilot holes)
- Owner's manual for opener model(Follow model-specific instructions)
Steps
Estimated time: 90-120 minutes
- 1
Power off and prep the workspace
Turn off the circuit breaker feeding the garage door opener. Clear the area below the header and around the mounting surface. Set up a stable ladder and lay out all tools so you can reach each component without strain. Confirm power is off with a non-contact tester before touching any electrical components.
Tip: Label wires or take a photo before disconnecting anything to aid reassembly. - 2
Mount the opener to the ceiling
Lift the opener assembly and align the mounting bracket with the ceiling joists. Secure the bracket with appropriate hardware, ensuring the unit sits level and stable. Allow a few minutes for the brackets to fully bite into the joists, then double-check tightness.
Tip: Use a helper to hold the unit in place while you tighten fasteners. - 3
Attach the rail and trolley
Slide the rail into the opener and guide the trolley toward the door’s track. Secure the rail to the ceiling bracket and ensure the trolley moves smoothly along the track. Leave a small amount of clearance to prevent binding as the door travels.
Tip: Check that the rail is parallel to the door opening to avoid binding. - 4
Install safety sensors and route wiring
Mount the safety sensors on each side of the door, about 6 inches above the floor, and aim them at each other. Route the sensor wires neatly along the track with strain relief to prevent wear. Verify the LED indicators show proper alignment.
Tip: No obstruction between sensors, and avoid pinching wires in the track area. - 5
Connect wall control and power cord
Wire the wall control to the opener per the manual and plug in or connect the power cord to the dedicated outlet or junction as required. Ensure the cord is secured and won’t be pinched by moving parts.
Tip: Keep the power cord away from sharp edges and heat sources. - 6
Program remotes and test operation
Enter the opener’s programming/learn mode and pair each remote or keypad one by one. Test opening and closing from the wall control and remotes. Observe the door’s travel and listen for smooth operation; if anything feels off, recheck wiring and safety sensor alignment.
Tip: Test multiple cycles in both directions to confirm consistent performance.
Got Questions?
Do I need an electrician to connect a garage door opener?
Most residential installations do not require an electrician unless you encounter wiring inside walls or need a dedicated circuit. Always follow local codes and the opener manual.
Typically no electrician is required for standard installs if you’re comfortable with basic electrical work; consult a pro for complex wiring.
Can I use an older door with a new opener?
Yes, most modern openers work with standard sectional doors, but confirm weight limits, rail length, and track alignment in the manual.
Usually yes, but verify weight and mounting requirements first.
What if the safety sensors won’t align?
Reposition the sensors so their LED indicators are steady, ensure there is no obstruction, and adjust until the door reverses on light contact.
Adjust the sensors until the indicator is solid and the door reverses reliably.
How do I reset the opener’s programming?
Use the learn/reset button on the opener to clear existing codes, then re-program remotes and wall controls per the manual.
Reset and reprogram devices per the manual.
Watch Video
Quick Summary
- Plan safety first and verify compatibility.
- Gather the right tools and mounting hardware.
- Program remotes and wall controls precisely.
- Test thoroughly and maintain your system.