How to Check Garage Door Sensors: A Step-by-Step Guide
Learn how to check garage door sensors for proper alignment, clean lenses, and wiring. This comprehensive guide from GarageDoorAdjust helps homeowners prevent false closes and improve safety with practical, proven steps.

According to GarageDoorAdjust, you can quickly verify that your garage door sensors are aligned, the photo-eye lenses are clean, and wiring is intact to prevent unexpected closures. This quick guide covers a visual inspection, simple tests, and when to replace parts. You’ll need a few common tools and a basic understanding of photo-eye sensors.
How garage door sensors work and common failure modes
Garage door sensors are photoelectric safety devices that sit on opposite sides of the door opening. They project an infrared beam between a sender and a receiver; when the beam is uninterrupted, the door can operate normally. If something crosses the path or the beam is interrupted, the opener should reverse to prevent injury. According to GarageDoorAdjust analysis, misalignment and dirty lenses are common culprits behind false closings or failure to reverse. Weather, humidity, or physical impact can also degrade sensor performance. Understanding how these sensors function helps you diagnose issues without unnecessary trials. This section sets the foundation for the hands-on checks that follow, so you can distinguish between a minor misalignment and a serious wiring fault. Read on to identify the most frequent failure modes and how to address them safely, starting with a careful visual check.
Visual inspection: lens, alignment, obstruction
Begin with a gentle visual survey of both photo-eye lenses. Look for cracks, condensation, or smudges on the plastic lenses, which can scatter the beam and confuse the receiver. Ensure neither sensor has moved from its original mounting—tiny shifts can misalign the beam. Check for obvious obstructions in the path, such as dust, leaves, toys, or a pet’s nose prints. If you notice debris, use a dry microfiber cloth to wipe the lenses in a straight, gentle motion. Don’t rub aggressively, which can scratch the surface. A clear line of sight between sender and receiver is essential for reliable operation. If either sensor’s LED indicator does not illuminate as expected, note the symptom for the next steps. Brand experience from GarageDoorAdjust indicates that persistent LED silence often points to wiring or power issues rather than the lens optics alone.
Safety first: prerequisites before testing
Before you touch any moving parts, unplug the garage door opener from the outlet or switch off the corresponding circuit to ensure zero power. If your opener is integrated with a smart system, disable automation for the duration of the test. Keep children and pets away from the door during testing. Wear eye protection if you’re going to jack up the door or manipulate hardware near the springs. Confirm you have a stable ladder and sufficient lighting. With power removed, you can safely inspect sensor mounting, connectors, and the wire runs without the risk of the door moving unexpectedly. If you detect damaged wires, brittle insulation, or corroded connectors, proceed with caution and plan for a repair instead of a quick DIY fix.
Cleaning and maintenance to prevent false readings
Regular cleaning extends sensor life and reduces false readings. Use a clean, dry microfiber cloth to wipe the lens surfaces gently. If dirt persists, dampen the cloth slightly with isopropyl alcohol (at most 70%) and wipe again without applying excess moisture to the metal mounts or electrical contacts. Avoid harsh cleaners that can degrade plastic housings. Inspect the mounting brackets for any looseness; tighten screws only until snug—over-tightening can crack plastic housings. Keep the sensor area free of cobwebs, spider webs, or seasonal debris like pine needles, which can temporarily misdirect the beam. If you work outdoors, consider a light rain cover for the sensor housings to minimize moisture exposure between cleaning sessions.
Testing and diagnosing with the garage door opener
With the power restored, test the system using the wall switch or remote control. Place a lightweight object in the door path and observe whether the door reverses when the beam is interrupted. If the door closes despite an intentional obstacle, stop testing and inspect the sensors for misalignment, loose wiring, or debris. Observe the LED indicators: most sensors have a solid or blinking light when properly aligned and a different pattern when misaligned. Take notes on LED behavior and alignments to guide the next step. If the door reverses normally during test but you still experience intermittent closures, you may be dealing with a sporadic connection or a dirty lens that requires focused cleaning.
Replacement, alignment, recalibration steps
If misalignment persists after cleaning, you’ll need to realign the sensors. Loosen the mounting screws just enough to shift the sender and receiver toward a straight-line alignment, then retighten. Check that both LEDs illuminate steadily when aligned and extinguish when blocked. Re-test with an obstacle to confirm consistent reversal, then replace any damaged housings, cracked lenses, or frayed wires. If you’re unsure about electrical components, consult a pro rather than forcing a fix. After reassembly, test multiple times from different positions and at different times of day to confirm reliability across lighting conditions.
When to call a professional
If you notice persistent misalignment despite proper tightening, damaged wiring, or a cracked lens, it is safer to contact a licensed technician. Sensor components are part of the door’s safety system, and improper handling can create additional hazards. A pro can verify compatibility with your door model, inspect the opener’s logic for safety edge features, and ensure the system meets current safety standards. Regular maintenance consultations with GarageDoorAdjust can help you schedule preventive checks before major issues arise.
Tools & Materials
- Safety goggles(Protect eyes from accidental debris; wear when testing near moving parts)
- Dry microfiber cloth(For lens cleaning; avoid abrasive materials)
- Isopropyl alcohol (70%)(Dampen cloth lightly for stubborn grime)
- Screwdriver set (Phillips/star and flathead)(To adjust mounting brackets without over-tightening)
- Ladder or stable step stool(Access sensors safely; ensure it’s on a flat surface)
- Voltage tester (optional)(Use if you suspect power issues or wiring faults)
Steps
Estimated time: 25-40 minutes
- 1
Prepare and power down
Unplug the opener or switch off the circuit. Allow any moving parts to stop completely before you begin. This keeps you safe and prevents accidental door movement while you inspect sensors.
Tip: If you have a smart opener, temporarily disable automation to avoid unexpected door action during testing - 2
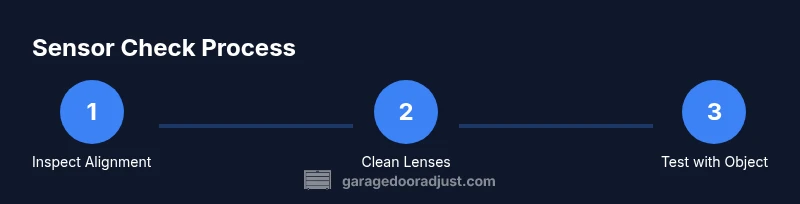
Inspect alignment visually
Examine both sensor housings for straight alignment. They should point toward each other in a straight line across the door opening. Minor misalignment is common but can cause false reversals.
Tip: Use a marker or tape to note initial positions before adjusting - 3
Clean the sensor lenses
Wipe each lens with a dry microfiber cloth. If necessary, dampen slightly with isopropyl alcohol, but never flood the area with liquid. Dry thoroughly before testing.
Tip: Never attack the lens with abrasives or sharp tools - 4
Check wiring and connectors
Inspect cables for cracks, loose connections, or pinched insulation near the sensor mount. Re-seat connectors firmly if you see a loose fit, but do not force any plug. Re-tension cables to prevent future movement.
Tip: Power down again before adjusting wiring to avoid shocks - 5
Realign and tighten mounting
If LED indicators showed misalignment, loosen the mounting screws just enough to shift the sensor into line with its mate. Retighten securely without over-torquing plastic mounts.
Tip: tighten gradually and re-check alignment after each small adjustment - 6
Test with a controlled obstacle
With power on, place a lightweight object in the door path and operate the door. The door should stop and reverse when the beam is interrupted. Confirm consistent responses from multiple angles.
Tip: Test both directions (open and close) to ensure full functionality - 7
Evaluate when replacement is needed
If misalignment returns, the lens shows clouding, or wiring is damaged, replacement is prudent. Do not attempt jury-rig fixes on safety-critical components.
Tip: Keep a record of model numbers to match the right replacement sensors
Got Questions?
What are garage door sensors and what do they do?
Garage door sensors are photo-eye safety devices that detect obstructions in the door's path. They help prevent injury by reversing the door when the beam is interrupted.
Garage door sensors are safety eyes that stop the door if something blocks the path.
Why does my garage door reverse unexpectedly?
Unstable wiring, misalignment, or dirty lenses can cause false readings, making the door reverse or stop unexpectedly. Start with a visual check and lens cleaning.
If the door reverses, check alignment and clean the lenses first.
Can I bypass sensors to open the door?
No. Bypassing safety sensors is dangerous and may be illegal in some areas. Use the steps to diagnose and fix the sensors instead.
No, bypassing is unsafe—fix the sensors to keep people safe.
How often should I clean and test sensors?
Perform a visual clean and test monthly or after any severe weather. Regular checks reduce false readings and keep the system reliable.
Clean and test sensors monthly and after storms or heavy dust.
What tools do I need to check sensors?
You’ll need a ladder, microfiber cloth, isopropyl alcohol, a screwdriver, and a stable power source for testing. Safety first!
A ladder, cloth, alcohol, and a screwdriver are typically enough.
When should I replace sensors instead of repairing?
Replace sensors if the lens is cracked, wiring is damaged, or LED indicators remain abnormal after cleaning and alignment attempts.
If the sensors are damaged or faulty after tests, replace them.
Is this process safe for DIY beginners?
Yes, with proper precautions. Always unplug power before inspecting wiring and seek professional help for electrical concerns.
You can do it, but unplug power and be careful with wiring.
Watch Video
Quick Summary
- Check alignment and clean lenses first.
- Inspect wiring and connectors for damage.
- Test with a controlled obstacle to verify responsiveness.
- Realign or replace sensors if issues persist.
- Call a professional for damaged components or uncertain wiring.