Garage Door Sensor Test: Step-by-Step Diagnostic Guide
Learn how to safely test and diagnose your garage door safety sensors. This guide covers alignment, beam tests, wiring checks, and when to replace sensors to keep your door operating safely and reliably.

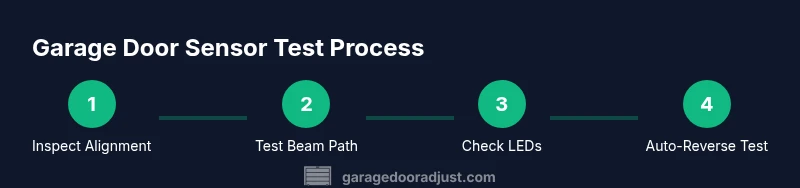
A garage door sensor test verifies that your safety sensors align correctly and stop the door from closing on people or objects. You’ll need a clear floor, basic tools, and a non-destructive test approach to avoid damage. This quick test guides you through sensor alignment, beam obstruction checks, and auto-reverse validation so your system stays safe and reliable, per GarageDoorAdjust guidance.
What is a garage door sensor test and why it matters
A garage door sensor test checks the safety beams at the bottom of the door. These photoelectric sensors detect obstacles and automatically reverse the door to prevent injury or damage. A quick, thorough test ensures the system remains reliable, reducing the risk of crushed items, pets, or fingers in your doorway. According to GarageDoorAdjust, regular testing helps homeowners identify misalignment and ensure proper operation. Performing these checks after installation, after maintenance, or after a minor door impact keeps your system safe and compliant with basic safety practices. A reliable sensor test not only protects your family but also helps you avoid costly repairs that stem from a failed safety mechanism. If the test fails, note which step caused the issue and address it before attempting a full door cycle.
How safety sensors work: components and how they trigger the door
Safety sensors are typically a paired set of photoelectric devices mounted at each side of the door track near the bottom. The transmitter emits an invisible beam, and the receiver detects it. When the beam is uninterrupted during door operation, the opener should stop and reverse if the force is detected. Proper alignment, clean lenses, and secure wiring are essential for reliable operation. A misaligned beam or dirty sensor lenses can mimic an obstruction, causing false reversals or a failure to stop. From a maintenance perspective, regular inspection of the sensor housings, mounting brackets, and wires helps prevent intermittent failures. GarageDoorAdjust emphasizes that small misalignments accumulate over time, so periodic recalibration is worthwhile.
Diagnostic plan: prerequisites, safety, and setup
Before you begin, clear the area beneath the door, remove any clutter, and ensure pets and people are out of the way. If your opener has a removable power switch, turn it off to prevent movement during testing. A clean, dry surface prevents misreads caused by moisture or dirt. For homeowners, a simple test path works best: start with alignment checks, then perform obstruction tests, and finally test the auto-reverse feature. If you notice any arcing, burnt smells, or damaged wiring, stop and consult a professional. As noted by GarageDoorAdjust, beginning with a safe, controlled environment reduces risk and yields clearer results.
Sensor alignment check: visual and LED cues
Visually inspect each sensor for even gaps and secure mounting. Look for straight alignment with the beam path across the door opening. Most sensors have indicator LEDs—green typically means aligned and listening, red or no light signals an issue. If the LEDs don’t behave as expected, gently adjust the brackets until both units show solid, steady lights. A small adjustment can restore correct detection and prevent nuisance reversals.
Beam obstruction test and auto-reverse check
Block the beam with a safe object (like a rolled towel) at the sensor level while the door is in the closed position. Press the close button or use the wall control to attempt closing. The door should stop and reverse after a brief delay. Remove the obstruction and re-test to confirm the beam read is clean. This test verifies both sensor responsiveness and the opener’s auto-reverse feature, which is critical for safety. If the door does not reverse, inspect wiring and consider replacing the sensors.
Wiring, power, and clean fixes that actually help
inspect the sensor wires at the control box and at the sensor mounts. Look for loose connections, frayed insulation, or corrosion. Re-seat connections carefully and secure with electrical tape if needed. Clean the sensor lenses with a soft, lint-free cloth and isopropyl alcohol if allowed by the sensor manufacturer. Dirty lenses or loose wires are common culprits in intermittent sensor failures.
Replacing sensors: when and how
If the LED indicators remain inconsistent after alignment, or if the beam path is clearly compromised, replacement is often the best option. Choose sensors compatible with your garage door opener model and follow the manufacturer’s installation steps. After replacing, re-run the full sensor test to confirm the new units function correctly. Regular maintenance intervals help ensure long-term reliability. The GarageDoorAdjust team recommends replacing sensors that show persistent misreads rather than attempting ongoing temporary fixes.
Final testing and maintenance recommendations
Power the system back on and perform a final full test: close the door normally, then block the beam to trigger a reversal. Confirm safe operation across multiple attempts, including remote and wall-control triggering. Schedule periodic inspections of brackets, wiring, and lenses, especially after door impacts or weather events. Regular checks help catch issues before they compromise safety, which aligns with GarageDoorAdjust’s guidance on proactive maintenance.
Tools & Materials
- Flathead screwdriver(For mounting brackets or screws)
- Phillips screwdriver(For sensor screws)
- Non-marring ladder or step stool(Access sensors safely)
- Soft lint-free cloth(Clean sensor lenses)
- Isopropyl alcohol (70% or higher)(Dampen cloth for lens cleaning)
- Electrical tape(Secure loose wires)
- Non-contact voltage tester(Confirm power status if needed)
- Replacement safety sensors (optional)(Only if sensors are damaged or persistently misread)
- Camera/phone for a quick reference photo(Document alignment before adjustments)
Steps
Estimated time: 40-60 minutes
- 1
Prepare workspace and safety gear
Clear the area under and around the door. Gather tools and confirm the door is fully closed to prevent accidental movement during testing. Position a ladder so you can comfortably reach the sensors without stretching or leaning.
Tip: Take a reference photo of the sensors before starting—easy to compare after adjustments. - 2
Power down safely
If your opener has a power switch, switch it off or unplug the unit from the outlet. This prevents the door from moving unexpectedly while you inspect wiring and brackets.
Tip: Test power status with a non-contact tester to confirm no active current before touching wiring. - 3
Inspect sensor alignment visually
Look at both sensors and ensure they face each other directly across the door opening. The gaps should be even and brackets secure. If a sensor looks tilted, gently adjust the bracket until alignment is level.
Tip: Tiny angle changes can improve beam integrity—make small adjustments and re-check both sides. - 4
Check LED indicators
Observe the LEDs on both sensor heads. Consistent solid LEDs usually indicate good alignment. If one side is dim or flickers, re-adjust and wipe the lens.
Tip: Use a dry cloth first; avoid applying liquid cleaners directly on the sensor. - 5
Beam obstruction test
With the door closed, block the beam gently with a soft object and press close. The door should stop and reverse. If it doesn’t, inspect wiring and consider realigning or replacing sensors.
Tip: Avoid using hard objects that could scratch lenses; cardboard or a cloth roll works well. - 6
Auto-reverse and remote test
Test the auto-reverse feature by triggering the door with the wall control and remote while the beam is blocked. The door must reverse promptly and not continue to close.
Tip: Document any unusual delays in reversal—this can indicate sensor or opener issues. - 7
Inspect wiring and tighten connections
Check connectors at the sensors and the control box. Tighten any loose screws and ensure wires aren’t stretched or pinched. Replace damaged wires if necessary.
Tip: Label wires if you disconnect them for reassembly to avoid miswiring. - 8
Clean lenses and re-test
Wipe both sensor lenses with isopropyl alcohol on a lint-free cloth. Re-test the beam with a light obstruction and confirm LEDs reflect stable status.
Tip: Do not scrub aggressively—gentle circular motions preserve coating on the lens. - 9
Replace sensors if needed and re-test
If misreads persist after alignment and cleaning, consider replacing with compatible models. Re-test thoroughly after installation.
Tip: Follow the manufacturer’s wiring diagrams exactly to avoid faults. - 10
Restore power and finalize tests
Reconnect power and perform a full-door cycle test in normal operation, including multiple close/reverse attempts. Confirm consistent, safe behavior.
Tip: Keep notes of results and any adjustments for future maintenance.
Got Questions?
What is the purpose of garage door safety sensors?
The safety sensors detect obstructions in the door's path and automatically reverse to prevent injury or damage.
Safety sensors detect obstructions and stop the door to prevent injuries.
How can I tell if sensors are aligned?
Check that both LEDs are steady and colors indicate a healthy beam; verify visual alignment across the door opening.
Look for steady LEDs and align the beams directly across the door.
Can I test the sensors with the door moving?
No. Testing should be done with the door in a controlled position to avoid injury or damage.
No, tests should be done with the door stationary to stay safe.
What should I do if the beam is blocked?
Remove the obstruction and re-check the beam alignment; then run a full test to ensure reversal works.
Remove the obstacle and re-test to ensure the door reverses properly.
Is it safe to bypass sensors during testing?
No. Bypassing safety sensors creates a serious risk of injury and property damage.
Do not bypass safety features under any circumstances.
How often should I test the sensors?
Perform sensor tests after installation, after maintenance, or after any door impact, and periodically as part of home safety checks.
Test after installation, after maintenance, and after impact, plus regular checks.
Watch Video
Quick Summary
- Test sensors regularly to ensure safety.
- Keep sensor lenses clean and brackets secure.
- Align, test beam path, and verify auto-reverse every time.
- Replace faulty sensors rather than forcing operation.