How to Clean Garage Door Sensors: A Homeowner's Guide
A practical, safety-focused guide to cleaning garage door sensors. Learn tools, steps, and tips to prevent false opens and keep your system reliable. Guidance from GarageDoorAdjust.

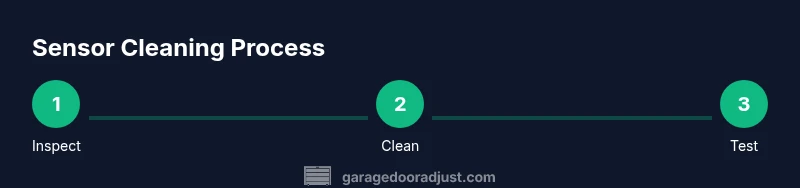
Learn how to clean garage door sensors safely and effectively to prevent misreads and unreliable operation. This quick guide identifies required tools and a step-by-step process to keep sensors clean and aligned. According to GarageDoorAdjust, clean sensors reduce nuisance opens and improve safety. Follow these steps to complete the task in about 15-25 minutes.
Why cleaning garage door sensors matters
If you're wondering how to clean garage door sensors, there's more at stake than keeping the door looking tidy. Dirt, dust, and fingerprints on the sensor lenses can block infrared signals or reflection, causing misreads and unexpected door movement. This is not just an annoyance; it can create safety hazards, such as the door reversing unexpectedly or failing to stop when an object is in the path. The garage door sensors are part of the safety system; keeping them clear ensures reliable operation and reduces nuisance opens. According to GarageDoorAdjust, sensor cleanliness is a common and addressable maintenance task that homeowners can perform in minutes with basic supplies. This article walks you through the process so you can do it safely and effectively, preserving the door's protective features.
In practice, a clean sensor pair can mean the difference between smooth operation and repeated false-reads. The goal of this guide is to empower you with simple, repeatable steps so you don’t have to guess when something is dirty or misaligned. By following a consistent approach to cleaning and testing, you’ll maintain the safety system and extend the life of your opener.
Tools and safety basics
Preparation matters. Before you touch anything, unplug the opener or switch it off at the control panel to prevent the door from moving while you're working. Wear eye protection if debris could fall, and keep a sturdy step ladder within reach. Gather the essential items in one place to avoid scrambling mid-task. A soft microfiber cloth, a mild sensor-safe cleaner, cotton swabs, a flashlight, and a few minutes of quiet space are usually enough for a thorough clean. Also verify the sensors' power and status indicators so you know when you’re finished. GarageDoorAdjust recommends a cautious approach, because a rushed job can damage the sensors or misalign them further.
Step 1: Inspect sensor alignment and wiring
Start by locating the two sensors on either side of the door track. Look for the small LED indicators; they should be steady and aligned so the beams face each other directly. If you see a misalignment, gently adjust the mounting brackets until the LEDs point toward each other and illuminate consistently. Check the wiring for any loose connections or frayed insulation. A loose wire can mimic a dirty lens as the signal path is disrupted. After addressing alignment and wiring, you’re ready to clean the surfaces. This step reduces the chance you’ll need a full replacement later.
Step 2: Prepare cleaning materials and workspace
Set your cleaning area with good light and a clear canvas. Pour a little cleaner onto the microfiber cloth rather than spraying directly onto the sensors to avoid drips. Have a few cotton swabs handy for tight spaces where dust hides. Keep the cloth slightly damp, not soaking wet, to avoid moisture intrusion. If you’re uncertain about a solvent, test it on a small area of the sensor housing first. Setting up properly now saves you from headaches later and helps protect the sensor electronics.
Step 3: Clean sensor surfaces (housings and lenses)
Gently wipe the sensor housings to remove dust, then focus on the lenses where dirt tends to accumulate. Use a fresh area of the cloth for each lens to avoid cross-contamination. If smudges persist, lightly dampen a cotton swab and roll it around the lens edge, never applying liquid directly to the glass. Avoid abrasive cleaners or solvents that could scratch the lens or seal. After cleaning, dry with a separate part of the cloth to ensure no moisture remains.
Step 4: Clean crevices and check seal integrity
Sensors sit in small recessed housings; dust collects in crevices and that can reintroduce dirt quickly. Use a cotton swab to reach tight spots around the bracket and along the edge of the lens. Inspect the seal around each sensor for cracks or gaps where dust can seep in. If you see damage, replace the sensor or consult a professional. Keeping seals intact helps maintain protection against moisture and contaminants.
Step 5: Re-align sensors and power up
Reconnect any wiring you may have loosened and power the opener back on. Observe the two LEDs; they should illuminate steadily and remain aligned when the door is idle. If one side is dim or off, tighten the mounting screws slightly and retest. This re-alignment often resolves the majority of false operation issues caused by dirt or misplacement.
Step 6: Test sensor function with a controlled obstacle
Place a small, non-dangerous object in the door path and operate the door in safety mode. The door should stop or reverse when the obstacle blocks the beam. If it does not, re-check the alignment and ensure there is no residual dirt on the lenses. Repeat with a second test object to confirm consistency. This functional test confirms the system is responding properly.
Step 7: Establish a simple maintenance routine
Schedule periodic quick checks to dust and inspect the sensors, repeat cleaning when you notice smudges or after messy weather. Keep a dedicated cleaning cloth for the garage door area, and store cleaners out of reach of children. A small routine makes sensor maintenance easy and consistent, helping prevent future misreads and door stalls. If you notice persistent issues after cleaning, consult GarageDoorAdjust's guidance or a qualified technician.
Tools & Materials
- Soft microfiber cloth(For wiped surfaces)
- Mild sensor-safe cleaner(Avoid harsh household cleaners)
- Cotton swabs(For tight spaces and crevices)
- Isopropyl alcohol (rubbing alcohol)(Optional, use on cloth, not directly on glass)
- Flashlight(Good lighting for visibility)
- Step ladder(Access sensor mounts safely)
- Safety goggles(Protect eyes from debris)
Steps
Estimated time: 20-30 minutes
- 1
Power down the opener
Unplug the opener from its power source or switch off at the outlet. This prevents movement while you work, reducing risk of injury or damage. Verify the door is locked in place and won’t drift during the cleaning.
Tip: Lock or block the door manually if possible before starting. - 2
Inspect sensor alignment and wiring
Locate the sensors on either side of the door track and visually confirm they face each other cleanly. If misaligned, loosen the mounting screws slightly and adjust until the LEDs align. Check for loose wires or damaged insulation and fix before continuing.
Tip: Only adjust mounting brackets by a small amount to avoid over-tightening. - 3
Prepare cleaning materials
Gather your microfiber cloth, cleaner, and cotton swabs in a well-lit area. Pour cleaner onto the cloth, never directly onto the sensors, to prevent liquid intrusion. Keep a dry section of cloth ready to dry lenses after cleaning.
Tip: Test cleaner on a hidden area first to ensure compatibility. - 4
Clean sensor housings and lenses
Wipe the sensor housings to remove dust, then gently wipe the lenses with a fresh cloth surface. If smudges persist, use a dampened swab around the edge of the lens but avoid soaking the glass. Dry thoroughly before proceeding.
Tip: Use a fresh cloth section for each lens to avoid cross-contamination. - 5
Re-align sensors and power up
Reconnect any wiring you may have touched and re-power the opener. Check that both LEDs illuminate steadily and point toward each other. If one side is dim, slightly adjust the mount and re-test until both are equal.
Tip: Don’t force screws beyond their tolerance; small adjustments are best. - 6
Test sensor function with a controlled obstacle
Place a light obstacle in the door path and run a test close. The door should stop or reverse when the beam is interrupted. If not, re-check alignment and remove any last remaining smudges from the lens.
Tip: Use a safe, non-damaging object for testing. - 7
Document and schedule maintenance
Record the cleaning date and note the sensor condition. Establish a routine (e.g., quarterly or after severe weather) to re-check and clean sensors to maintain reliability. Update your maintenance checklist if needed.
Tip: Set a calendar reminder to ease ongoing upkeep.
Got Questions?
Is it safe to clean garage door sensors myself?
Yes. With the power off, use a soft cloth and mild cleaner. Avoid spraying cleaner directly on the sensors and handle wires gently. If you’re unsure, consult a professional.
Yes. Power off the opener, wipe with a soft cloth and mild cleaner, and avoid spraying directly on the sensors. If unsure, consult a pro.
How can I tell if sensors are misaligned?
LED indicators should face each other and stay steady when the door is idle. If one LED is dim or off, adjust the mounting brackets slightly and re-test.
Look for steady LEDs facing each other and adjust the mounts a little if one is dim.
Can I use household cleaners on the sensors?
Avoid harsh chemicals. Use a mild sensor-safe cleaner and a microfiber cloth to prevent damage to lenses and housings.
Use a mild cleaner designed for sensors and a soft cloth; avoid harsh chemicals.
How often should I clean sensors?
As part of routine maintenance, especially after dusty, humid, or muddy conditions. Schedule a quick check every few months.
Do sensor cleanings as part of routine maintenance, especially after harsh weather.
What if the door still malfunctions after cleaning?
Re-check wiring and alignment first. If issues persist, consider professional inspection or sensor replacement.
If issues persist after cleaning, re-check wiring or call a professional.
Is cleaning the sensors dangerous for the door’s safety system?
When done with power off and careful cleaning, the risk is minimal. Follow the steps and never bypass safety features.
With power off and careful steps, cleaning is safe; never bypass safety features.
Watch Video
Quick Summary
- Always unplug the opener before starting.
- Use non-abrasive cleaners and a soft cloth.
- Maintain proper sensor alignment to prevent false opens.
- Test functionality after cleaning to confirm reliability.