How hard is it to replace a garage door motor: A practical DIY guide
Discover how difficult it is to replace a garage door motor, weigh DIY vs pro help, and follow a detailed step-by-step plan with safety tips, tools, and maintenance guidance.

Curious how difficult is it to replace garage door motor? For many homeowners, it's doable with the right safety steps and tools, but complexity rises with torsion springs, track type, and wiring. This guide walks you through a careful, step-by-step plan and safety checks to decide whether DIY is right for you or if you should hire a pro.
Understanding the difficulty: what makes replacing a garage door motor challenging
Understanding the difficulty of replacing a garage door motor starts with recognizing that all openers are not created equal. According to GarageDoorAdjust, the main challenges come from drive type (belt vs chain), whether the door uses torsion springs, and how the motor is integrated with safety sensors and limit switches. The motor must fit your model, connect to the rail correctly, and operate without interfering with the door's balance. If the door is very old or has worn springs, replacing the motor can become more of a hardware retrofit than a straightforward swap. On the other hand, a newer, standard two-car garage door with a direct-Drive opener is often the simplest scenario for a DIY replacement. The key is to assess three factors before you touch tools: compatibility (motor and rail match), electrical safety (power off, test voltage, ground fault protection), and the ability to safely lift and support the door during the work. In practice, many homeowners underestimate the time and steps required; planning saves grief and risk. GarageDoorAdjust Analysis, 2026 notes that the biggest variance in difficulty is torsion vs extension springs and motor compatibility.
Assessing compatibility before you buy
Before purchasing a replacement motor, determine if the new unit will fit your current setup. Check the drive type (belt, chain, or direct drive), mounting pattern, rail length, and whether the motor requires the same horsepower and voltage. Look up your opener’s model number and match it to the motor documentation. If you own a torsion-spring system, you’ll want to verify that the new motor can operate safely with the existing springs and springs’ tension. Remember that not all motors are drop-in replacements; some brands use different mounting holes or require adapters. If you find that parts don’t align, you may end up needing a new opener kit rather than a simple swap. This step is crucial because an ill-matched motor can lead to uneven door movement or sensor misreads, increasing risk during use.
Safety essentials you must respect
Safety should guide every garage door motor project. Always unplug the opener, disconnect the power at the outlet or circuit breaker, and secure the door to prevent a sudden drop. Wear safety glasses and work with a helper when lifting a heavy or awkward component. Keep children and pets away from the workspace, and avoid working on a door that shows visible spring wear or imbalance. If you hear unusual noises, feel resistance, or notice erratic movement, stop and reassess. If you’re not comfortable with electrical work or spring systems, consider hiring a professional to prevent injury. GarageDoorAdjust’s guidance emphasizes safety as the non-negotiable first step in any motor replacement.
Tools and materials you'll need
A motors replacement combines electrical work with mechanical installation. You’ll need a voltage tester, a screwdriver set, a socket wrench, pliers, a torque wrench (optional but helpful), safety glasses, a stable ladder, a labeled wiring plan or photos, and a replacement motor kit that matches your model. Having a helper can simplify handling heavy parts. Always verify that the new motor kit includes all mounting hardware and belt/chain components required for your rail system. If the kit is missing pieces, don’t improvise—order the correct parts before starting.
The step-by-step path at a glance
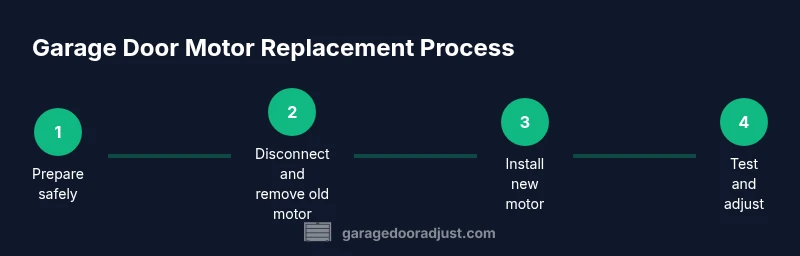
Replacing a garage door motor is a project that benefits from planning. The process typically follows these phases: verify compatibility, power down and secure the door, remove the old motor housing from the rail, detach the drive mechanism, install the new motor, reconnect wiring and sensors, calibrate travel limits, and test the system with caution. Each phase has critical sub-steps to ensure safety and proper operation. Review the Step-by-Step section for precise actions, timing, and pro tips to avoid common missteps. The goal is to end with a smoothly operating door that stops where you want and senses obstacles correctly.
Common pitfalls and how to avoid them
A few recurring mistakes can derail a motor replacement. Caution: always test power off and avoid working with live wiring. Common errors include mismatched motor models, incorrectly routed belts or chains, misaligned safety eyes, and forgetting to reprogram limit switches. Another pitfall is neglecting the door’s balance—replacing a motor while springs are near end-of-life can mask underlying issues and lead to premature failure. Take time to confirm wiring colors and connector orientations, label or photograph connections, and double-check that all fasteners are torqued to spec. Following a clear plan reduces risk and increases the likelihood of a durable repair.
Testing, adjustment, and final checks after replacement
Once the motor is in place, restore power and test the door at low speed. Listen for abnormal sounds and observe door movement in both directions. Check the safety sensor alignment and make sure the door stops on a detected obstacle. Recalibrate travel limits and force settings per the operator’s manual. If the door hesitates or drifts off track, shut down, recheck the alignment, and repeat the tests. Document any changes and keep a simple log for future maintenance.
Maintenance tips to extend motor life
After the replacement, implement a basic maintenance routine: lubricate the moving components at manufacturer-recommended intervals, keep rails clean, inspect and tighten hardware, and periodically test safety features. Clean sensors to prevent false positives and replace worn weatherstripping that could strain the system. A small, consistent maintenance habit can extend the life of both motor and opener components and reduce future repair costs.
When to hire a pro and what to expect
If your door uses torsion springs, unusual noises arise, or you’re unsure about electrical connections, stop and call a professional. A pro can assess the overall system, verify spring health, and ensure the motor, rails, and sensors function together safely. Expect a pro to verify compatibility, perform wiring and sensor checks, and provide a final safety test. Hiring a pro reduces risk and can speed up the process, especially if access is tight or the opener is integrated with a smart home system.
Tools & Materials
- Voltage tester(Check for live wiring before touching connections)
- Screwdriver set (Philips and flat-head)(Sizes #2 and #3 are common)
- Socket wrench set(Metric sizes 8-14mm; 1/2 inch commonly fits)
- Adjustable wrench(For mounting bolts and nuts on rails)
- Pliers (needle-nose and standard)(Grip wires, bend connectors safely)
- Safety glasses(Eye protection against debris)
- Stable ladder(Choose a non-slip ladder tall enough for rail access)
- New motor kit compatible with your model(Ensure model match and mounting pattern)
- Electrical tape(For insulating wiring and securing loose cables)
Steps
Estimated time: 60-120 minutes
- 1
Disconnect power and secure the door
Power off the opener at the circuit breaker or unplug the unit. Use locking pliers or clamps to hold the door in the closed position to prevent movement while you work. This prevents serious injury as the springs and cables can move unexpectedly.
Tip: Take a photo of wiring before disconnecting. - 2
Document existing wiring and connections
Label each wire and connector, or take detailed photos from multiple angles. This ensures you can reattach everything in the correct orientation and helps prevent miswiring that could damage the motor or opener.
Tip: Label wires with color-coded tape. - 3
Remove the motor cover and release the trolley
Remove screws to access the motor housing and slide it away from the track. Do not force parts; gentle, even movements prevent damage to the rail or belt/chain.
Tip: Keep screws sorted and grouped by location. - 4
Disconnect the drive mechanism and wiring
Detach the belt or chain from the motor to isolate the old unit. Unplug the connectors from the control board and set the motor aside carefully.
Tip: Handle belts gently to avoid stretching. - 5
Prepare the new motor and mounting hardware
Compare the new motor against the old unit for mounting holes, shaft size, and drive type. Ensure you have the correct mounting brackets and hardware before installation.
Tip: Double-check the footprint match before you bolt in. - 6
Install the new motor and reconnect drive
Mount the motor, reattach the drive belt/chain, and reassemble the sheath. Reconnect the wiring according to your labeled references and ensure connectors click securely.
Tip: Do not overtighten mounting bolts; use manufacturer torque specs. - 7
Reconnect safety devices and sensors
Reinstall safety eyes and ensure sensor alignment is precise. Reattach limit switches and verify they respond to a closed door when tested with moderate force.
Tip: Keep sensors clean and aligned for reliable operation. - 8
Test, calibrate, and finalize
Restore power and run the opener in both directions at slow speed. Calibrate travel limits and force so the door stops accurately and doesn’t reverse unexpectedly.
Tip: Perform several full-closure tests before regular use.
Got Questions?
Is it safe to replace a garage door motor myself?
It can be safe for a basic setup with proper safety measures and electrical knowledge. If the door uses torsion springs or you’re unsure about wiring, hire a professional.
DIY is possible for simple setups, but seek a pro if springs or wiring cause doubt.
What are the signs that the motor needs replacement?
Frequent overheating, unusual noises, jerky movement, inconsistent stopping, or error codes can indicate motor failure.
Look for overheating, grinding sounds, or erratic operation.
Do I need to replace springs when replacing the motor?
Springs are a separate component. Inspect them for wear and replace only if they show signs of aging or damage.
Springs wear is separate; inspect before deciding.
How long does a motor replacement typically take?
For a straightforward setup, expect 1-2 hours; more time may be required if wiring or alignment is unusual.
Most replacements take about one to two hours.
Can a new motor improve energy efficiency?
A newer motor can be more reliable and quieter, but efficiency gains depend on the model and setup.
Newer motors can be quieter and more reliable.
What maintenance should follow a motor replacement?
Lubricate moving parts, check sensors, and test remotes regularly for best performance.
Lubricate, check sensors, test remotes after install.
Watch Video
Quick Summary
- Assess compatibility before starting a replacement
- Power down and secure the door for safety
- Follow the step-by-step plan and document connections
- Test safety sensors and adjust travel limits after installation
- Hire a pro for torsion-spring or complex setups