Garage Door Opening Motor: DIY Diagnosis and Repair Guide
Learn to diagnose, repair, or replace a garage door opening motor with safe, step-by-step guidance. Tools, maintenance tips, and cost considerations to keep your opener reliable.

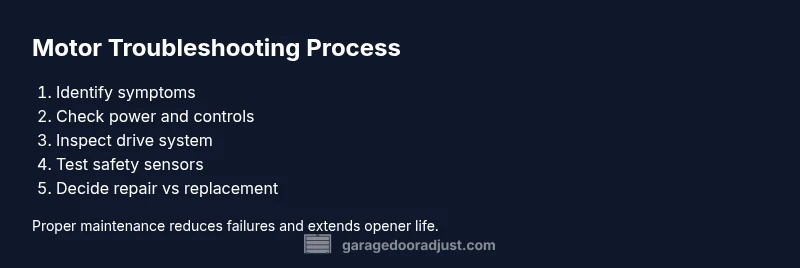
This guide helps you diagnose common garage door opening motor problems, decide between repair and replacement, and safely perform a basic maintenance routine. You’ll need a power source, basic tools, and access to your motor model information for compatibility checks. According to GarageDoorAdjust, many motor failures stem from worn gears, misaligned tracks, or faulty limit switches.
What is a garage door opening motor?
A garage door opening motor is the heart of an automatic door system. It converts electrical power into rotational motion that drives a drive system (belt, chain, or screw). This motion is transferred to a trolley or carriage that pulls or pushes a lifting mechanism attached to the door. Most residential setups pair a motor with a torsion spring system or extension springs to balance load, making it possible to raise a heavy door with a relatively small amount of motor torque. The motor’s built-in safety features—like limit switches and the photoelectric sensors at the door bottom—help stop movement at the correct points and prevent injury. Understanding these components helps you pinpoint where a failure starts, from power supply to the drive belt and sensor alignment.
Key components to know include:
- Motor housing and impedance control
- Drive belt or chain that translates rotation into linear motion
- Trolley/Carriage assembly connected to the door
- Limit switches that set the open/close endpoints
- Safety sensors for obstacle detection
- Remote receiver or wall switch circuitry
As you work, keep in mind the keyword for this topic is the garage door opening motor, and this system is designed to work in concert with the door’s springs and tracks for smooth operation.
note”:null},
Tools & Materials
- Screwdriver set (Phillips and flathead)(Include small and medium sizes for interior screws and brackets)
- Adjustable wrench(For bolts on motor mount and hardware connections)
- Multimeter(To test voltage, continuity, and resistance in the control wiring)
- Voltage tester(Non-contact tester to verify live circuits before touching wires)
- Pliers (needle-nose)(Gripping and manipulating wires and connectors)
- Ladder (6–8 ft)(Access the motor housing safely without overreaching)
- Safety gloves and eye protection(Personal protective gear for shocks and debris prevention)
- Silicone-based lubricants(Lubricate tracks and rollers if they’re dry (avoid oil-based lubricants))
- Shop rags(Clean residues and wipe down components during inspection)
- Replacement motor or drive components(Only if you’ve identified a failed part that can be swapped in)
Steps
Estimated time: 60-120 minutes
- 1
Power down and access the opener
Unplug the garage door opener from its outlet or switch off the circuit breaker supplying the unit. Open the access panel and inspect the mounting hardware to ensure the motor is firmly secured. This initial step prevents accidental movement and protects you during inspection.
Tip: Verify power is fully disconnected with a voltage tester before touching any wires. - 2
Inspect external hardware and drive system
Look for loose bolts, worn drive belts or chains, and signs of wear on the trolley or carriage. Misalignment or frayed belts are common culprits that cause slipping or sluggish movement. Record observations to guide your next steps.
Tip: Take photos from multiple angles to help with reassembly if you replace parts. - 3
Test limit switches and control wiring
Use a multimeter to check continuity on the limit switches and inspect the door’s control wiring for damage or burns. A tripped limit switch or damaged wire can stop the door at incorrect points or cause intermittent operation.
Tip: If you’re not confident reading electrical signals, proceed to the next diagnostic steps before handling live circuits. - 4
Check belt/chain tension and alignment
Ensure the belt or chain has proper tension and runs cleanly on pulleys with no rubbing. A loose belt can slip, while a misaligned track causes binding and extra strain on the motor.
Tip: Do not over-tighten belts; excessive tension can wear pulleys and bearings faster. - 5
Test door movement with the manual release
Disconnect the door from the opener using the manual release and move the door manually to feel for binding or unusual resistance. If the door is heavy or sticks, the issue may lie with springs, tracks, or balance rather than the motor alone.
Tip: If the door is heavy to move manually, stop and reassess—besides motor issues, spring balance problems exist. - 6
Evaluate repair vs replacement options
Based on your findings (belt wear, electrical faults, or worn gears), decide whether a repair is feasible or a motor/drive replacement is necessary. Consider the door’s age, the motor’s availability of parts, and cost implications.
Tip: If the motor is older than 8–10 years or parts are scarce, replacement may be more reliable long-term. - 7
Reassemble, reconnect, and test
Reattach any panels, reconnect the wiring, plug the unit back in, and test the door’s open/close cycle. Observe for smooth operation and listen for grinding or unusual noises. Re-torque all fasteners and ensure sensors align correctly.
Tip: Perform multiple open/close cycles to confirm consistent performance before concluding the job.
Got Questions?
What are the common signs that my garage door opening motor is failing?
Look for slow or jerky movement, grinding noises, the door not opening fully, or the motor buzzing without moving the door. Repeated circuit breakers trips or non-responsiveness during remote operation are also red flags.
Common signs include slow movement, grinding sounds, and the door failing to reach its full open or close position.
Is it safe to repair a garage door opening motor myself?
DIY can be feasible for simple issues like belt tension or sensor misalignment. However, electrical faults or significant motor replacement carry risk—consider hiring a professional if you’re unsure about wiring, torsion balance, or safety systems.
You can handle minor fixes, but for electrical work or motor replacement, it’s safer to call a pro.
What tools do I need to replace a garage door motor?
Common tools include a screwdriver set, pliers, multimeter, voltage tester, adjustable wrench, and a ladder. You may also need a replacement motor or drive components compatible with your door.
You’ll typically need basic hand tools and a compatible replacement motor.
How long does it take to replace a garage door motor?
Plan for 1–3 hours depending on door type, access, and whether parts are readily available. If a professional is involved, scheduling and setup time may vary.
A motor replacement usually takes about one to three hours, depending on the setup.
Are garage door motors universal across brands?
Motors and drive systems vary by brand and model. Always check compatibility for voltage, mounting, belt/chain size, and drive type before purchasing replacements.
Not all motors fit every door—check compatibility carefully.
Should I lubricate the motor area?
Lubricate dry moving parts like tracks and rollers with silicone-based lubricant. Avoid oil-based products on belts, pulleys, and electrical components.
Lubricate only the moving metal parts and tracks; avoid the motor itself.
Watch Video
Quick Summary
- Identify whether the motor drive system or control wiring is failing
- Assess balance, tracks, and springs to avoid misdiagnosis
- Follow safety-first steps before any disassembly
- Choose repair or replacement based on age, parts availability, and total cost
- Test thoroughly with multiple open/close cycles after work