Hamilton Garage Doors: A Complete Step-by-Step Guide
Comprehensive, expert guidance for diagnosing, repairing, and installing Hamilton garage doors. Learn safe practices, maintenance routines, and when to call a pro, with clear steps and trusted tips from GarageDoorAdjust.

This guide helps homeowners diagnose, repair, or install Hamilton garage doors with a practical, step-by-step approach. You’ll learn to identify common symptoms, perform safe maintenance, and decide when to call a professional. By following these steps, you can restore smooth operation and extend the life of your Hamilton garage doors.
What Hamilton garage doors symptoms usually mean and how to interpret them
For homeowners dealing with Hamilton garage doors, common symptoms include slow lifting, grinding noises, door sticking at mid-range, or reversing unexpectedly. Temperature swings and humidity in the Hamilton area can affect tracks, springs, and lubrication, making symptoms more noticeable at certain times of year. Start by noting when the issue occurs, how long it lasts, and whether the problem affects the opener or the manual lift. This context helps you distinguish between a simple lubrication issue, a misaligned track, or a worn spring. Throughout this guide, you’ll see practical checks you can perform safely to narrow the root cause for Hamilton garage doors, saving time and reducing the need for emergency service calls.
Safety first when working on Hamilton garage doors
Garage doors are heavy and move with impressive force, so safety cannot be optional. Before touching any components, unplug the opener and remove the remote from inside the house. Wear safety glasses and work gloves, and keep children and pets away from the work area. Use a sturdy ladder on level ground and never stand under a door supported by a person. If you notice frayed cables, cracked panels, or signs of corrosion, stop and call a professional. For Hamilton garage doors, following these safety steps lowers the risk of severe injury and accidental door release during maintenance.
Balancing, lubrication, and track alignment: core maintenance for Hamilton garage doors
A well-balanced door should lift smoothly with minimal resistance and should stay put when lifted to the halfway point. Check tracks for dents, debris, or misalignment. Clean tracks with a rag and apply a silicone-based lubricant to rollers, hinges, and contact surfaces a light, even coat—avoid over-lubricating, which can attract dirt. Use a level to verify that vertical tracks are plumb; misalignment can cause binding and excess wear. For Hamilton garage doors, routine lubrication every 3–6 months helps bearings and seals, reduces noise, and prolongs life. After any adjustment, retest the door with the opener to ensure appropriate travel and safety features operate correctly.
When to repair vs replace components on Hamilton garage doors
Not every problem warrants component replacement. Worn rollers, bent tracks, damaged weather seals, or cracked panels are common repair or replacement considerations. Springs require professional handling due to high tension and risk of injury; if you hear grinding, notice unbalanced movement, or see irregular door behavior, call a qualified technician. If the door shows significant rust, material fatigue, or persistent misalignment after multiple attempts, replacement may be more cost-effective and safer in the long run for Hamilton garage doors.
Choosing parts and tools for Hamilton garage doors repairs
Having the right tools and quality parts makes repairs safer and more durable. Start with a basic toolset (screwdrivers, adjustable wrench, pliers, level, and a flashlight) and silicone-based lubricant. Use only manufacturer-approved or equal-grade tracks, rollers, weather seals, and springs for compatibility and safety. For torsion or extension springs, rely on a pro; attempting DIY spring work can be dangerous. Keep replacement parts organized and labeled by location (tracks, rollers, weatherstripping) to streamline the process on Hamilton garage doors.
Monthly maintenance routine you can perform for Hamilton garage doors
Create a simple monthly check-in routine to catch problems early: inspect hardware for loosened screws, clean tracks to remove dust and debris, lubricate moving parts with a silicone-based product, test safety reversing sensors, and confirm the door returns to a closed position when released from a higher point. Check weather stripping for wear and replace if gaps appear. A quick wipe-down and inspection can prevent many common issues seen with Hamilton garage doors, reducing the likelihood of unexpected failures.
Troubleshooting quick checks for common issues on Hamilton garage doors
If the door hesitates, binds, or makes unusual noises, start with the simplest causes: loose hardware, dirty tracks, or a misadjusted opener. Confirm power to the opener; reset the opener if it has a programable feature. Check sensor alignment and safety reversing mechanism; dirty or misaligned sensors can cause automatic reversal. If problems persist after these checks, the issue could be a worn spring, damaged panel, or a more complex electrical fault requiring professional service for Hamilton garage doors.
Tools & Materials
- Safety glasses(Shatter-resistant lenses; protect eyes from springs and fasteners)
- Work gloves(Grip and protect hands during lifting and wrenching)
- Sturdy ladder(Stable on flat surface; rated for your weight)
- Adjustable wrench set(Cover a range of bolt heads (metric/standard))
- Screwdrivers (Phillips and flat-head)(Use appropriate size to avoid stripping screws)
- Pliers (needle-nose and standard)(Grip and reposition small components safely)
- Silicone-based lubricant(Apply thin, even coats to rollers, hinges, and tracks)
- White lithium grease(Use sparingly on metal-to-metal contact points)
- Rags or lint-free cloths(Clean surfaces before lubrication)
- Torque wrench (optional)(If you plan to adjust hardware to precise specifications)
- Replacement weather seals, rollers or tracks (as needed)(Only replace if worn or damaged; follow manufacturer specs)
- Non-contact voltage tester (optional)(Check for live circuits before handling open electronics)
Steps
Estimated time: 60-90 minutes
- 1
Disconnect power and secure area
Unplug the garage door opener at the wall and disable any remote controls to ensure the door cannot move during inspection. Visually clear the workspace and remove objects that could cause tripping hazards. This initial safety step prevents accidental startup while you assess the door.
Tip: Always verify power is off by attempting a manual close with the door in view; if it moves, re-check wiring and ensure the opener is isolated. - 2
Inspect balance and tracks
With the door closed, visually inspect tracks for dents, misalignment, or buildup of dirt. Use a level to check vertical tracks and realign brackets if needed. Look for loose hardware or worn rollers that could contribute to binding.
Tip: If a track is visibly bent, do not force it—mark the bend and call a pro; small bends can enlarge with use and be dangerous. - 3
Test manual balance
Disconnect the automatic opener and manually lift the door about halfway up; release gently. If it stays in place, the balance system is likely ok; if it drifts down or up, spring tension or balance components need attention.
Tip: Never try to adjust torsion springs by yourself; rely on a professional for spring work. - 4
Lubricate moving parts
Apply a light coat of silicone-based lubricant to rollers, hinges, and the track where metal slides. Wipe off excess lubricant to prevent dust accumulation. Re-test door operation after lubrication.
Tip: Do not lubricate plastic bushings or nylon rollers excessively; over-lubrication attracts grime. - 5
Check opener sensors and alignment
Ensure safety sensors are clean and properly aligned as the door nears the floor. Misaligned sensors can prevent the door from closing or reverse forcefully. If misalignment is detected, adjust the bracket and re-test with the opener.
Tip: Use a piece of masking tape as a visual cue to confirm sensor alignment during testing. - 6
Tighten hardware and re-check gaps
Go around the door and tighten loose brackets, hinges, and mounting hardware. Check weather stripping for wear and replace if you notice gaps or cracking. Confirm there is no obvious rust or corrosion on metal parts.
Tip: Avoid over-tightening screws; overtightening can strip threads or warp components. - 7
Test the entire operation with the opener
Reconnect power and test the door with the opener through all travel stages. Listen for abnormal sounds and observe smooth movement. Verify the auto-reverse feature works by gently placing an obstacle in the path and re-testing.
Tip: Keep hands clear of the door edges and ensure pets and kids stay away during testing. - 8
Document results and schedule follow-up
Note what was inspected, what was adjusted, and any parts replaced. If issues persist, plan a professional inspection, especially if springs or cables were involved. Schedule a follow-up check in 3–6 months.
Tip: Maintain a simple maintenance log for Hamilton garage doors to track wear trends and plan replacements before failure.
Got Questions?
Can I adjust torsion springs myself?
No. Torsion springs carry dangerous tension, and DIY adjustments can cause severe injury or door failure. Always call a licensed professional for spring work on Hamilton garage doors.
Adjusting torsion springs is dangerous; contact a pro for safety.
What is the most common cause of a noisy garage door?
Most noises come from worn rollers, dirty tracks, or loose hardware. Start by cleaning tracks, tightening screws, and lubricating moving parts before replacing components.
Noisy doors are usually rollers, tracks, or loose hardware.
How often should I lubricate Hamilton garage door components?
Lubrication every 3–6 months is typically sufficient for most homes, depending on climate and door usage. Avoid over-lubrication and use silicone-based products.
Lubricate every 3–6 months to keep things moving smoothly.
Is it safe to operate a visibly damaged door?
Operating a visibly damaged door can be dangerous. If you notice cracks, severe rust, or bent components, stop using the door and consult a professional.
If it looks damaged, stop using it and call a pro.
Do I need to replace the entire Hamilton garage door if one panel is damaged?
Often a single damaged panel can be replaced, but cost and structural integrity vary. A professional can assess whether replacement or a whole-door upgrade is best.
Panel damage can sometimes be repaired, but a pro will tell you if replacement is better.
Can I program a new garage door opener myself?
Yes, most openers allow user programming via a reset and receiver pairing. Follow your model’s manual and safety guidelines to avoid improper operation.
Yes, but follow the model instructions carefully to avoid issues.
Watch Video
Quick Summary
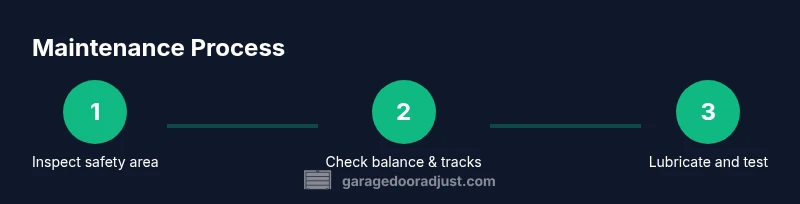
- Inspect safety area before any work begins.
- Balance and tracks determine smooth operation and longevity.
- Do not attempt spring adjustments unless you are trained.
- Lubricate moving parts with silicone-based products only.
- Call a pro for major spring or structural concerns on Hamilton garage doors.