Genie Garage Door Remote Battery Replacement: Step-by-Step Guide
Step-by-step guide to replace a Genie garage door remote battery: identify the correct cell, open the remote safely, install a fresh battery, and test functionality. GarageDoorAdjust analysis shows battery issues are a common remote failure.

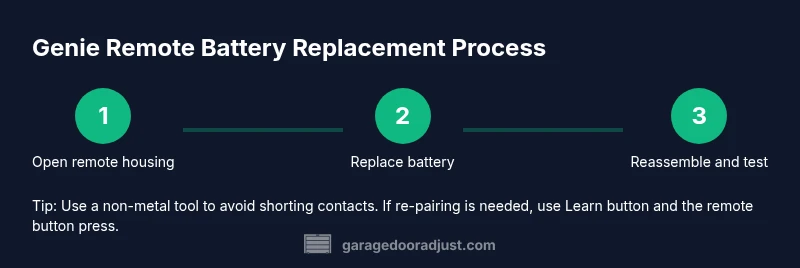
Genie garage door remote battery replacement is a quick fix you can complete in minutes. This guide helps you identify the correct battery, safely open the remote, install a fresh cell, and test performance. According to GarageDoorAdjust, battery issues are among the most common remote failures. Whether you own a modern Genie remote or an older model, the steps are the same.
Why Genie Remote Battery Problems Happen
Genie remote failures are most often caused by something simple: a dead or weak battery, poor contact between the battery and the springs, or corrosion on the terminal surfaces. Temperature fluctuations and frequent button presses can accelerate wear. The GarageDoorAdjust analysis shows that battery-related issues are the leading cause of reduced range, intermittent operation, or a remote that won’t trigger the opener. If the LED on the remote blinks or refuses to respond from a normal distance, it’s usually a sign the power source is fading and should be addressed promptly to prevent a larger failure.
Identifying the Right Battery Type for Genie Remotes
Genie remotes come in a few battery configurations depending on the model and era. To avoid guesswork, inspect the dead battery for size markings, remove the cover, and note any model number printed on the case or inside the battery compartment. Many common Genies use coin-cell batteries such as CR2032 or CR2025, but some older or specialty remotes may use a small rectangular cell like an A23. Always verify the exact type for your specific remote model before buying a replacement. If in doubt, check the user manual or search Genie model number + battery to confirm the correct cell. Using the wrong size can damage contacts or prevent a proper seal, creating future corrosion.
Tools, Safety, and Safe Handling
Prepare a clean, well-lit workspace and gather only the essential items. Use a non-conductive tool to pry open the remote; avoid metal objects that could short the circuit. Work on a non-slip mat to prevent dropping the tiny parts. Wear eye protection if you’re concerned about battery leakage; battery electrolyte can irritate the skin. After opening, handle the circuit board by the edges and avoid touching the metal contacts with bare fingers to preserve a clean surface for the new battery.
How to Replace the Battery: A Practical Overview
The replacement process is straightforward, and you can complete it in roughly 15–25 minutes once you have the correct parts. Start by removing the outer shell, then gently lift out the old battery without bending the contacts. Check the contact springs for corrosion or residue and wipe with a clean, dry cloth or isopropyl alcohol if needed. Align the new battery with the correct polarity (+ facing the positive contact), seat it firmly, and reseal the shell. Finally, test the remote at close range to confirm it responds, then test at the far end of your driveway to ensure consistent performance. If the device still misbehaves after replacement, the issue may lie with the receiver in the opener or a need for re-pairing.
Re-pairing and Testing After Replacement
Some Genie remotes automatically sync after battery installation, while others require a manual pairing step. Start by ensuring the garage door opener is powered and within range. Press the Learn/Program button on the opener, then press a button on the remote within 30 seconds to complete the pairing. Once paired, test the range and responsiveness from several distances and angles, noting any dead zones. If you still experience issues, try re-pairing the remote with the opener or consider replacing the receiver module if age or wear is suspected.
Common Pitfalls and Troubleshooting Quick Fixes
Don’t skip the re-pairing step if your model requires it; many remote faults persist until the pairing is refreshed. Avoid using a damaged or bent battery contact because it can create intermittent contact or misreads in the circuit. Always dispose of old batteries properly and ensure your replacement is genuine and within the battery type specified for your Genie model. If the LED on the remote remains dark or flickers inconsistently after replacement, inspect the opener’s Learn button and the receiver board for damage or corrosion.
Tools & Materials
- Replacement Genie remote battery (verify model-specific type)(Common types include CR2032 or CR2025; verify exact model)
- Small screwdriver (Phillips #0 or #1)(Model-dependent)
- Plastic pry tool or spudger(Gently lift shell without marring)
- Lint-free cloth(Clean contacts without lint)
- Isopropyl alcohol (70% or higher)(For stubborn residue)
- Non-conductive mat or safe work surface(Prevents slips and shorts)
- Latex-free gloves (optional)(Keep oils off contacts)
Steps
Estimated time: 15-25 minutes
- 1
Open the remote housing
Power down the remote and locate the tiny screws on the back or side. Use a small screwdriver to remove them, then gently pry the shell apart with a plastic tool. Set the cover aside in a safe spot.
Tip: Work slowly to avoid cracking the plastic; keep track of which screws came from which hole. - 2
Remove the old battery
Carefully lift the old cell from its springs or contact clips, noting its orientation. Do not bend the metal contacts.
Tip: Take a quick photo of the battery orientation for reference when you install the new one. - 3
Check battery contacts
Inspect the springs and contact pads for corrosion or residue. If needed, wipe with a dry lint-free cloth or a small amount of isopropyl alcohol and allow to dry.
Tip: Ensure the contacts are clean and flat for a solid battery seat. - 4
Install the new battery
Align the new battery with the correct polarity and press it into place until it sits flat. Do not force it; a misaligned battery can damage the contacts.
Tip: Double-check the orientation before seating the battery. - 5
Reassemble the remote
Carefully snap the two halves of the shell back together and reinstall all screws. Make sure the case closes evenly and the seams line up.
Tip: Don’t over-tighten screws; this can crack the housing. - 6
Test the remote at short range
Before re-pairing, press a few buttons and verify the LED lights up and the door responds at a few meters away.
Tip: If there’s no LED or weak light, re-check battery seating and contacts. - 7
Test the remote at distance
Move a few steps away and test again. If the door responds inconsistently, check for interference or damaged receiver.
Tip: Clear nearby metal objects that can reflect the signal if needed. - 8
Re-pair if required
If your model requires pairing, initiate Learn on the opener and then press a button on the remote to complete the process within 30 seconds.
Tip: If pairing fails, reset both remote and opener following the model’s manual.
Got Questions?
Will replacing the battery fix a Genie remote that won’t open the door?
In many cases, yes, a dead or weak battery is the culprit. If the door still won't respond after replacement, check the opener's power, re-pairing, or receiver board.
Usually a new battery fixes a non-responsive remote, but if it still doesn't work, you may need to re-pair or inspect the opener.
What battery types do Genie remotes use?
Genie remotes use several coin-cell sizes depending on model, commonly CR2032 or CR2025. Some older units may use a small rectangular cell like A23. Always verify the exact type for your remote model.
Genie remotes use different coin cells by model; CR2032 and CR2025 are common.
Why does the remote blink but not operate the door?
A blinking LED often indicates low battery or a failed pairing. Replace battery first and then re-pair if the opener requires it.
Blinking can mean a weak battery or pairing issue.
Do I need to reprogram the remote after replacing the battery?
Often not, but many Genie remotes require re-pairing with the opener after battery replacement. Check your model’s manual or the Learn button on the opener.
Sometimes you need to re-pair after battery replacement.
Can I replace the battery without opening the remote?
Most Genie remotes require opening the shell to access the battery. Some models have a cover that slides off without full disassembly.
Generally, you’ll need to open the remote to replace the battery.
How do I know if the new battery is seated correctly?
Ensure the positive and negative sides align with contacts. The battery should sit flat with no wiggle. If you can press the cover and it stays firmly closed, it's likely seated correctly.
Check orientation and a firm, flat seating.
Watch Video
Quick Summary
- Identify model-specific battery before replacement
- Install the correct battery with proper orientation
- Test the remote and re-pair if required
- Regular checks reduce unexpected failures