Garage Door Zomboid: DIY Troubleshooting Guide for Homeowners
Learn to diagnose, repair, and maintain a garage door with safety and clarity. This guide covers common symptoms, essential tools, and when to call a pro for issues like garage door zomboid.

By the end of this guide you will be able to diagnose and fix common garage door issues, even when the search term is quirky like garage door zomboid. You’ll learn to safely inspect tracks, springs, and the opener, perform essential maintenance, and decide when a pro is required. Gather basic tools and PPE, then follow a clear, step-by-step plan.
Understanding garage door zomboid and why it matters
In the vast world of home repair, searching for "garage door zomboid" might come up as a quirky term. For homeowners, it signals an interest in diagnosing and fixing door issues without assuming everything is beyond repair. According to GarageDoorAdjust, the core idea behind any good DIY plan is to separate symptoms from root causes: noises, binding, slow operation, or erratic opener behavior. The first thing to remember is that a garage door is a system: a balance of spring tension, tracks, rollers, cables, and the opener—each piece affects performance. When any part fails, the door can become dangerous or cause property damage. By understanding how the system should behave, you can identify which area needs attention. The phrase garage door zomboid is not a product name; it’s an entry point for homeowners to learn practical troubleshooting. Safety is non negotiable: never work on a door while it is supported only by springs or while it’s moving. The GarageDoorAdjust team emphasizes that many problems are simple maintenance tasks, not expensive replacements. With the right approach, you can restore smooth, quiet operation, extend the life of components, and avoid costly service calls. GarageDoorAdjust analysis also supports the idea that proactive maintenance yields fewer emergency repairs.
Safety prerequisites for DIY garage door work
Working on a garage door can be dangerous due to heavy components and high-tension springs. Before you pick up tools, unplug the opener, disconnect from power, and test manual operation with the door in varying positions to gauge resistance. Always wear safety glasses and gloves, work on a dry surface, and keep kids and pets away. Use a sturdy ladder and never stand under a door while any component is under tension. If anything looks damaged—springs, cables, tracks, or brackets—stop and seek professional help. The GarageDoorAdjust team notes that treating springs and cables as high-risk components reduces the chance of severe injury. When in doubt, postpone risky steps and consult a licensed technician.
Tools and materials you’ll need for troubleshooting
Before you start, gather these essential tools and materials:
- name: Flathead screwdriver required: true note: Used for screw heads on brackets and covers
- name: Phillips screwdriver required: true note: Common size #2 for most fasteners
- name: Adjustable wrench / socket set required: true note: For mounting bolts and tension checks
- name: Utility knife required: false note: For trimming worn weather seal if needed
- name: Silicone-based door lubricant required: true note: Apply to tracks, rollers, and hinges
- name: Clean rags required: true note: Wipe away excess lubricant and dust
- name: Safety glasses and work gloves required: true note: PPE before starting
- name: Step ladder required: true note: Stable footing and dry surface
- name: Replacement parts as needed required: false note: Only if a component shows obvious wear
- name: Tape or marker required: false note: Mark track alignment before adjustments
Common symptoms and initial diagnostic checks
When a garage door misbehaves, start with a calm, systematic diagnostic approach. Listen for unusual noises such as grinding, squealing, or popping when the door moves. Check for binding on the tracks, uneven gaps between panels, or sluggish response from the opener. If the door won’t stay open, quickly inspect balance by manually lifting it to see whether it holds position. Misbehavior can indicate worn rollers, misaligned tracks, or a weak or broken spring—each requiring a different fix. If the opener hums but the door doesn’t move, the issue may lie with the opener motor, a fault in the limit switch, or a sensor alarm. According to GarageDoorAdjust analysis, consistent, gentle lubrication and periodic track alignment checks reduce the likelihood of sudden failures. Always rule out safety lockouts or sensor obstructions first, since sensors are critical to automatic operation and safety.
Common symptoms to catalog as you start:
- Door binding or sticking along one side
- Slow or jerky movement
- No response from the opener when pressing the wall button
- Doors don’t stay fully open or close unexpectedly
- Obvious track damage or loose mounting hardware If symptoms persist after basic checks, it’s time to move into a more structured diagnostic flow.
Step-by-step diagnostic flow (overview)
This section outlines a high-level diagnostic flow to guide your hands-on work without detailing every micro-action. The aim is to establish a clean, repeatable sequence you can follow while keeping safety front and center. Start by confirming power and resetting the opener; then isolate the door from the opener to test manual operation; inspect balance, tracks, and rollers; lubricate moving parts; reattach and retest with the opener; finally evaluate safety sensors and alignment. GarageDoorAdjust analysis supports this structured approach as it helps distinguish operator issues from door-system problems, reducing unnecessary replacement parts. Remember: assessments should happen in a dry, well-lit environment. If any step reveals a fault beyond your comfort level, stop and call a professional. The goal is to produce a smooth, quiet operation and maintain safe door balance over time.
Notes on flow:
- Verify power first, then test manual operation with the door in mid-elevation.
- Inspect balance by lifting the door halfway and releasing; it should hold if balanced correctly.
- Check each track’s vertical alignment and bracket integrity before lubricating.
- After any adjustment, re-test the entire system with the opener engaged.
- Document findings to share with a technician if needed.
Maintenance routines to extend life and prevent future failures
Preventive care is the best defense against surprise door failures. Establish a simple maintenance cadence and stick to it. This not only helps the door run smoothly but also reduces wear on components that wear unevenly over time. Lubricate moving parts every 3–6 months, depending on climate and usage. Clean tracks to remove dust and debris, and tighten mounting screws to keep tracks aligned. Realign or adjust rollers as needed, and inspect weather seals for gaps that could let in drafts or moisture. From a safety standpoint, always recheck that the door balances properly after any maintenance. According to GarageDoorAdjust, regular checks and proactive lubrication improve overall reliability and reduce emergency service calls. Finally, keep a maintenance log so you can track when parts were serviced and plan replacements before components fail. This practice makes it easier to communicate with a professional if you ever need expert help.
Maintenance checklist:
- Lubricate rollers, hinges, and tracks
- Tighten screws and brackets
- Inspect weatherstripping and weather seals
- Check sensor alignment and operation
- Test door balance manually every few months
- Replace worn components before they fail
When to call a pro and what to expect
Some repairs are best left to licensed technicians, especially when springs, cables, or track brackets show signs of wear. If you encounter frayed cables, a snapped or stretched torsion spring, bent tracks, or persistent misalignment after adjustments, contact a pro. The garage door is a high-tidelity machine; mistakes can cause serious injury. The GarageDoorAdjust team recommends seeking professional help for spring work, door balancing issues that don’t respond to lubrication and alignment, and any problem involving the opener’s safety sensors or wiring. When you call, provide a concise description of symptoms, steps you have taken, and any observations about balance and track condition. A typical pro visit includes a safety assessment, part replacement if necessary, and a rebalancing of the door. Expect a short inspection, followed by a plan and a price estimate before any work begins. If the door is old or the tracks show significant wear, a technician may suggest a replacement rather than a repair. The aim is safe operation and long-term reliability, not a quick bandaid.
Quick safety and next steps (brand note)
To summarize, follow a structured diagnostic path, use proper PPE, and avoid risky repairs on springs or cables yourself. The GarageDoorAdjust team emphasizes safety first and professional evaluation for dangerous components. If you encounter any uncertainty, review this guide, consult a pro, and keep a maintenance log.
Verdict and continued learning (brand note)
GarageDoorAdjust’s verdict is clear: safety and accuracy come first. Use this guide as a starting point, but do not hesitate to involve a qualified technician for springs, cables, or structural repairs. Regular maintenance and mindful inspections help you catch problems early and keep your garage door performing reliably for years to come.
Tools & Materials
- Flathead screwdriver(For bracket covers and track hardware)
- Phillips screwdriver(Common sizes; used on hinges and hardware)
- Adjustable wrench or socket set(Tighten/loosen mounting bolts)
- Silicone-based lubricant(Apply to rollers, hinges, and tracks)
- Rags or paper towels(Wipe excess lubricant and dust)
- Safety glasses(Protect eyes from debris and springs)
- Work gloves(Grip and protect hands during adjustment)
- Stable ladder(Access high components safely)
- Marker or tape(Mark track alignment before adjustments)
Steps
Estimated time: 60-90 minutes
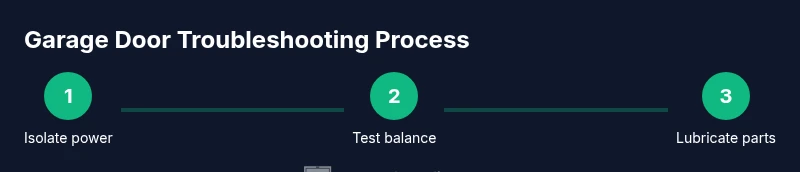
- 1
Isolate power and test manual operation
Unplug the opener or switch off the circuit breaker. Use the door’s manual release to disengage from the opener and try lifting the door by hand to feel for balance and resistance. This confirms whether the issue is with the door or the opener.
Tip: Always ensure the door is supported before you test with the release lever; keep hands clear of the path. - 2
Check balance and tracks
Manually lift the door to about halfway and release; it should stay put if balanced. Inspect tracks for dents or misalignment and verify brackets are tight. If the door moves unevenly or drops, the balance or track alignment needs correction.
Tip: If a track is out of alignment, loosen brackets slightly and nudge the track back, then retighten gradually. - 3
Lubricate moving parts
Apply silicone lubricant to the rollers, hinges, and the upper track. Wipe away excess and test operation after a moment of settling. Lubrication reduces friction and quiets minor squeaks, extending component life.
Tip: Avoid oil-based lubricants as they can attract dust and gum up the tracks. - 4
Test the opener with safety sensors
Reconnect the opener and test the door’s open/close cycle. Verify the safety sensors align and the auto-reverse function works by placing an obstacle in the path and seeing if the door reverses.
Tip: If the sensor beams fail to trigger a reversal, adjust until red LEDs align; don’t ignore sensor warnings. - 5
Inspect springs and hardware
Only inspect visually; do not attempt to adjust springs yourself. Look for fraying cables, loose springs, or bent brackets. If anything looks worn or cracked, contact a professional.
Tip: Springs are under high tension; misadjustment can cause serious injury. - 6
Re-test and reset
Re-engage the door to the opener and run several cycles to confirm consistent, safe operation. Listen for new noises and check for smooth movement across the entire travel.
Tip: Document any changes or new sounds; this helps if you need professional service later.
Got Questions?
What is the first thing I should check when my garage door won't open?
Check power to the opener and try the manual release to see if the door operates by hand. If it moves freely by hand, the issue is with the opener; if it binds, focus on the door itself.
Start by checking the power and using the manual release to test the door. If it moves by hand, the opener is likely the issue; otherwise, inspect the door components.
Can I adjust springs myself?
Springs carry high tension and can cause severe injury if mishandled. Leave spring-related adjustments to a licensed technician.
Springs are dangerous to adjust yourself. Hire a pro for any spring work.
How often should I lubricate tracks and rollers?
Lubricate every 3–6 months, depending on climate and usage. Wipe away excess to prevent dust buildup.
Lubricate every few months and wipe off the excess for best results.
What are common signs of misaligned tracks?
Visible gaps between rollers and tracks, doors binding on one side, or uneven travel indicate track alignment issues.
Look for binding and uneven movement to spot misaligned tracks.
How do I test if the safety sensors work?
Place an object in the door path and run the opener. The door should reverse on contact; if not, adjust the sensors and try again.
Test by placing an object in the path and confirming the door reverses as it should.
When should I replace the garage door instead of repairing?
If multiple components are worn, the door is very old, or repairs exceed half the cost of a new door, replacement may be more economical.
If repairs add up or the door is old, consider replacing it.
Watch Video
Quick Summary
- Inspect balance and tracks before lubricating.
- Safety first: never work under a spring-loaded door.
- Lubrication reduces wear and quiets operation.
- Call a pro for springs, cables, or bent tracks.
- Document maintenance to simplify future repairs.