Garage Door for Dummies: DIY Troubleshooting Guide 2026
A practical, step-by-step guide for homeowners to diagnose and fix common garage door problems safely. Learn maintenance, safety, and when to call a pro with GarageDoorAdjust insights.

This guide helps homeowners diagnose and fix common garage door problems with a safety-first approach. You’ll learn to test balance, inspect tracks, lubricate moving parts, replace worn rollers, and reprogram openers. By the end, you’ll confidently troubleshoot most routine garage door issues without guesswork. This article uses plain language and practical photos so you can follow step-by-step.
What 'garage door for dummies' really means
Garage door for dummies means turning a daunting repair into a practical, step-by-step plan that any homeowner can follow. According to GarageDoorAdjust, breaking tasks into small, safety-first steps increases both effectiveness and safety. You’ll learn about the key components of a typical sectional or tilt-up door, such as tracks, rollers, springs, cables, and the operator. This guide uses plain language, clear checklists, and photos to translate jargon into doable actions. Remember: you’re not aiming for perfection—just safer, more predictable door operation and fewer surprise trips to the hardware store. The phrase here is a friendly invitation to fix rather than fear, with a focus on safe handling and logical progression. As you read, notice how simple decisions lead to concrete results, even on a DIY budget. The goal is to empower you to handle routine maintenance and minor repairs confidently, using a methodical, test-driven approach.
Common symptoms and what they indicate
When a garage door behaves oddly, it’s usually signaling a specific issue. A door that won’t open or fully rises may point to spring tension problems, damaged tracks, or a failing opener. A door that closes but reverses or stalls might indicate an obstruction, sensor misalignment, or worn rollers. Noisy operation—grinding, scraping, or squealing—often signals lubrication needs, loose hardware, or worn bearings. Uneven gaps at the bottom suggest warped tracks or weather-stripping wear. By mapping each symptom to a likely cause, you can prioritize the most impactful fixes and avoid unnecessary part replacements. Throughout this guide, you will see the phrase garage door for dummies used to remind you that the aim is clarity, not jargon. This approach helps homeowners stay focused on actionable steps instead of getting overwhelmed by the complexity of garage door systems.
Safety first: essential precautions for DIY
Before you touch anything, put safety first. Disconnect the power to the garage door opener to prevent unexpected movement, and keep hands away from the moving parts and pinch points. Wear safety glasses and gloves, and work on a dry, clear surface with stable footing. Never attempt to adjust springs or cables unless you have proper training, as these components store high tension and can cause serious injury. Keep children and pets away from the work area. If you’re unsure about a step, err on the side of caution and consult a professional. Following a written plan and taking measured, deliberate actions reduces risk and makes DIY repairs safer and more reliable. GarageDoorAdjust emphasizes that a calm, deliberate pace beats rush and reckless improvisation, especially around torsion springs and track alignment.
Basic diagnostic checks you can perform
Start with simple, non-invasive checks that don’t require disassembly. With the door closed, disconnect the opener from its power source and lift the door manually to check balance; it should stay put when you hold it near the bottom. Inspect tracks for dents, alignment, and debris; tighten loose mounting screws and clean out obstructions. Check rollers and hinges for wear and lubricant needs; apply a silicone-based or white lithium spray where appropriate, avoiding over-application. Reconnect power, then test the opener’s force and limit settings, sensor alignment, and the auto-reverse function by placing a small object in the door’s path. If the door behaves oddly at any step, take notes and proceed with caution—some issues require professional evaluation. This balance of manual and electrical checks gives you a solid foundation for diagnosing common garage door problems without specialized tools. Garage door for dummies strategies here emphasize test, observe, and document.
Maintenance tasks that prevent future breakdowns
Regular maintenance is the cheapest insurance against dramatic failures. Lubricate moving parts—rollers, hinges, and tracks—with a silicone-based lubricant, avoiding heavy oils that can attract dirt. Inspect weatherstripping and seals for gaps and wear; replace damaged weatherstripping to improve insulation and reduce drafts. Tighten loose fasteners and ensure the hardware is snug, but avoid overtightening, which can strip threads or distort components. Clean the door surface to minimize corrosion and inspect the door’s balance monthly if you use the garage frequently. Keep the opener battery topped up and replace it as needed. A simple, routine schedule reduces friction, extends component life, and preserves safe operation. This section reinforces the 80/20 rule: a small set of regular checks yields most of the reliability improvements for a garage door.
When to call a pro and how to choose one
Not every problem is a DIY fix, and there is no shame in seeking professional help when springs, cables, or structural issues are involved. If you notice frayed cables, excessive spring tension, misaligned tracks, or persistent sensor errors after basic maintenance, contact a licensed technician. Ask for a written estimate that itemizes parts and labor, and verify credentials, insurance, and warranties. For common, non-urgent issues, compare at least two quotes and request a clear scope of work. When you hire, ensure the technician explains the problem in plain language and demonstrates safe practices. The GarageDoorAdjust team recommends documenting the before-and-after results and keeping a simple maintenance log for future reference.
Authority sources
Trustworthy information shapes effective DIY practice. For more details on safety and standards, consult recognized sources such as OSHA, the U.S. Department of Energy, and NIST. These organizations provide baseline safety guidelines and standards that apply to household repair work and DIY electronics. This section anchors practical steps in credible public resources to help you verify best practices and stay compliant with safety norms.
Tools & Materials
- Safety glasses(ANSI-rated protective eyewear; splash protection if using solvents or solvents on tracks.)
- Work gloves(Grip and protect hands during lifting and handling of doors.)
- Step ladder(Stable, non-slip ladder tall enough to reach tracks safely.)
- Screwdrivers (Phillips & flathead)(For mounting screws and minor adjustments.)
- Adjustable wrench(Useful for track bolts and hardware tweaks.)
- Rag or shop towels(Wipe surfaces and clean tracks as needed.)
- Lubricant (silicone-based or white lithium grease)(Lightly lubricate hinges, rollers, and tracks; avoid over-application.)
- Cordless drill (optional)(May speed up removing or tightening screws.)
- Torque/line level (optional)(Helps verify track alignment and level.)
- Masking tape(Mark alignment before adjustments.)
Steps
Estimated time: 45-60 minutes
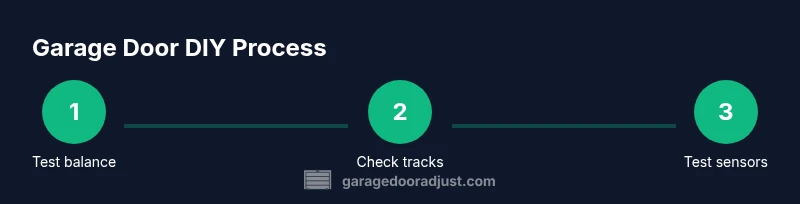
- 1
Disconnect power and test balance
First, unplug the garage door opener or switch off the circuit to ensure no movement. Manually lift the door about halfway and release; the door should stay in place if it’s balanced. If it drops or rockets upward, the springs or balance system may be out of whack and require professional attention. This check gives you a baseline before you touch other parts.
Tip: Always keep hands on the bottom section of the door when lifting to avoid pinch points. - 2
Inspect tracks and rollers
With the door down, inspect the vertical and horizontal tracks for dents, burrs, or loose hardware. Tighten mounting brackets evenly and clean any debris that interferes with smooth movement. Check rollers for wear and spin freely without wobble. Misaligned or worn components can cause binding and noise.
Tip: Use a level to confirm tracks are plumb; even a small misalignment can escalate over time. - 3
Check springs and cables (don’t DIY if compromised)
Springs provide the torque to lift the door. Visually inspect springs for gaps, rust, or visible deformation. Never attempt to replace or adjust springs yourself unless you’re trained; improper handling can cause severe injury. If you suspect spring issues, call a pro.
Tip: If you see any twist in the spring or frayed cables, stop and call a licensed tech immediately. - 4
Lubricate moving parts
Apply a light silicone-based lubricant to hinges, rollers (if non-metallic), and tracks where they contact moving metal. Avoid oily products that attract dust. Wipe away excess to prevent pooling near the door’s base and springs.
Tip: Lubricate sparingly; a thin film is enough to reduce friction without attracting dirt. - 5
Test safety sensors and limits
Reconnect power and test the safety sensors by placing an object near the bottom edge as the door closes. The door should reverse if an obstruction is detected. If the limits or opener feel off, reprogram or adjust according to the manufacturer’s instructions.
Tip: Keep pets and kids clear of the testing area during sensor checks. - 6
Finalize test and re-balance if needed
Perform a full cycle with the door operating under power. Listen for unusual noises and watch for any binding or uneven movement. If all looks good, re-tighten hardware and document any changes for future maintenance.
Tip: Record settings and maintenance notes in a dedicated home repair log.
Got Questions?
Is it safe to DIY a garage door repair at home?
DIY can be safe for basic maintenance and non-structural fixes when you follow safety guidelines and avoid high-tension components. If springs, cables, or tracks look compromised, consult a professional.
DIY can be safe for basic checks, but avoid springs and complex repairs; call a professional if you’re unsure.
Should I disconnect power before starting any work?
Yes. Always disconnect the opener’s power before starting any inspection or adjustment to prevent accidental movement. This protects you and others nearby.
Always unplug or switch off the opener before you begin.
How do I know if springs are failing?
Signs of failing springs include door that sags, makes loud creaking, or is difficult to lift manually. If you suspect a spring issue, do not attempt a DIY repair; call a pro.
If the door sags or you hear grinding near the springs, seek professional help.
How often should I lubricate the moving parts?
Lubricate every 3-6 months depending on usage and environment. Use a light silicone-based lubricant and wipe away excess.
Lubricate every few months, or as soon as you hear squeaking.
When should I replace the whole door instead of fixing it?
If the door is severely warped, damaged beyond repair, or the track or frame is bent, replacement may be more cost-effective and safer.
If damage is extensive, replacement could be wiser than costly repairs.
Watch Video
Quick Summary
- Plan before touching any hardware
- Balance tests and safety sensors first
- Keep lubrication light and targeted
- Call a pro for springs or major track issues