Garage Door Tech: DIY Diagnostics & Repairs Guide for 2026
A practical, step-by-step guide to diagnosing and fixing common garage door tech issues. Learn safety, essential tools, and proven repair methods for homeowners in 2026.

By following this guide, you’ll diagnose and address common garage door tech issues yourself. You’ll verify power and safety, inspect sensors and tracks, perform a spring tension check, and complete a safe lubrication routine. The steps balance DIY fixes with safety boundaries, helping homeowners decide when to press forward or call a pro. Start with the basic checks and gather essential tools.
What is garage door tech and why it matters
Garage door tech encompasses the mechanical and electronic systems that make your door operate safely and reliably. It includes the door panels, tracks, rollers, springs, opener motor, safety sensors, control boards, remotes, and wall switches. Understanding how these pieces work lets homeowners diagnose issues early, maintain performance, and avoid costly surprises. In practical terms, you’ll be looking for misalignment, worn hardware, sensor faults, and control-system glitches. A solid grasp of garage door tech helps you identify root causes rather than chasing symptoms, which saves time and reduces the risk of injury during DIY work. This guide centers on home-friendly diagnostics that respect safety boundaries while delivering real-world results.
As you read, you’ll notice that many failures show up in predictable patterns: sensors misbehave when misaligned or dirty, tracks bind when dirty or bent, and springs lose tension after heavy use. The goal is to build a reliable mental model of how the garage door tech stack fits together and where to look first when something goes wrong. Throughout, we’ll keep the focus on practical steps you can take safely in a typical residential setting.
Common failure modes and quick checks
A large share of garage door tech issues come from a few repeatable problems. Here are the most common failure modes homeowners encounter, with quick checks you can perform without specialized tools:
- Sensor misalignment or dirty lenses: The safety sensors should face each other with a clear line of sight. Clean the lenses with a soft cloth and realign if the beam is partially blocked. If the door won’t reverse on contact, recheck the sensors first.
- Track binding or misalignment: Visually inspect both tracks for dents or gaps. If the door is hard to open manually, the tracks may be out of alignment or obstructed by debris.
- Worn or broken springs: Springs provide the bulk of the lifting force. If the door feels heavy or won’t stay open, springs may be fatigued. Do not attempt to replace springs yourself unless you have the proper training—this is high risk.
- Loose hardware or corroded rollers: Check all mounting screws, bolts, and hinge pins. Tighten loose components and replace any worn rollers to restore smooth operation.
- Opener motor or logic glitches: Listen for unusual noises from the opener gear or motor. If the remote or wall switch behaves inconsistently, you may need to reset the opener or re-pair remotes.
- Cable wear and track damage: Frayed cables or bent cables near the drum are a serious hazard and require a professional assessment. If you notice exposed cable or fraying, stop using the system immediately.
Use these checks to triage the problem. If you encounter a safety-critical issue (springs, cables, or structural damage), schedule a professional service right away. Regular inspections and proactive maintenance reduce the chance of sudden, inconvenient breakdowns.
Safety first: essential precautions
Safety must come before any hands-on work with a garage door. Always start by isolating power to the operator and ensuring the door cannot move unexpectedly. Wear eye protection and gloves to guard against sharp edges and pinch points. Keep children and pets away from the door during inspections, and never place yourself under a door that could drop unexpectedly. When you work near springs or cables, assume there is stored energy and treat the components with respect. If you’re unsure about a step, pause and consult the opener’s manual or a professional.
Before touching any electrical components, unplug the opener or switch off the dedicated breaker. If you need to test control signals, use a non-conductive tool and confirm the circuit is de-energized. Finally, keep a well-lit workspace and take breaks as needed to avoid fatigue—mistakes in a DIY garage door project can be costly or dangerous.
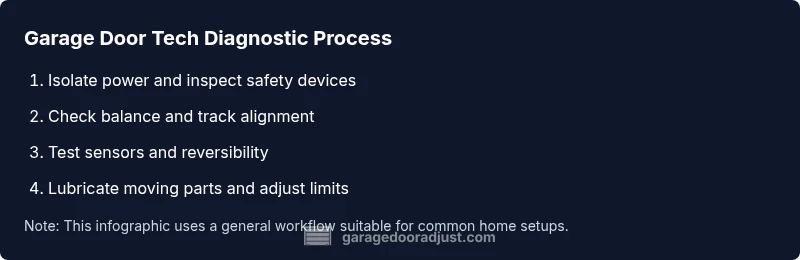
Diagnostic workflow you can follow at home
Adopt a repeatable checklist to diagnose garage door tech issues without guesswork. Start with a simple, high-value triage before diving into more complex tasks:
- Verify power and safety devices are functional. Ensure the opener is disconnected from power and that door movement can’t occur unexpectedly. Use a voltage tester if you’re uncertain about wiring.
- Check door balance by manual operation. With the door disconnected from the opener, lift it halfway. A balanced door should stay in place; if it moves, the springs or cables may be overworked.
- Test safety sensors and reversal. Place a small obstacle in the sensor path and ensure the door reverses properly. Clean and realign sensors if needed.
- Inspect tracks, rollers, and hinges. Look for dents, rust, or loose hardware. Tighten bolts and gently lubricate moving parts to restore smooth motion.
- Reconnect power and perform a controlled test of the opener. Observe the limit settings and reverse testing, and verify the door closes fully without sticking.
- Document results and plan maintenance. Record what you fixed and what remains, scheduling professional service if essential components show wear or if the repair exceeds your comfort level.
Following this workflow helps you stay organized and reduces guesswork when diagnosing garage door tech issues. It also makes it easier to communicate with a pro if further help is needed.
DIY fixes you can perform safely and effectively
Some fixes are well within a homeowner’s skill set, provided you respect safety limits and don’t attempt dangerous repairs. Safe DIY tasks include:
- Cleaning and aligning sensors: Realign misaligned sensors and clean the lenses to restore proper safety features. This is often the first and simplest fix for false door operation.
- Lubricating moving parts: Apply a silicone-based lubricant to hinges, rollers, and the track where metal contacts metal. Wipe away any excess; avoid spraying directly on springs or pulleys.
- Tightening loose hardware: Secure loose mounting bolts on tracks, brackets, and hinges. Loose hardware is a common source of noisy operation and premature wear.
- Reprogramming remotes and keypads: If remotes stop working, re-pair them with the opener following the manufacturer’s instructions. This is a low-risk fix that solves many control problems.
Important caveats:
- Do not attempt to adjust or replace springs, cables, or winding mechanisms unless you’re trained for such work.
- If you hear grinding from the opener, or if the door shows signs of binding, pause and consult a pro. These can indicate a misaligned or damaged component that requires specialized tools.
- Always test the automatic reversal after any change to sensor or control settings to ensure ongoing safety.
By focusing on safe, manageable tasks and knowing your limits, you’ll extend the life of your door while reducing risk. If any step feels beyond your experience, contact a qualified technician.
When to upgrade or replace components
Garage door tech evolves with materials and safety standards. When deciding whether to upgrade or replace components, consider:
- Age and condition: If springs, tracks, or the opener motor show significant wear or have surpassed their expected life, replacement may be more cost-effective than frequent repairs.
- Efficiency and reliability: An older system may consume more energy or require more maintenance. Replacing with newer, energy-efficient components can improve performance and reduce downtime.
- Noise and safety features: If your door is noisy or lacks modern safety features like auto-reverse sensors, an upgrade can improve daily usability and safety.
- Budget and disruption: A full replacement is more disruptive and expensive than targeted repairs. Weigh short-term costs against long-term benefits.
If you’re unsure, consult a technician who can assess whether a planned upgrade or a simple repair best fits your home and budget. A well-chosen upgrade can dramatically improve reliability and safety for years to come.
AUTHORITY SOURCES
- OSHA safety guidelines for powered industrial equipment and household devices: https://www.osha.gov
- U.S. Consumer Product Safety Commission guidance on garage door safety and child safety standards: https://www.cpsc.gov
- Popular Mechanics garage door repair overview and security considerations: https://www.popularmechanics.com
These sources provide safety-oriented context and best practices that align with the practical approach outlined here.
Tools & Materials
- Safety goggles(ANSI Z87.1 rated)
- Work gloves(Non-slip, cut-resistant)
- Flashlight or headlamp(Bright, focused light)
- Voltage tester(Check opener wiring safely)
- Adjustable wrench(For track bolts and hardware)
- Screwdrivers (Phillips and flathead)(Electronics and hinges)
- Lubricant (silicone-based)(Apply sparingly on rollers and hinges)
- Towels or rags(Clean as you go)
Steps
Estimated time: 60-90 minutes
- 1
Isolate power and verify no movement
Disengage the opener by pulling the emergency release, then disconnect the power to the unit. Confirm with a manual test that the door cannot move. This prevents electric shock and accidental movement during inspection.
Tip: Always wear safety goggles when testing. - 2
Manual balance check
With the opener disengaged, lift the door to about halfway and hold. A balanced door should stay in place; if it sags or rises, the springs or cables may be fatigued and require professional service.
Tip: Have a helper nearby in case the door shifts. - 3
Sensor and safety test
Check that both photoelectric sensors face each other and the path is clear. Clean lenses and realign if the beam is blocked. Test by placing an object in the path to confirm auto-reverse behavior.
Tip: If the door doesn’t reverse, stop and reassess before re-energizing. - 4
Inspect tracks, rollers, and hardware
Look for dents, rust, or loose fasteners along tracks and hinges. Tighten loose screws and gently lubricate rollers and hinges. Ensure the door moves smoothly by hand along the tracks.
Tip: Use a sticky note to mark any moved parts for later reference. - 5
Lubricate and re-tune limits
Apply a silicone-based lubricant to moving parts, avoiding springs and cables. Re-check travel limits and force settings per the opener’s manual to prevent improper operation.
Tip: Wipe away excess lubricant to prevent dust buildup. - 6
Reconnect and test run
Reattach the opener, restore power, and perform a controlled test: close the door with the wall switch and test the remote. Confirm the auto-reverse feature triggers correctly after adjustments.
Tip: Stand clear of the door path during the test.
Got Questions?
What is garage door tech and why is it important for homeowners?
Garage door tech refers to the components, sensors, and control systems that operate a garage door opener. Understanding the basics helps homeowners diagnose simple issues, maintain safety, and extend the life of their system.
Garage door tech covers the moving parts and sensors that open and close your door. Knowing the basics helps you spot simple problems and keep your system safe.
Can I fix a misaligned sensor or off-track door myself?
Sensor alignment and basic track cleaning are doable for many homeowners. Do not attempt spring or cable work unless you’re trained. If the door remains stubborn after alignment, contact a pro.
Yes, you can usually fix sensors and tracks, but springs and cables are dangerous and should be handled only by a professional.
How do I know when to call a professional?
Call a pro if springs, cables, or structural components show wear, if the door won’t balance, or if the opener has unusual noises. A professional can safely replace high-energy parts.
If you notice worn springs, frayed cables, or persistent misbalance, it's time to bring in a pro.
Is lubrication necessary for every garage door?
Lubrication is recommended for moving metal parts a few times a year and after cleaning, but avoid spraying springs and drums. Use silicone-based lubricant in thin coats.
Lubricate moving parts lightly a few times a year, but skip the springs and drums.
What safety precautions should I follow during DIY checks?
Disconnect power, wear eye protection, and never place yourself under a door while testing. Keep children away and work in a well-lit area. If unsure, pause and seek guidance.
Always unplug the opener, wear eye protection, and keep kids away while you work.
Watch Video
Quick Summary
- Master basic diagnostics you can safely perform
- Prioritize safety at all times
- Lubrication and alignment matter for quiet operation
- Know when to call a pro