Garage Door Yeppoon: Step-by-Step Troubleshooting and Repairs
Learn how to diagnose, repair, and install garage doors in Yeppoon with a step-by-step guide from GarageDoorAdjust. Safe, practical guidance for homeowners facing common issues.

You can diagnose and fix common garage door problems in Yeppoon by following this step-by-step guide. It covers safety checks, basic maintenance, track alignment, and opener troubleshooting. Use the right tools, know your limits with springs, and when in doubt, call a licensed technician. This plan helps homeowners save time and avoid damage.
Why Yeppoon Garage Doors Matter
Living in Yeppoon means dealing with coastal humidity, salt air, and occasional tropical weather. These conditions can accelerate wear on garage doors and openers, making timely maintenance essential. The phrase garage door yeppoon captures homeowners seeking practical, local guidance. According to GarageDoorAdjust, understanding climate-specific wear helps you prioritize lubrication, weather sealing, and quick visual checks. The GarageDoorAdjust team found that many local repairs are avoidable with a simple, repeatable routine. This section lays the groundwork for a proven, safe approach to diagnosing issues that arise in Yeppoon’s coastal environment, from tracks that sag after a wet season to gear-driven openers affected by humidity. You’ll learn a methodical path that protects your home and minimizes downtime, with local context woven in every step.
Assessing Your System: Basic Diagnosis
Before you touch anything, make safety a habit. Start by unplugging the opener from its power source and securing the door with a wedge if you need to work near the track or springs. Listen for unusual noises—grinding, squeaks, or rattling can indicate worn rollers, misaligned tracks, or loose hardware. Look for obvious signs of damage such as cracked panels, bent brackets, or rust on metal components. Now inspect the door’s balance by disconnecting the opener and lifting the door halfway. It should stay put; if it drifts or is difficult to lift, there’s an imbalance that often points to worn springs or misadjusted hardware. If you notice repeated reversals from the safety sensors, check for misaligned eyes or a dirty sensor lens. This foundational diagnosis helps you decide whether a quick DIY fix is enough or a professional is warranted. As you proceed, keep in mind that gradual wear is common, and catching it early saves time and money. The guidance here reflects practical experience from the GarageDoorAdjust Team.
Tools and Safety Essentials
Gather a focused set of tools before you begin. Essential items include safety glasses to protect your eyes from debris, work gloves for grip and protection, a sturdy ladder or stable steps for reaching high components, and a set of screwdrivers (flathead and Phillips) for brackets and panels. An adjustable wrench, pliers, and a clean rag with a mild solvent are also valuable for inspecting and cleaning parts. Have a silicone-based lubricant or lithium grease ready for tracks and hinges, plus a tape measure to verify track alignment and door height. If you expect to replace components, keep spare rollers or weather stripping on hand, but only as needed. By assembling these tools upfront, you reduce interruptions and maintain safety while working on a live door.
Step-By-Step Troubleshooting: Part 1
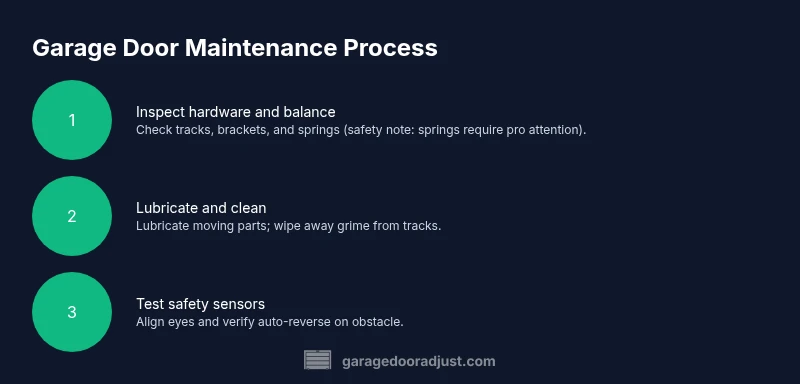
- Safety first: unplug the opener and secure the door to prevent accidental movement. 2) Visually inspect panels, hinges, and brackets for cracks or looseness; tighten screws or replace damaged parts as needed. 3) Check the tracks for dents, debris, or misalignment; remove obstructions and gently coax the track back to true with a rubber mallet if needed. 4) Manually lift the door halfway to test balance; if it does not stay in place, the springs or balance system likely needs professional attention. Pro tip: work in small sections and keep a running note of every part you inspect. Why: balanced doors are safer, quieter, and less prone to future issues.
Step-By-Step Troubleshooting: Part 2
- Lubricate moving parts: apply a thin layer of silicone-based lubricant to rollers, hinges, and the track interior to reduce friction. 6) Inspect and clean safety sensors; align the photo-eye sensors and wipe lenses to ensure proper operation. 7) Reconnect the opener and test the up-down motion, auto-reverse, and soft-close or open-limit settings. 8) Check weatherstripping at the bottom edge and sides; replace if cracked or compressed to improve energy efficiency and keep out pests and dust. Pro tip: document your test results so you can spot trends over time. Why: maintenance reduces wear and preserves system life.
Maintenance and Prevention
Monthly quick checks help keep a Yeppoon home running smoothly: inspect hardware for looseness, verify the door tracks are free of debris, and wipe down metal surfaces to prevent corrosion from humidity. Schedule a more thorough maintenance session every 3–6 months, including lubrication of tracks and rollers and replacement of weatherstripping if needed. Invest in a basic door balance test quarterly and confirm sensor alignment after any heavy wind or storm event. Weather and salt air can accelerate wear, so local adjustments to the lubrication schedule are prudent. The goal is predictable operation, minimized downtime, and a longer life for both door and opener.
When to Call a Pro
If you notice persistent imbalance, loud grinding, broken torsion springs, frayed cables, or persistent failure of the opener to reverse on contact with an obstacle, stop immediately and call a licensed technician. Springs operate under high tension and can cause serious injury. Even if you feel confident with basic fixes, a professional assessment ensures safety and compliance with local codes. For routine maintenance and non-spring repairs, a homeowner can often manage the work with care. The GarageDoorAdjust team emphasizes safety above all, and recommends professional service when springs, cables, or structural components are involved.
Installation Tips for Yeppoon Climate
If you’re installing a new door or opener, choose products that are rated for coastal humidity and salt exposure. Look for garage doors with corrosion-resistant hardware and sealed weatherstripping. Proper insulation matters in Yeppoon’s warm climate, so consider insulated panels to improve energy efficiency. When wiring a new opener, plan for a grounded outlet in a dry location and keep the control button away from moisture. During installation, ensure tracks are perfectly vertical and plumb to prevent early wear. Finally, follow the manufacturer’s torque specifications and safety warnings to avoid over-tensioning components.
Troubleshooting Modern Openers: Common Models
Newer openers feature smart features and safety sensors that can complicate troubleshooting. If your opener hesitates, check the remote batteries and re-pair the remote if required. For belt-driven models, listen for unusual belt noise and inspect pulleys and sprockets for wear. If your unit supports periodic software updates, ensure the firmware is current to fix known bugs. Always perform a full test after any adjustment to verify up/down movement, obstacle sensing, and safety reversal.
Authority sources
This guide references standard safety and maintenance practices from recognized authorities. For best practices, consult: Safe Work Australia (https://www.safeworkaustralia.gov.au), OSHA (https://www.osha.gov), and NIST (https://www.nist.gov) for general safety and equipment handling guidance. These sources provide foundational safety principles applicable to home maintenance and tool use, including garage door work.
Tools & Materials
- Safety glasses(Protect eyes from debris and rust particles)
- Work gloves(Improve grip and protect hands)
- Ladder or stable steps(Safe access to high components)
- Screwdrivers (Flathead & Phillips)(For brackets and panel screws)
- Adjustable wrench(Loosen/tighten bolts on hinges and brackets)
- Pliers and needle-nose pliers(Grip cables and detach small hardware)
- Lubricant (silicone-based or lithium grease)(Lubricate tracks, rollers, hinges)
- Rags and cleaning solution(Clean tracks before lubrication)
- Replacement parts (as needed): rollers, weatherstripping(Only if worn or damaged)
Steps
Estimated time: 60-90 minutes
- 1
Safety: disconnect power and secure the door
Unplug the opener and place a wedge under the door if you need to work near the tracks. This prevents accidental movement and reduces injury risk. Verify the area is clear of pets and children before proceeding.
Tip: Label the outlet or switch so you won’t reconnect the power during intermediate tests. - 2
Inspect panels and hardware
Visually examine door panels, hinges, and brackets for cracks, bending, or loose screws. Tighten fasteners where needed and replace damaged components to restore structural integrity. Note any unusual looseness or wobble in the door assembly.
Tip: Use a flashlight to catch hidden cracks; do not force bent components back into place. - 3
Check tracks and alignment
Look for dents, rust, or debris in vertical tracks. Gently coax misaligned sections back to true with a rubber mallet and wipe away debris. Ensure tracks are parallel and securely fastened to the wall.
Tip: Avoid bending tracks; minor realignments are safer and more effective when done gradually. - 4
Test door balance without the opener
With the door disconnected from the opener, lift it halfway and release to test balance. It should stay put; if it rises or falls, the balance system or springs may need professional adjustment. Do not attempt to modify springs unless you are trained.
Tip: If the door moves, proceed with professional inspection to avoid injury. - 5
Lubricate moving parts
Apply a light layer of silicone-based lubricant to the rollers, hinges, and the interior of the tracks. Wipe away excess to prevent dust accumulation. Lubrication reduces friction and extends life.
Tip: Lubricate only moving parts; avoid getting lubricant on belts or electronics. - 6
Check safety sensors
Inspect the photo-eye sensors for alignment and cleanliness; wipe lenses and adjust to ensure the beam is unobstructed. A misaligned sensor can cause false reversals. Recalibrate if needed following the manufacturer’s instructions.
Tip: Test sensor function with an obstacle in the path to ensure safe reversal. - 7
Test the opener operation
Reconnect power and run the door through a full cycle. Observe smooth ascent and descent, check for unusual sounds, and ensure the door reverses on contact with an obstacle. If issues persist, document symptoms and plan a targeted fix.
Tip: Keep hands clear of the moving door during tests. - 8
Address weather sealing
Inspect bottom seals and weatherstripping; replace if worn to reduce drafts and moisture intrusion. Tighten or adjust weather seals to maintain door performance in Yeppoon’s humidity.
Tip: After replacement, test door movement to ensure seals don’t bind while opening/closing. - 9
Plan maintenance and replacement
Create a simple maintenance schedule, noting when tests were performed and parts replaced. For components under tension, such as springs or cables, schedule professional checkups yearly or after major weather events.
Tip: Keep a log you can review during future repairs to spot wear trends early.
Got Questions?
Can I fix my garage door myself?
Yes for basic maintenance and non-spring tasks. DIY work is fine if you stay within safe limits and follow manufacturer instructions. For anything involving springs, cables, or structural parts, hire a licensed professional.
You can handle simple maintenance yourself, but avoid springs and cables. If in doubt, call a pro.
What are signs I need a professional?
Persistent imbalance, grinding noises, slipping or jerky movement, frayed cables, or springs under tension require professional assessment. These symptoms can indicate dangerous conditions or failed components.
If the door shows imbalance, loud grinding, or spring tension signs, call a professional.
How often should I lubricate the tracks?
Lubricate moving parts every 3–6 months, or after a stormy season in Yeppoon. Focus on rollers, hinges, and the interior of the tracks. Wipe away excess to prevent dust buildup.
Lube every 3–6 months and after heavy weather; keep it light and away from the electronics.
Is it safe to adjust torsion springs myself?
No. Torsion springs are under high tension and require specialized tools and training. Incorrect adjustments can cause serious injury.
Spring work is dangerous. Don’t attempt it yourself.
What should I do after a severe weather event?
Inspect for misalignment, check hardware for loosening, and test safety sensors. If you notice damage, contact a pro for a thorough inspection.
After storms, check alignment and sensors, and call a pro if you see damage.
Can I replace my opener myself?
You can install a basic, non-smart opener if you follow the manual; ensure proper wiring and code resets. If you’re unsure, hire a pro to handle electrical connections safely.
New openers can be installed by a handy homeowner, but if you’re unsure about wiring, get a pro.
Watch Video
Quick Summary
- Diagnose safety first and unplug power before work
- Balance and tracks are critical to door life
- Lubrication and cleaning prevent wear and noise
- Sensor alignment ensures safe operation
- Know when to call a pro for springs or structural issues