Garage Door Yellow Light Blinking: Quick Troubleshooting Guide
Urgent, practical guide to diagnose and fix a garage door yellow light blinking fault. Learn safe checks, a clear diagnostic flow, and when to call a pro for repairs.

On most garage doors, a blinking yellow light indicates a fault code tied to safety sensors, door balance, or the opener itself. The quickest fix is to power-cycle the opener, then inspect the safety photo-eye for misalignment or obstruction and clear any debris. If the light keeps blinking, follow the diagnostic flow below for step-by-step troubleshooting and when to call a pro.
What the yellow light blinking means on your garage door
A blinking yellow light on a garage door opener is a fault indicator, not a simple status light. It typically points to a sensor, balance, or electronics issue that prevents the door from operating safely. According to GarageDoorAdjust, the flashing pattern helps homeowners narrow down the category of problem—from safety sensors to balance concerns. Start by noting the exact blink pattern (single blink, rapid bursts, or a long blink) as different codes map to different faults. This early clue guides you toward the right checks without wasting time on irrelevant fixes. Safety should always come first, especially when you’re near a moving door or a heavy spring system. If you feel uncertain at any point, stop and seek professional help.
Safety first: quick checks before you touch the hardware
Safety is non-negotiable when dealing with garage doors. Begin by unplugging the opener or switching off the outlet if you have a wall switch, then verify the area around the door is clear. Remove any items that could interfere with the tracks, torsion spring area, or photo-eye beam path. Do not attempt to manually force a bound door. If the door moves with unusual weight, or you hear grinding, stop and contact a pro. This is the moment where a calm, methodical approach pays off and reduces the risk of injury or damage.
Diagnostic flow overview: symptom → cause → fix
This section maps how symptoms translate to likely causes and actionable fixes. Start with the most common, easiest checks and progress to more involved steps only if needed. The goal is to resolve the blinking light without risking your safety or the door system. Use this flow to decide whether you should attempt a DIY fix or schedule a professional inspection. Remember, if any part of the system feels compromised, don’t proceed with higher-risk maneuvers.
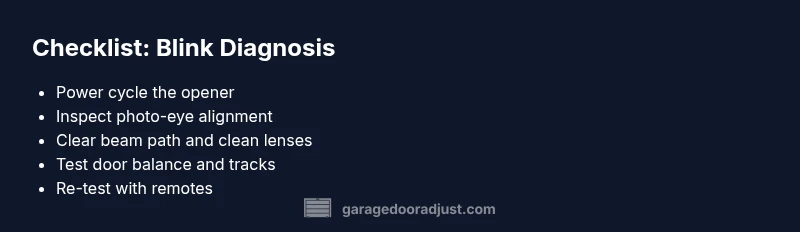
Step-by-step fixes for the most common cause: sensor misalignment or obstruction
- Power cycle the opener: unplug for 60 seconds, plug back in, and test the remote control. 2) Check the photo-eye lenses on each side of the door track; clean them with a soft cloth and look for misalignment. 3) Realign the photo-eye mounting brackets until both LEDs glow steady. 4) Clear any dust, spider webs, or debris from the beam path. 5) Re-test door operation from both wall control and remote across several cycles. 6) If still blinking, re-check wiring connections at the opener terminal block. 7) If you’re comfortable, re-position the sensors to restore a clear line of sight across the door opening. Pro tip: never bypass sensors; they are crucial for safety and compliance.
How to safely reset and re-test after each fix
After any adjustment, reset the opener to ensure new settings take effect. Power off for at least 30 seconds, then restore power and re-pair remotes. Test the door at multiple heights to confirm the safety sensor path is clear. If the light returns after a reset, you’ve likely got a wiring issue or a sensor fault that requires professional attention.
Prevention: maintenance habits to reduce future blinking incidents
Regular cleaning of the sensor lenses, keeping the beam path unobstructed, and inspecting tracks for debris can prevent many light-blinking issues. Lubricate moving parts as recommended by the manufacturer, and check mounting brackets for looseness every few months. Keep the area around the opener clean and free of clutter. Early maintenance reduces the chance of sudden blinks and unexpected door stops, saving you time and stress.
When to call a professional and what to expect during service
If the blinking persists after following the diagnostic flow, or if you notice binding, unusual noises, or visible damage to springs or tracks, it’s time to call a pro. A licensed technician will test sensor continuity, verify track alignment, assess door balance, and check the opener’s logic board. The GarageDoorAdjust team recommends scheduling a professional inspection when the fault involves springs, cables, or the door balance, as DIY fixes can be dangerous in those areas.
Steps
Estimated time: 25-60 minutes
- 1
Power cycle the opener
Unplug the opener or switch off the circuit breaker for 60 seconds, then plug back in and test the remote and wall control to see if the light behavior changes.
Tip: A full power reset often clears minor electronics glitches. - 2
Inspect safety sensors
Look for physical obstructions and ensure both sensors face each other directly. Clean any dirt or spider webs from the lenses.
Tip: Even small smudges can disrupt sensor operation. - 3
Realign photo-eye brackets
Loosen the mounting screws, adjust until the beams align, and re-tighten. Verify the LED indicators stay steady.
Tip: Small misalignments cause repeated fault codes. - 4
Check for track obstructions
Inspect tracks for dents, leaves, or debris. Remove obstructions and lubricate rollers and hinges as recommended by the manufacturer.
Tip: Keep tracks clean to prevent sticking and misreads. - 5
Test with multiple remotes
After adjustments, test from different remotes and the wall control. Observe the blink pattern during each test.
Tip: If one remote works and another doesn’t, re-pair the remote. - 6
Inspect wiring and limit switches
Check the opener’s terminal block for loose wires and confirm the limit switches are set correctly for open/close positions.
Tip: Loose wiring can cause intermittent fault signaling. - 7
Evaluate final operation
Operate the door manually to ensure it moves smoothly, then re-test automatically using the opener.
Tip: Do not leave a door that binds or sticks unattended.
Diagnosis: Yellow light blinking on garage door opener
Possible Causes
- highBlocked or misaligned safety photo-eye sensors
- mediumSensor misalignment or dirty lenses
- mediumDoor balance issues or track binding
- lowOpen/close limit switch fault or wiring issue
Fixes
- easyClear the photo-eye path, clean both lenses, and ensure unobstructed line of sight between sensors
- easyRealign the safety sensors using the adjustment screws until both LEDs glow steady
- mediumInspect door balance and tracks for obstructions, lubricate rollers, and tighten loose hardware
- easyPower cycle the opener, check wiring at the terminal block, and reset the system if needed
Got Questions?
What does a blinking yellow light mean on a garage door opener?
A blinking yellow light usually signals a fault with safety sensors, door balance, or the opener’s electronics. Identifying the blink pattern helps target the right fix.
A blinking yellow light typically means there’s a fault in the safety sensors, door balance, or the opener electronics.
Should I unplug the opener when the light blinks?
Power cycling is a common first step: unplug for about 60 seconds, then plug back in and test. This can reset minor faults.
Yes—try unplugging for about a minute, then plug back in and test.
What if sensors look clean but the light still blinks?
Re-check wiring and alignment. If it persists, test with a second remote and consider a professional inspection for wiring or PCB issues.
If it still blinks after cleaning, check wiring or call a pro for a deeper inspection.
Can I repair a balance issue myself?
Balance issues can involve springs and tracks; these can be dangerous. If you suspect a spring problem, contact a professional immediately.
Balance problems with springs are dangerous—best left to a professional.
When is it safe to retest after a fix?
Retest after each fix by operating the door from the wall control and a remote at multiple distances to confirm consistent operation.
Test the door after each fix from both the wall and the remote.
Do blinking lights always mean I need a new opener?
Not always. Many blinking-light issues are maintenance or alignment problems that can be resolved without replacement.
Usually not—fixes and maintenance can often resolve blinking lights.
Watch Video
Quick Summary
- Identify fault type using the blink pattern.
- Prioritize sensor alignment before tackling balance issues.
- Always power-cycle before complex testing.
- Call a professional for springs, cables, or persistent faults.