Garage Door Weather Stripping Lowes: Step-by-Step Guide
Master the install of garage door weather stripping lowes options with a 1800-word, practical how-to. Learn measurement, material choices, and safe installation to seal drafts and save energy.

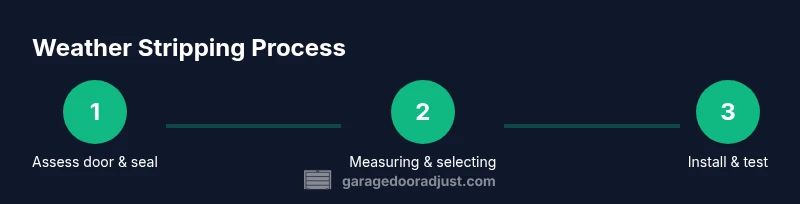
Goal: you will select the right garage door weather stripping, measure gaps accurately, and install a seal that minimizes drafts for a warmer, more energy-efficient garage. This guide references Lowes options and practical best practices, plus a clear, step-by-step installation approach, measurement tips, and maintenance advice to ensure a long-lasting seal.
Why Weather Stripping Matters for Your Garage Door
A properly sealed garage door prevents drafts, moisture intrusion, pests, dust, and noise from entering your space. When the seal is worn or ill-fitting, your HVAC system works harder to maintain temperature, increasing energy usage and comfort issues. Garage door weather stripping lowes is a common search phrase for homeowners who want practical, store-bought options that fit standard doors. The best results come from selecting a profile that matches your door type (metal, wood, or composite), climate, and traffic. In this section we outline the core benefits of sealing a garage door and why a durable seal matters year-round.
Types of Garage Door Weatherstripping
Weather stripping for garage doors comes in several profiles and materials. Vinyl bulb seals provide a rounded, compressible edge ideal for metal doors and high-traffic doors. Fin or fin-and-bulb combinations offer extra contact pressure in draft-prone areas. V-seals and T-seals fit into door jamb channels to seal edge gaps and reduce wind intrusion. Foam tapes are inexpensive and easy to install in low-load situations but wear faster in hot sun. When considering garage door weather stripping lowes options, account for door thickness, whether the door seals at the sides, and if a bottom seal is needed. For exterior doors, polyurethane and PVC blends often resist moisture better than simple rubber. Select a profile that creates a continuous barrier without impeding the door’s travel.
Measuring Gaps and Sizing the Seal Profiles
Precise measurement is the foundation of a successful seal. Start by lowering the door to measure the bottom gap at the head, middle, and corners. Measure side gaps at the jambs from the door edge to the frame. Note any irregularities such as warped tracks or door sag, since these can affect seal fit. Record both height and width, and bring these measurements when shopping for weather stripping lowes options. Most seals come in standard lengths; you will trim to fit. Remember to account for hardware and weather-related compression—seals compress about 1/4 to 1/2 inch in typical installations, so plan accordingly for a snug, not overly tight, fit.
Matching Climate and Door Type to Seal Material
Climate drives seal performance. In cold climates, a denser, more compressive bulb seal reduces cold drafts and protects against snow infiltration. In hot or humid environments, moisture-resistant vinyl or PVC-based seals perform better and last longer. Wood doors may expand and contract seasonally, so a forgiving profile (slightly more flexible) can prevent binding. Lowes weather-stripping options offer a range of profiles designed for common door types; ensure the chosen seal is compatible with your door material and the door’s operating speed. The goal is a seal that remains flexible with weather changes and resists UV degradation.
Preparing the Door: Cleaning and Removing Old Seal
Before installing a new seal, remove the old weather stripping. Use a utility knife or scraper to detach the old material from the bottom track and jambs, taking care not to gouge the surface. Remove any nails, staples, or adhesive remnants with pliers and a gentle solvent such as isopropyl alcohol. Once removed, wipe down the channel with a clean rag to remove dust, dirt, and grease. A clean, dry surface ensures the new seal adheres and seats properly, reducing future detachment. Let the channel dry completely before proceeding.
Cutting and Fitting the New Weather Stripping
Unroll the new weather stripping and lay it flat to acclimate to room temperature. Measure each door section again and cut the strip to length with a sharp knife or scissors, leaving a small extra at corners that you can trim later. For bottom seals, ensure the lip faces outward toward the ground to create a barrier against water and dust. If using a profile that requires adhesive, apply a continuous bead along the adhesive surface and press firmly into the channel. For stapled or clip-on variants, align edges carefully to avoid gaps. Always test a dry fit before final adhesion.
Installing the Seal Along Bottom Edge and Sides
Follow the profile’s installation method: bottom seals are often stapled or hooked into the bottom track, while side seals snap into jamb channels. Start at a corner and work toward the center, pressing the seal into place to avoid air gaps. For vinyl bulbs, keep the bulb aligned with the door edge so it compresses evenly when the door closes. If your door has weather seal channels, slide the strip into place rather than forcing it. Check that the seal remains flush with the frame without creating new resistance for the door to travel.
Testing, Adjusting, and Ensuring a Tight Seal
With the seal installed, slowly operate the garage door a few times to observe how it travels. Look for light leakage at the edges when the door is closed; if you see gaps, readjust the ends or trim a bit more. Confirm there’s no drag when opening or closing, and ensure the door does not ride on the seal. If the bottom seal prevents full closure, trim the bottom lip slightly and recheck. Periodic checks post-install help catch settling or sagging before it becomes a problem.
Maintenance, Inspection, and Longevity
To extend the life of your weather stripping, clean the seals every season with a mild soap solution and a soft brush. Inspect for cracks, hardening, or shrinking; replace damaged sections promptly. Keep the tracks clean to prevent debris buildup that can misalign the seal. If you notice persistent drafts after replacement, consider upgrading to a higher-grade seal or adding weatherstripping at the jambs for a tighter fit. Regular maintenance preserves energy savings and door performance.
Common Mistakes and Quick Fixes
Common mistakes include using the wrong seal profile for your door, trimming too aggressively, and forcing a stiff seal into a channel. Over-compressing seals can create binding and wear out the material quickly. If you see light gaps after installation, re-check alignment, reseat the seal, and trim small amounts as needed. For high-traffic doors, choose a tougher material with better wear resistance. Always allow time for adhesives to cure if used, and avoid UV-exposed sealing materials that degrade over seasons.
Tools & Materials
- Measuring tape(preferably metal for accuracy)
- Utility knife or scissors(sharp blade for clean cuts)
- Screwdriver or stapler (if required by seal)(depends on seal type)
- Pliers(remove nails or staples)
- Isopropyl alcohol or degreaser(clean channel surfaces)
- Rags or paper towels(dry surfaces after cleaning)
- Utility screws or adhesive (depending on seal)(adhesive-backed seals may not need screws)
- Replacement weather stripping (bulb, V, or foam profile)(select based on door type and climate)
Steps
Estimated time: 1-2 hours
- 1
Measure the door height and identify the seal profile
Lower the door and measure the bottom gap, then measure the side gaps along the jambs. Compare these measurements to standard seal profiles to select the correct type. Accurate sizing reduces trimming later and ensures a proper seal.
Tip: Take multiple measurements at top, middle, and bottom to catch variations. - 2
Remove old weather stripping
Carefully detach old seal with a utility knife or pliers. Remove staples or nails without gouging the surface, then pull away the material to inspect the surface of the track and jambs.
Tip: Wear gloves to protect hands from sharp edges. - 3
Clean the surface and channels
Wipe all channels with isopropyl alcohol to remove dirt, grease, and debris. A clean surface ensures the new seal adheres properly and seats evenly in the track.
Tip: Let the surface dry completely before installing the new seal. - 4
Cut the new weather stripping to length
Unroll and lay the new strip flat. Mark lengths for each section and trim slightly longer to allow for compression. Avoid cutting at joints or corners that can create gaps.
Tip: Trim only small amounts at a time and test fit before final attachment. - 5
Attach bottom and side seals
Place the bottom seal into the door bottom track first, then run the side seals along the jambs. Ensure the lip faces outward toward the ground and the seals align with the frame without excessive bending.
Tip: Start at a corner to maintain alignment and avoid gaps. - 6
Secure and adjust the ends
Secure ends with screws, staples, or clips as required by the profile. Trim any excess length and ensure the ends meet flush without overlaps that could trap air.
Tip: Avoid over-tightening that could warp the seal. - 7
Test door operation and seal integrity
Close the door slowly and check for drafts or light coming through the edges. If light shows, reposition the seal or trim a little more. Reopen and recheck after any adjustment.
Tip: Do a few cycles to confirm consistent performance.
Got Questions?
What is the best weather stripping for a metal garage door?
For metal doors, a vinyl bulb or vinyl fin-seal offers good durability and compression. Choose a UV-resistant material with a flexible profile to handle temperature changes without cracking.
For metal doors, vinyl bulb or fin-seal works well because they compress yet stay durable. Look for UV resistance and flexible profile to cope with temperature changes.
Can I install weather stripping myself or should I hire a pro?
Many homeowners successfully install weather stripping themselves using common tools. However, if your door is misaligned, has warped tracks, or you notice persistent drafts after a DIY install, a professional may diagnose underlying issues.
Most DIYers can install weather stripping, but if the door is misaligned or drafts persist, consider a pro for a full diagnostic.
How long does weather stripping last in a garage environment?
Lifespan varies with material and climate but expect several years with proper maintenance. Inspect for cracks or hardening annually and replace worn sections to maintain performance.
Seal life depends on material and weather, but expect a few years with maintenance. Check annually for wear and replace as needed.
Will weather stripping affect door height or operation?
If the seal is too thick or misaligned, it can impede door travel or raise the door slightly. Always trim to fit and test operation after installation.
Too thick a seal can hinder movement. Trim to fit and test the door after installation.
Should I replace all seals at once or only damaged sections?
If multiple areas are worn or varied in age, replacing all at once ensures even behavior and consistent sealing. Otherwise, target damaged sections first.
If several seals are worn, replace all for even performance; otherwise fix only damaged parts.
Are there Lowes-specific products I should look for?
Look for a universal garage door weather-stripping kit that fits standard door sizes. Compare profiles (bulb, V, foam) and ensure compatibility with your door type and climate.
Check universal kits at Lowes and pick a profile that fits your door and climate.
Watch Video
Quick Summary
- Measure accurately before selecting a seal.
- Match climate, door type, and traffic to the profile.
- Trim precisely for a tight, gap-free fit.
- Test operation after installation and adjust as needed.
- Perform regular inspections to extend seal life.