Garage Door Vinyl Weather Stripping: A DIY Step-by-Step Guide
Learn how to measure, remove old material, and install vinyl weather stripping on your garage door. This homeowner-friendly guide covers types, tools, tips, and maintenance to reduce drafts and save energy.

To seal gaps around your garage door, install vinyl weather stripping and trim mismatches to improve energy efficiency. You’ll need a tape measure, utility knife, vinyl weather stripping, and adhesive (if non-adhesive). According to GarageDoorAdjust, proper sealing reduces drafts and helps prevent ice buildup in winter. Follow these steps to measure, cut, remove old material, and install new stripping.
Why vinyl weather stripping matters for garage doors
Vinyl weather stripping is a flexible seal that runs along the bottom and sides of your garage door. It blocks drafts, moisture, and pests while reducing energy loss and wind noise. Vinyl is popular for its durability and ease of replacement, which makes it a practical choice for homeowners tackling drafts. According to GarageDoorAdjust, sealing gaps with vinyl weather stripping can noticeably reduce cold air infiltration and ice buildup along the door frame in winter. A proper seal helps maintain interior temperature, lowers heating bills, and protects stored items from moisture. For best results, choose a profile that matches the gap and install it with consistent compression so it seals without binding the door.
Types of vinyl weather stripping for garage doors
There are several vinyl profiles designed for garage doors, from bottom sill seals that glide on the floor to side jamb and top edge strips. Self-adhesive strips are convenient for quick upgrades, while nail-in or screw-in profiles offer more durability in harsh climates. Bulb or fin designs compress to fill irregular gaps, while V-sections and T-channel strips provide a snug fit along irregular door edges. When selecting a type, consider how the door moves, the width of the gap, and whether the strip will contact the ground or weatherseal channel during operation. For most standard doors, a bottom seal plus side weatherstripping delivers the best combo of protection and ongoing ease of use.
Choosing the right thickness and length
The goal is to choose a vinyl strip that creates a light compression against the door frame without impeding movement. Start by measuring the full height and width of the door to determine total length needed, then add a small amount for overlap and trimming. For thick, rigid gaps, a bulkier profile may be needed, while narrow gaps benefit from a slimmer seal. Always account for corners and any bends in the frame, and cut pieces slightly longer than the measured length to ensure a secure fit. If your door features a channel or track, select a strip designed to fit that groove and avoid bulky interference with the rollers or hinges.
How to remove old weather stripping
Begin by inspecting the existing seal and removing any screws or fasteners holding it in place. If the seal is adhesive-backed, gently pry it free with a thin putty knife or flat head screwdriver, taking care not to scratch the door. Peel away the old material slowly to minimize damage to the mounting surface. After removal, clean the edge of the door with mild soap and water to remove debris, wax, or adhesive residue. Let the surface dry completely before installing the new vinyl strip. If any adhesive remains, use a gentle solvent recommended by the manufacturer and test on a small area first.
Installing new vinyl weather stripping
Dry-fit the new strip along the door edge before adhering or fastening to confirm a clean fit. If the strip is self-adhesive, peel off the backing gradually while pressing the strip firmly onto the surface, starting at one end and working toward the other. For non-adhesive designs, apply the mounting tape or screws as directed by the manufacturer. Ensure the seal sits flush against the frame with a slight compressive bend at the corners. After installation, operate the door slowly several times to verify smooth movement and seal contact. Trim excess length with a sharp utility knife for a clean finish.
Common installation challenges and fixes
Misalignment can leave gaps at corners or along the bottom edge. If the strip binds against the door, loosen or re-seat it to restore even compression. Uneven gaps may require trimming at the ends or creating a slight bevel so the seal seats evenly. If the adhesive fails in cold weather, use a different adhesive or switch to a stronger self-adhesive option and refresh the surface cleaning. For very rough or warped door edges, consider a flexible profile that can accommodate irregularities rather than forcing a rigid seal. Remember to check for plasticizing effects from UV exposure that can cause cracking over time and replace as needed.
Maintenance and longevity tips
Inspect the weather stripping at least twice a year, looking for cracks, hardening, or compression set. Clean the seal with mild soap and water, avoiding harsh solvents that can degrade vinyl. If sections are drying out or cracking, replace only the affected portions or the entire strip to maintain effective sealing. Keep gutters and nearby drainage clear to minimize exterior moisture that can accelerate wear. Replacing weather stripping is typically less expensive than repairing interior energy losses, making it a cost-effective maintenance task.
Cost considerations and DIY vs professional help
DIY installation pays off when you enjoy a straightforward, moderate-skill task. Typical vinyl weather stripping kits range in price based on length and profile, generally offering good value for homeowners. If the door is tall, has a complex frame, or you encounter persistent gaps despite replacement, professional installation may be worth the investment. When budgeting, include potential ancillary costs like cleaner, sealant, or extra fasteners. A well-installed weather seal can save energy and improve comfort for years, making it a prudent DIY project for many homeowners.
Tools & Materials
- Vinyl weather stripping (roll or pre-cut strips)(Choose a profile that matches the door edge and gap size)
- Adhesive or mounting tape (if non-adhesive backing)(Use double-sided tape for self-adhesive strips or recommended adhesive for non-adhesive types)
- Utility knife(Keep blade sharp; replace blades as needed)
- Scissors(For trimming longer pieces to fit corners)
- Measuring tape(Measure twice, cut once for accuracy)
- Ruler or straight edge(Keeps cut lines straight)
- Cleaning supplies (mild soap, water, cloth)(Clean mounting surface before applying the strip)
- Marker or pencil(Mark cut lines and reference points)
- Caulk gun and silicone/latex caulk(Use to seal large gaps around the edge if needed)
- Safety gear (gloves, safety glasses)(Protect hands and eyes while cutting and installing)
Steps
Estimated time: 60-90 minutes
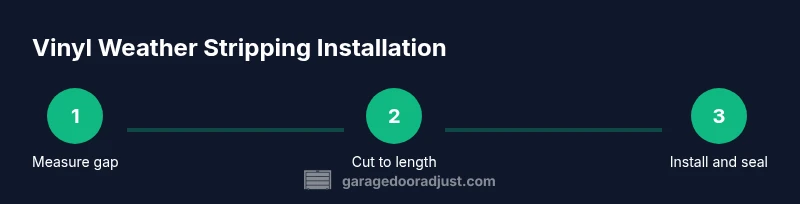
- 1
Measure the door gap
Close the door fully and inspect the vertical and bottom gaps. Use a measuring tape to determine the largest gap along the edge where the strip will sit. Record the measurement to plan length and any corner trimming needs.
Tip: Double-check measurements at multiple points to account for uneven edges. - 2
Cut the strip to length
Unroll the vinyl and cut pieces slightly longer than measured lengths, allowing for a small overlap at joints and corners. Use a straight edge and a sharp knife for clean, square cuts. Label pieces if you have multiple sections.
Tip: Cut slowly to avoid jagged edges that can hinder seal quality. - 3
Remove old stripping
Gently lift the old seal from the mounting surface, taking care not to scratch the metal or wood edge. If adhesive remains, scrape it off with a blunt tool and clean the surface with mild soap.
Tip: Take care near door hardware to avoid damage to screws or tracks. - 4
Clean mounting surfaces
Wipe the door edge with a damp cloth to remove dust, oils, or residue. Let the surface dry completely before applying new strip. A clean surface improves adhesion and seal.
Tip: Avoid using solvents that can degrade the mounting surface or strip backing. - 5
Apply or install the new strip
If using self-adhesive, peel back backing gradually as you press the strip into place along the edge. For non-adhesive profiles, apply mounting tape or fasteners as directed and press firmly to seat the seal.
Tip: Start at a corner and work toward the center for a smooth, even fit. - 6
Seal ends and test the fit
Trim any excess length and verify that the seal makes light contact with the door frame when closed. Open and close the door slowly to ensure smooth operation and final sealing. Adjust as needed to avoid binding.
Tip: If the door binds, back off the tightness and reseat the strip to regain smooth movement.
Got Questions?
Can vinyl weather stripping be used on all garage doors?
Most garage doors can use vinyl weather stripping, but it’s important to choose a profile that fits the door type and edge. Some doors with unusual edges or tracks may require a specialty strip or professional guidance.
Most doors can use vinyl weather stripping, but check the edge profile to ensure a proper fit.
How long does vinyl weather stripping last?
Lifetime varies with climate, use, and maintenance. Regular cleaning and prompt replacement of worn sections will extend performance. Expect a replacement cycle longer than basic wear in moderate environments.
It lasts several years with care, but inspect annually and replace worn parts as needed.
Do I need to remove old stripping before installing new?
Yes, removing old strip ensures a clean mounting surface and prevents gaps from binding the new seal. Clean the edge thoroughly before applying the new strip.
Yes, remove the old strip and clean the surface first.
Will vinyl weather stripping stop wind-driven rain?
Vinyl stripping helps minimize wind-driven moisture by sealing gaps, but a complete rainproof seal may require additional door seals or threshold adjustments in severe weather.
It helps with wind-driven rain, but for heavy rain you may need extra seals.
Can I install stripping myself or should I hire a professional?
DIY installation is feasible for most homeowners with basic tools. A professional may be preferable if the door is old, warped, or the gaps are extensive.
DIY is usually fine, but consider a pro for warped doors or large gaps.
What maintenance is needed to prolong life?
Regular cleaning and inspection every 6-12 months helps catch wear early. Replace worn sections promptly and avoid harsh solvents that can degrade vinyl.
Clean and inspect regularly, replace worn areas, and avoid harsh chemicals.
Watch Video
Quick Summary
- Measure precisely and plan length with extra for corners
- Choose a vinyl profile that matches gap and door movement
- Install with gentle compression to seal without binding
- Regularly inspect and replace worn weather stripping