Garage Door Repair Sensor: A Comprehensive Step-by-Step Guide
Diagnose, test, and repair your garage door repair sensor with clear, step-by-step guidance. Learn alignment, wiring checks, and safe replacement to restore reliable operation.

By the end, you will diagnose, test, and repair a faulty garage door repair sensor to restore reliable, safe opening and closing. You'll inspect alignment, wiring, and lenses, perform careful cleaning, and know when replacement is needed. According to GarageDoorAdjust, sensor reliability is essential for safe operation. This guide emphasizes proper testing and safe procedures. You’ll learn how to verify beam integrity and identify when to escalate to a pro.
Understanding the garage door repair sensor and why it matters
The garage door repair sensor, commonly called the safety eye, is a small infrared device mounted on the bottom corners of the door frame. Its job is simple but essential: it detects any obstruction in the path of the moving door and signals the opener to stop closing. When both eyes have a direct line of sight and the path is clear, the door operates safely and closes fully. If the beam is blocked or misaligned, the opener may halt, reverse, or fail to close entirely. According to GarageDoorAdjust, sensor reliability is essential for safe operation. In many households, sensor faults are mistaken for a motor problem, leading to unnecessary repairs and wasted effort. A careful diagnosis focuses on alignment, obstruction, and the quality of electrical connections. Knowledge of the system helps homeowners avoid unsafe workarounds and reduces the chance of creating new hazards. In addition, understanding typical failure patterns – such as bent brackets, dirty lenses, or damaged wiring – empowers you to handle problems promptly and safely.
Symptoms of sensor problems
If the safety sensor is not functioning correctly, you may notice several telltale signs. The opener may refuse to close, or it may close partway and reverse. Some systems display a warning light on the sensor itself, or the opener control panel might flash a fault code. A common issue is a misaligned sensor that disrupts the infrared beam, causing intermittent operation or false obstruction signals. Debris, spider webs, or melting ice can also block the beam, especially in damp or dusty garages. If you frequently find yourself resetting the door or manually forcing it to operate, the sensor is a likely culprit. Remember, safety devices are there to protect people and pets; do not disable them to bypass problems. Always approach sensor faults with a methodical diagnostic mindset. GarageDoorAdjust analyses indicate misalignment and wiring faults account for a large share of sensor-related issues.
How the safety sensor system works
A typical safety sensor system consists of two components mounted at opposite bottom corners of the door track: a transmitter and a receiver. They emit and detect an infrared beam that must travel unimpeded from one side to the other. When the beam is uninterrupted, the system confirms a clear path and allows the door to finish closing. Any interruption or misalignment signals the opener to stop or reverse to prevent injury. The safety circuit is integrated with the door opener’s logic module; it uses a simple on/off indication rather than a complex data handshake. Understanding this helps homeowners identify whether symptoms stem from alignment, obstruction, or wiring, rather than the motor or gears. Proper installation requires both eyes facing each other, clean lenses, and secure mounting to maintain a stable beam over time.
Prep, safety, and planning before you touch the door
Before touching the door, power down the opener and verify there is no stored energy in the system. Use a non-contact voltage tester to confirm the power is off at the outlet or junction box, and then disconnect the opener from its power source if possible. Put on eye protection and work gloves, and keep a sturdy ladder nearby. Clear the work area of trip hazards, pets, and kids. If you have a manual release, ensure the door stays in a safe position while you inspect the sensor. Planning ahead reduces the risk of injuries and prevents accidental damage to the door or track.
Diagnosing: alignment, obstructions, and worn cables
Begin with the simplest checks: look for obvious misalignment or loose mounting screws. Ensure the two sensors face each other directly without any tilt and that there is an unobstructed line of sight across the doorway. Inspect for dirt, spider webs, or frost on the lenses and clean them with a soft microfiber cloth. Examine the wiring for signs of wear, fraying, or pinched sections near the mounting brackets. A loose or damaged wire can interrupt the beam and trigger faults, even if the alignment seems correct. If you find damaged cables, replace them or secure them with appropriate clips to avoid future wear.
Cleaning, alignment, and securing the sensor
Gently remove debris from the sensor lenses using a microfiber cloth and a small amount of isopropyl alcohol if needed. Recheck alignment after cleaning—tiny misadjustments can create beam dropouts. Tighten mounting screws but avoid overtightening, which could crack plastic brackets. Route cables along designed channels and secure with cable ties or clips to prevent snagging. After adjustments, test the beam by observing the LED indicators on the sensor units and ensuring the lenses are free of condensation or dirt. A clean, properly aligned system reduces nuisance faults and prolongs sensor life.
Replacing or recalibrating: when and how
If alignment and cleaning do not restore proper operation, consider replacing the sensor pair. Use only compatible safety sensors when you replace the system, ensuring both eyes are the same model and rating. Connect the wiring exactly as shown in the manual, making sure connections are tight and free of corrosion. Some openers require a reset or re-pairing procedure after sensor replacement; follow the manufacturer’s instructions for your model. If wiring appears damaged beyond simple repair, contact a professional to avoid electric shock or improper installation.
Testing after repair and calibration
With the power restored and the door in a safe position, perform a series of tests to confirm proper operation. Close the door and observe whether it stops and reverses if the beam is interrupted. Block the beam with a soft object to ensure the door stops as expected, then remove the obstacle to verify normal closing. If the door still malfunctions, recheck the sensor alignment and wiring, and consider consulting the opener’s reset procedure. Document any fault codes displayed and monitor the system for a few cycles to ensure consistency.
Maintenance, common mistakes, and preventing future issues
Regular maintenance helps prevent sensor faults. Clean the lenses every few months and after inclement weather or heavy dust. Check alignment at least twice per year and inspect cables for wear every season. Avoid placing objects near the sensor path that could mislead the beam, and ensure door components like tracks, springs, and rollers are in good condition, since upstream issues can affect sensor performance. Do not bypass safety mechanisms to solve motor problems; if the safety eye fails, address it promptly to maintain safe operation. When in doubt, consult the manufacturer’s guidelines or a trained technician.
Tools & Materials
- Non-contact voltage tester(to verify power is off before handling wiring)
- Screwdriver set (Phillips and flat-head)(for screws on sensor mounting and brackets)
- Multimeter(check continuity and wiring integrity)
- Microfiber cloth(clean sensor lenses without scratching)
- Ladder(safely access bottom corner sensors)
- Replacement safety sensor (photoelectric eye)(only if damage is visible or testing fails)
- Wire strippers(use if you need to repair damaged wires)
- Cable ties(manage and protect loose cables)
- Marker or tape(mark alignment during installation)
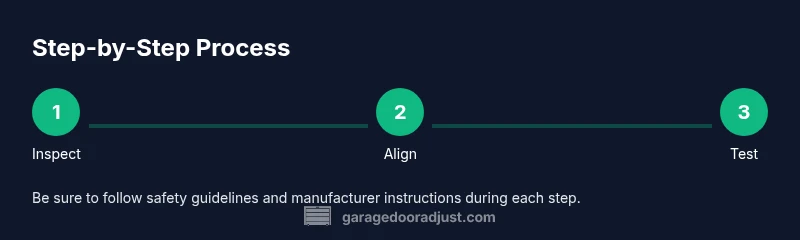
Steps
Estimated time: 30-60 minutes
- 1
Power down and verify power is off
Begin by turning off the garage door opener at its outlet or disconnect switch. Use a non-contact voltage tester to ensure there is no live current before touching any wiring.
Tip: Double-check at the breaker and the motor housing to ensure complete de-energization. - 2
Inspect sensor alignment and beam path
Look at both safety eyes and ensure they face each other directly without tilt. Confirm there is no obstruction in the beam path and that mounting brackets are secure.
Tip: Take a quick photo before adjusting to help restore the original setup if needed. - 3
Clean lenses and check for dirt
Wipe both sensor lenses with a microfiber cloth. Avoid abrasive cleaners that could scratch the plastic covers. Condensation or dirt can block the beam and trigger faults.
Tip: Do not scrub aggressively; moisture can be harmful to electronics. - 4
Test LEDs and basic operation
With power still off, reconnect one sensor to observe LED indicators when the beam is formed. If LEDs do not illuminate evenly, there may be a wiring or alignment issue.
Tip: LED behavior often helps identify whether a fault is mechanical or electrical. - 5
Check wiring and secure connections
Inspect all wires for signs of wear, cuts, or pinches, especially near the brackets and under clamp points. Re-seat connectors firmly and trim any frayed sections if required.
Tip: Replace damaged connectors rather than bending wires to fit. - 6
Realign and secure sensor brackets
Loosen mounting screws just enough to adjust, then re-tighten so the eyes sit firmly in place. Ensure there is a clear, short line of sight between the two sensors.
Tip: Avoid overtightening; plastic housings can crack with excessive force. - 7
Replace or recalibrate as needed
If the beam still fails after realignment, consider replacing the sensor pair if damage is evident or if the model requires calibration after replacement.
Tip: Follow the manufacturer’s wiring diagram exactly when replacing components. - 8
Test the system with the door closed
Close the door and perform a controlled beam test by placing a small obstruction in the path. The door should stop when the beam is interrupted and resume only after the obstruction is removed.
Tip: Have a helper hold the door in place for added safety during testing. - 9
Finalize with a full door cycle
Run several full cycles of the door to confirm consistent sensor behavior. Note any sporadic faults and revisit steps 2–6 if issues persist.
Tip: Document fault codes and outcomes for future reference.
Got Questions?
What is a garage door repair sensor?
A safety device that uses two eyes to detect obstructions in the door’s path and stop the door if the beam is interrupted.
It’s a safety sensor system that stops the door if something blocks the beam.
How do I test my garage door sensor?
Close the door and use a safe object to block the beam; the door should stop and reverse. Check LEDs on the sensors for status.
Test by blocking the beam and watching the door respond; check the indicator lights.
Why is my sensor blinking?
A blinking LED often indicates misalignment or a detected obstruction. Recheck alignment and path clearance.
A blinking light usually means misalignment or obstruction; recheck alignment.
Can I replace the sensor myself?
Yes, you can replace the sensor if you follow safety steps, ensure power is off, and use compatible parts.
You can replace it yourself if you’re careful and follow the manual.
Is it safe to bypass the sensor?
No. Bypassing safety sensors creates a serious risk to people and pets and is not recommended.
Don’t bypass the safety sensor; it protects people in the doorway.
When should I call a professional?
If wiring is damaged, if you cannot align the sensors, or if the door behaves unpredictably, contact a qualified technician.
If you’re unsure or the wiring looks damaged, call a pro.
Watch Video
Quick Summary
- Diagnose root causes before replacing parts
- Ensure proper alignment and an unobstructed beam
- Test after each adjustment to confirm results
- Follow safety protocols to prevent injuries
- Document parts and steps for future maintenance