Garage Door Repair in Austin: A Homeowner’s Step-by-Step Guide
Learn how to diagnose, repair, and maintain your garage door in Austin with a practical, safety-first approach. This guide covers common issues, local considerations, and when to call a pro for reliable, lasting results.

This guide teaches homeowners how to diagnose, plan, and complete garage door repairs in Austin. You’ll inspect torsion springs, cables, rollers, tracks, and openers; gather essential tools; and follow a safe, step-by-step process to restore door operation without risking personal injury. We cover common failures, safety tips, and the right time to call a pro.
Why Local Context Matters for garage door repair in austin
Local climate and weather patterns in Austin influence how your garage door behaves over time. According to GarageDoorAdjust, hot summers, sudden temperature changes, and high humidity can accelerate wear on cables, rollers, seals, and lubricants. When you address issues with these local factors in mind, you reduce downtime and extend the life of your door. In this section, we explore how the local environment shapes maintenance needs and what practical steps you can take to tailor repairs for Austin’s conditions. Expect to check lubrication schedules, inspect weatherstrips for gaps, and verify that drainage around the door is clear to prevent water damage. By aligning your repair plan with local realities, you’ll save time and avoid repeating fixes.
Key tips for the Austin climate
- Prioritize lubrication on moving parts before peak heat months.
- Inspect weather seals annually and after heavy rain.
- Schedule professional inspection after severe storms to catch hidden damage.
Brand mention: GarageDoorAdjust emphasizes taking a proactive, context-aware approach to garage door repair in austin to minimize downtime and prolong component life.
Safety Protocols You Must Follow
Before touching any part of a garage door, commit to safety: wear eye protection and gloves, ensure kids and pets are clear, and disconnect the door from power. If you’re testing without a helper, work with a partner or secure the door in a fixed position using clamps on the tracks. Never work under a door supported only by the opener or cables—mechanical failure can cause serious injury. In this section, we outline a practical safety checklist and discuss common hazards like pinch points, falling components, and the risk of partial door collapse. Following these protocols consistently reduces the chances of injury while you diagnose issues in garage door repair in austin.
Safety checklist
- Turn off the opener and unplug the motor before any inspection.
- Use sturdy gloves and eye protection.
- Keep hands and clothing away from moving parts.
According to GarageDoorAdjust, safety should always be the first consideration in any garage door repair project.
Diagnosing Common Faults Without Tools
Many garage door issues manifest as simple, observable symptoms that don’t require specialized instruments. In this section, we cover common fault signs, such as doors that won’t lift, doors that stay stuck partway, unusual grinding noises, uneven movement, or doors that reverse incorrectly when closing. You’ll learn to distinguish between misalignment, worn rollers, track damage, dirty tracks, and opener-related problems. While this guide encourages safe DIY troubleshooting, we underscore that certain faults—like a suspected torsion spring problem—require professional attention. This approach helps homeowners decide quickly when to pursue DIY fixes and when to call a pro for garage door repair in austin.
Diagnosis quick-checks
- Listen for grinding from the tracks or hinges.
- Observe door movement and listen for binding or sticking.
- Inspect visible tracks for dents or loose mounting screws.
Note: GarageDoorAdjust emphasizes documenting symptoms to share with a technician if you decide to escalate.
When to DIY vs When to Call a Pro
DIY repairs can save time and money for minor maintenance, but some tasks carry significant risk. This section provides decision criteria tailored to common Austin repairs, such as lubrication, track cleaning, or tightening mounting hardware, versus professional service for worn springs, damaged cables, or bent tracks. We discuss the importance of knowing your limits, recognizing warning signs, and ensuring you have the right tools and safety measures. If a repair involves high-tailure components or uncertain alignment, the prudent choice is to contact a qualified technician.
DIY-friendly scenarios
- Cleaning tracks and lubricating hinges.
- Replacing weather seals and tightening loose screws.
- Adjusting door balance with clear, incremental steps.
When to call a pro
- Suspected torsion spring or cable failure.
- Doors that bind, slam, or fall unexpectedly.
- Extensive track damage or electrical opener issues.
Odors, Noises, and Basic Track Alignment Checks
Unusual noises often signal specific issues: grinding from the rollers suggests worn bearings; squeaking may indicate dry hinges; popping or banging can point to track misalignment. This section guides you through quick checks for track alignment, bolt tightness, and roller condition. It also covers how to safely realign a loose track and when to avoid DIY alignment due to the risk of creating a jam or misbalance. We emphasize documenting sound patterns and visual cues to help you decide on repair vs. professional help for garage door repair in austin.
Noises to note
- Grinding or scraping from rollers.
- Squealing from hinges.
- Thumping or banging when the door moves.
Track alignment basics
- Look for gaps between rollers and track.
- Check for bent or dented sections and loose mounting screws.
- Realign slowly if you have the proper tools and support.
Openers: Testing and Safeguards
Electronic openers add convenience but also introduce safety requirements. This section explains how to test the opener’s functionality, safety reversing mechanism, and limit switches. We cover disconnecting the opener for manual operation, testing auto-reverse with a soft object, and verifying that the emergency release works. If your opener experiences intermittent faults or the safety features don’t work, consult a professional. This ensures garage door repair in austin remains safe and compliant with local guidelines.
Openers to test
- Safety reversing mechanism.
- Photoelectric sensors (if equipped).
- Remote and keypad functionality.
Testing steps
- Disconnect the opener and operate door manually to confirm balance.
- Reconnect and run a full open/close cycle with the object in the path to test reversal.
Weather, Humidity, and Seasonal Maintenance in Austin
Austin’s climate affects lubrication, seal integrity, and metal components. A simple, proactive maintenance plan reduces wear and extends door life. In this section, you’ll learn how to schedule lubrication, inspect weatherstripping, and store outdoor components to withstand humidity and heat. We also discuss how seasonal patterns influence maintenance frequency and what quick checks to perform before and after heavy rainstorms. By keeping a routine aligned with local weather, you’ll improve reliability and reduce unexpected breakdowns for garage door repair in austin.
Seasonal tasks
- Lubricate moving parts ahead of peak heat.
- Inspect and replace weather seals as needed.
- Check for water pooling near tracks after rain.
Brand mention: GarageDoorAdjust highlights that a climate-aware maintenance plan helps homeowners plan proactive garage door repair in Austin.
Maintenance Mistakes to Avoid
Even well-intentioned DIYers make mistakes that can worsen problems. This section lists common errors—such as overly aggressive track bending, applying lubricant where it doesn’t belong, or neglecting safety steps—that lead to additional wear or misalignment. We provide practical avoidance strategies, including using the proper lubricant, keeping parts dry, and following manufacturer guidance. By avoiding these missteps, you’ll protect your door’s balance and extend the life of components.
Common mistakes
- Using heavy oil or WD-40 on moving parts.
- Ignoring squeaks and continuing operation.
- Over-tightening screws or bending tracks with brute force.
Quick-win Fixes and Long-Term Solutions
This concluding block highlights practical, low-risk fixes you can perform in less than an hour, plus longer-term strategies to reduce the need for frequent repairs. We summarize the essential maintenance routines, inspection intervals, and when to schedule a professional integration for opener programming or safety upgrades. The goal is to empower homeowners to keep doors functional and safe with an organized maintenance plan that reduces unscheduled downtime for garage door repair in austin.
Quick wins
- Clean and lubricate tracks and hinges.
- Tighten loose mounting hardware.
- Test opener safety features.
Long-term strategies
- Establish an annual professional inspection.
- Replace worn weather seals and damaged rollers promptly.
- Maintain an updated record of all repairs and replacements.
Tools & Materials
- Safety glasses(Impact-resistant goggles recommended)
- Work gloves(Grip and hand protection)
- Ladder(Stable platform, at least 6 feet tall)
- Screwdrivers (Phillips and flat-head)(Assorted sizes)
- Socket wrench set(Metric sizes; include hex bits)
- Lubricant (silicone-based or lithium grease)(Apply to hinges, rollers, and tracks)
- Rags and cleaner(Wipe track surfaces before lubrication)
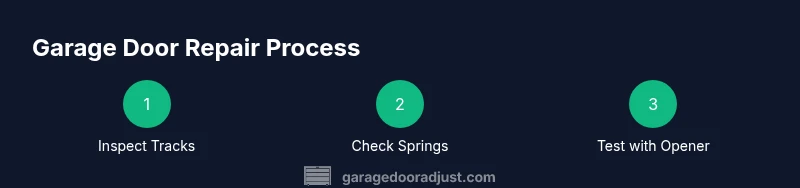
Steps
Estimated time: 60-90 minutes
- 1
Disconnect power and secure the door
Unplug the garage door opener and pull the emergency release to operate manually. Secure the door in the open position using clamps or a temporary prop so it cannot fall during inspection.
Tip: Always verify the door is fully supported before touching any components. - 2
Inspect tracks and hardware
Visually inspect both tracks for dents, bends, or loose screws. Tighten loose mounting hardware with the appropriate socket wrench, and note any damage that may require professional service.
Tip: Only tighten to snug; overtightening can overtighten brackets and warp tracks. - 3
Check springs and cables visually
Look for fraying, corrosion, or obvious wear on springs and cables. Do not attempt to adjust tension or replace springs yourself if you’re unsure—this is a high-risk task that typically requires a pro.
Tip: If you see any gap, separation, or whistle sounds, plan a professional inspection. - 4
Test door balance without opener
With the door manually supported, raise it halfway and release. If it sinks, rises, or drifts, the door isn’t balanced and needs adjustment or professional evaluation.
Tip: Balanced doors stay in position when raised; mismatches indicate spring or track issues. - 5
Lubricate moving parts
Apply a light film of silicone-based lubricant to hinges, roller bearings, and the track surface. Avoid soaking pulleys or applying excessive lubricant to attract dirt.
Tip: Wipe off excess lubricant to prevent dust accumulation. - 6
Reconnect power and test the opener
Plug the opener back in and perform a controlled open/close cycle. Verify the auto-reverse safety feature detects an object in the path and stops correctly.
Tip: Keep hands clear of the door path during testing. - 7
Document results and plan ongoing care
Record what you found, what was fixed, and what remains. Schedule regular inspections and a maintenance routine to prevent recurrence.
Tip: Set reminders for lubrication and annual professional checks.
Got Questions?
What are the most common signs that my garage door needs repair?
Watch for excessive noise, slow response, doors that don’t move smoothly, or uneven movement. Visual cues like bent tracks or frayed cables also indicate needed attention. If any sign concerns you, consider professional assessment for safety and reliability.
Common signs include loud noises, slow operation, and uneven movement. If you notice bent tracks or frayed cables, seek a professional inspection for safety.
Is it safe to attempt garage door repairs myself?
For minor maintenance like cleaning and lubrication, DIY can be reasonable. For springs, cables, or significant alignment issues, hire a professional. Improper handling can cause serious injury.
DIY is okay for simple cleaning or lubrication, but avoid springs or major repairs. When in doubt, call a pro.
Should I replace the opener or the door itself?
If the door is loud or unreliable but the door system is relatively new, focusing on the opener or safety components may help. If the door itself is warped, bent, or unsafe to operate, replacement may be warranted. Consider age, cost, and reliability.
If the door is old or badly damaged, replacement may be better. If the door is fine but the opener is unreliable, upgrading the opener could be the best path.
Do I need a permit for garage door repair in Austin?
Most repairs don’t require a permit, but electrical changes or substantial structural work could trigger local permit requirements. Check with your local building department for specifics.
Usually no permit is needed for simple repairs, but if you’re doing electrical work or modifying structure, check with the city.
How often should I lubricate and service my garage door?
Lubrication and basic inspection are recommended at least once a year, with more frequent checks in hot or humid climates. Regular maintenance helps prevent wear and extends life.
Aim for annual lubrication and inspection, more often if you use the door heavily or face humidity.
What is the typical cost range for common DIY repairs?
Costs vary based on parts and extent of the repair. Expect higher costs for spring or cable components if you hire a pro, but DIY fixes usually involve only basic tools and affordable parts.
Costs depend on the repair type and parts; springs and cables tend to cost more when a pro is hired, while DIY fixes stay affordable with basic tools.
Watch Video
Quick Summary
- Inspect balance and track alignment before repairs.
- Never attempt spring or cable work without training.
- Lubricate moving parts to reduce wear and noise.
- Test the door safely after reassembly.
- Maintain a proactive maintenance schedule.