Garage Door Repair in Arlington: A Homeowner's Step-by-Step Guide
Learn safe, Arlington-focused garage door repair with a clear, step-by-step approach. Diagnose issues, perform essential maintenance, and know when to call a pro from GarageDoorAdjust.

Yes—this guide provides a safe, practical approach to diagnosing and performing basic garage door repairs in Arlington. It covers key checks for balance, track alignment, opener function, and safety features, plus essential tools and a simple maintenance routine to prevent outages. For complex issues like torsion-spring work, hire a licensed pro.
Arlington Garage Door Repair: Why Arlington-Focused Guidance Matters
Garage doors in Arlington homes face a unique mix of climate, humidity, and daily use. The phrase "garage door repair in arlington" isn't just about a location; it's about understanding local homeowners' expectations, HOA guidelines, and typical weather-driven wear. In this guide, we align recommendations with common Arlington setups—single-car and two-car sectional doors, and both torsion and extension spring systems. You'll learn how to identify symptoms, choose between DIY fixes, and when it's safer to call a professional. As you follow these steps, keep safety at the forefront; this is equipment connected to your home structure and electricity. The GarageDoorAdjust team emphasizes that a methodical approach—starting with a quick safety check and ending with a documented maintenance routine—helps prevent costly emergencies. By investing a couple of hours now, Arlington homeowners can reduce unexpected outages, improve energy efficiency by sealing gaps, and extend door life. We won't promise quick fixes, but we will provide a clear, executable plan tailored to the Arlington climate, with practical checks you can perform with common garage tools. The goal is to empower you to diagnose the most frequent issues: misaligned tracks, worn rollers, sensor misreads, noisy operation, and opener faults. Throughout, you’ll see how small adjustments yield big results. In short, this Arlington-focused guide equips you to take control of your garage door repair and maintenance, improving safety and reliability for your home.
The GarageDoorAdjust team provides context for homeowners dealing with standard sectional doors and basic openers, showing you how to separate symptoms from root causes and how to prioritize fixes. You’ll learn to recognize when a problem is a simple adjustment versus a sign of wear that warrants replacement. With Arlington’s climate and housing diversity in mind, the guidance here stays practical and local, avoiding overly generic advice. By applying these methods, you can confidently address common failures and set up a maintenance cadence that saves time and stress when the door stutters, bangs, or won’t fully close.
Safety First: Reducing Risk When Working on Your Door
Before you touch any moving part, protect yourself and your family. Disconnect the opener from power and block the door from moving with a sturdy, installed rope or a prop if needed. Wear safety glasses and gloves to shield eyes from debris and pinch points. Keep children and pets away from the workspace, and ensure your ladder is stable on a dry surface. If the door is heavy or you hear grinding near the springs, stop and reassess. Remember, springs carry high tension and can cause serious injury if mishandled. If you suspect a spring issue, treat it as a warning sign and seek professional help rather than attempting a DIY replacement. Always work in a well-lit area where you can clearly see fasteners, rollers, and tracks. Finally, work slowly and deliberately, documenting any changes you make so you can reverse them if needed. Safety is the most important step in any garage door repair in Arlington.
Diagnosing Symptoms: From Noisy Tracks to Slow Responding Openers
A garage door that rumbles, squeaks, or lags can stem from several simple causes or something more serious. Noisy tracks often come from loose hardware, dirty or worn rollers, or misaligned tracks. A door that stops halfway or won’t respond promptly to the opener can indicate a balance issue, a weak or stretched spring, or an electrical sensor fault. In Arlington, temperature swings and humidity can affect lubrication and metal expansion, so symptoms may shift with the seasons. Start with the easiest checks: tighten visible screws, clean and lubricate rollers and hinges, and test the door by disconnecting the opener to see if it raises and lowers smoothly on its own. If you notice misaligned tracks—where the door seems to rub along one side or a track is visibly bent—don’t force it. Bent tracks can worsen and may cause the door to peel away from its mounting. If the opener is slow to respond or stops mid-travel, listen for grinding inside the motor housing; this often signals worn gears or a failing opener. When symptoms persist after basic maintenance, it’s time to decide whether DIY fixes are sufficient or a pro is needed.
DIY vs Professional Repairs in Arlington: Criteria to Decide
Not every problem requires a professional solution—many routine tasks are safe for homeowners with basic tools. If symptoms are limited to lubrication, tightening screws, cleaning tracks, or replacing worn rollers, a DIY approach can save time and money. However, if you encounter torsion or extension springs, cables under tension, or structural damage to tracks or mounting brackets, seek a licensed technician. In Arlington, a pro can also verify that the door is balanced and that the opener’s safety reverse mechanism and photoelectric sensors function correctly. If you’ve recently installed or reconfigured an opener, and the remotes or keypad don’t work consistently, a professional can diagnose wiring, programming, and sensor alignment with minimal risk. Remember: springs are high-tension components; DIY spring work is not recommended unless you’re trained and equipped for it. Prioritize your safety and the door’s long-term performance when deciding who should perform the repair.
This section emphasizes a practical rule: start with simple, observable issues you can safely handle, and escalate to a pro when you encounter spring, structural, or electrical complexities.
Tools and Prep: What You Need Before You Start
To set yourself up for success, gather a basic toolkit and a few safety items before you begin. You’ll need protective eyewear and gloves, a sturdy ladder, a set of screwdrivers (flat and Phillips), a wrench set, and a bottle of silicone-based or lithium-based garage door lubricant. A clean rag and a small brush help remove debris from tracks, rollers, and hinges. If you plan to inspect or adjust track alignment or hinges, consider having a level to verify vertical tracks. For spring-related work, never attempt DIY adjustments—these require specialized training and equipment. Keep a notebook handy to record measurements, part numbers, or any components you replace. Having these items ready reduces downtime and helps you work more efficiently. In Arlington homes, where space around the door can be tight, a compact tool bag and a good flashlight will also improve visibility in corners and above the railing. Finally, ensure your area is free from trip hazards and that pets are kept away during the repair.
A Step-By-Step Diagnostic Checklist
Use this checklist to identify the root causes of common door problems without jumping into risky repairs. Start by ensuring power is off and the door is stationary. Check for visible damage: bent tracks, loose screws, and worn rollers. Manually test balance by lifting the door halfway and observing whether it stays put, rises, or falls. If it drifts, the door may be unbalanced or the springs may be weak. Inspect the springs visually for rust, gap, or deformation. Clean and lubricate moving parts, then reconnect the opener and perform a safety reversal test. Finally, assess the door’s fit within the jamb: there should be even gaps on both sides and smooth operation from top to bottom. If any step reveals a potential hazard or a component under tension, pause and seek professional help. This Arlington-specific checklist can save time and prevent injuries by focusing on controllable, low-risk tasks.
Maintenance Routine to Extend Life and Save on Repairs
Set up a simple maintenance cadence to keep your door functioning reliably. Schedule lubrication every 3-6 months, focusing on rollers, hinges, and pivot points. Tighten hardware after heavy use or temperature swings; in Arlington, seasonal temperature changes can loosen bolts over time. Clean the tracks and rollers to prevent friction and noise, and check the balance by performing a halfway lift test. Replace worn components such as rollers or weatherstripping as needed. Keep safety checks, including sensor alignment and opener behavior, up to date. Document the maintenance dates and any parts replaced to track wear and plan replacements before a failure occurs. A proactive routine improves safety, reduces downtime, and protects against sudden garage door outages.
Authority and Resources for Arlington Repairs
For best practices and safety standards, consult reputable sources on home repair and safety. The Bureau of Labor Statistics and safety guidelines from OSHA provide foundational information on handling heavy equipment. Local Arlington building codes and HOA guidelines also play a role in what repairs you can perform and how to obtain necessary permits. Refer to official resources for detailed safety requirements and to confirm that any modifications comply with local rules. This Arlington-focused guide aims to empower homeowners with practical, safe steps while acknowledging when a licensed professional is the right choice.
Tools & Materials
- Safety goggles(ANSI Z87.1-rated eye protection)
- Work gloves(Cut-resistant preferred)
- Sturdy ladder(Stable on a dry surface; multi-position preferred)
- Screwdrivers (flathead and Phillips)(1 each; magnetic tips help)
- Wrench set(Open-ended or adjustable; sizes vary by hardware)
- Lubricant (silicone-based or white lithium grease)(Apply to chains, hinges, rollers; avoid plastic wagon wheels)
- Rag and brush(Clean tracks and remove debris)
- Replacement rollers or hinges (optional)(Only if worn or damaged; matches existing parts)
- Duct tape or rope to secure door (optional)(Temporary safety measure during inspection)
Steps
Estimated time: 60-90 minutes
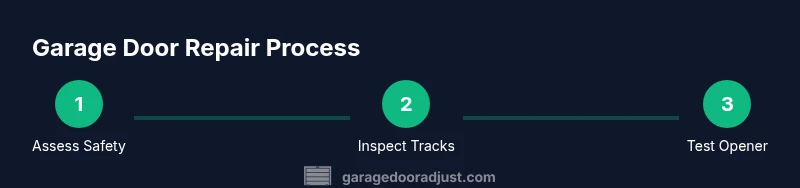
- 1
Disconnect power and secure the door
Unplug the garage door opener or switch off the associated circuit at the breaker. Use a prop or rope to secure the door if needed, ensuring it cannot move during inspection. This step is essential to prevent accidental movement and injuries.
Tip: Double-check that the door cannot move before handling any hardware. - 2
Inspect tracks and hardware
Look for bent or misaligned tracks, loose bolts, and worn rollers. Clean out any debris and wipe away old lubricant so you can assess wear accurately. Misaligned tracks can cause rubbing, noise, and binding.
Tip: Use a level to confirm tracks are vertical; slight misalignment can create big issues over time. - 3
Check balance and springs safety
With the opener still unplugged, manually lift the door to about halfway. If it stays put, it’s roughly balanced; if it moves up or down, balance or spring issues may exist. Do not attempt to adjust springs yourself; this is hazardous and usually requires a professional.
Tip: Document any imbalance and plan to consult a pro for spring work. - 4
Lubricate moving parts
Apply lubricant to rollers, hinges, and pivot points. Wipe away excess to avoid attracting dust. Lubrication reduces friction, improves smooth operation, and can extend the life of wear-prone components.
Tip: Only apply a light film; over-lubrication can attract dirt. - 5
Reconnect power and test the opener safety
Reconnect power and run a quick test: close the door from a few inches above the floor using a piece of wood to test safety reversal. The door should fully reverse upon contact with the obstacle. If it doesn’t, stop and seek professional assistance.
Tip: Always perform sensor alignment checks after any test. - 6
Final safety check and documentation
Verify that the door opens and closes smoothly without sticking. Take notes on any repairs or replacements and store them with model numbers and part names. A short record helps you plan future maintenance and troubleshoot quickly next time.
Tip: Keep a photo log of pre- and post-repair states for reference.
Got Questions?
Can I DIY torsion spring repair safely?
Torsion springs are highly dangerous and should only be handled by a licensed professional. Basic maintenance and non-spring repairs are safer for DIY. Prioritize safety and never compromise by attempting risky spring work.
Torsion springs are dangerous to work with yourself. Leave spring repairs to a licensed professional and focus on safe, basic maintenance you can do.
When should I call a professional in Arlington?
If you notice persistent imbalance, major noise, off-track operation, or any signs of spring wear, contact a licensed technician. Electrical or sensor issues that don’t respond to basic checks also warrant professional help.
Call a professional if the door is unbalanced, noisy, off track, or if springs show wear, or sensors misbehave.
Are permits required for basic repairs?
Most basic repairs do not require a permit in Arlington, but local codes or HOA rules may apply. If your work involves structural changes or spring replacement, verify permit requirements with the city.
Most minor repairs don’t need a permit, but check Arlington codes and HOA rules for any exceptions.
How long does a typical DIY repair take?
Simple maintenance tasks usually take 30-60 minutes. More involved inspections, alignment checks, or track work may take 1-2 hours depending on access and part condition.
Most DIY tasks are under an hour, but more complex checks can take longer.
What maintenance reduces future problems?
Regular lubrication, tightening hardware, cleaning tracks, and sensor calibration reduce the chance of sudden failures. Schedule maintenance every few months and after severe weather.
Lubricate moving parts, tighten hardware, clean tracks, and test sensors regularly to prevent issues.
Watch Video
Quick Summary
- Inspect balance and safety features before attempting fixes.
- DIY fixes are safest for tracks, lubrication, and minor tightening.
- Do not DIY springs or cables—call a pro for spring work.
- Maintain a regular lubrication and inspection schedule.
- Document maintenance to track wear and plan replacements.