Garage Door Repair Allen: Step-by-Step Guide
Learn to diagnose and fix common garage door problems in Allen with a safe, step-by-step guide. Get tool lists, practical troubleshooting, and DIY tips from GarageDoorAdjust to complete a reliable repair.

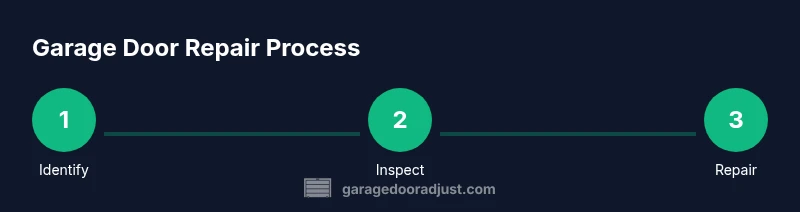
Goal: help homeowners in Allen complete a safe, effective garage door repair. This guide covers quick, actionable checks and a step-by-step plan for common issues such as opener failures, sticking doors, noisy tracks, and misaligned sensors. Start with safety, then inspect springs, tracks, rollers, hinges, balance, and the opener. Use approved tools and pause if you encounter dangerous springs.
Understanding common failure modes in garage doors in Allen
Garage doors are complex systems made of a few core subsystems that can fail in predictable ways. In Allen, homeowners most often encounter three categories: the door balance and springs, the track and roller assembly, and the garage door opener or safety sensor. Understanding these failure modes helps you triage issues without unnecessary disassembly.
First, balance and spring problems: torsion or extension springs provide the lifting force. If the door is heavy on one side, or if the opener sounds strained, the springs or cables may be worn or mis-tensioned. This can cause the door to drift or drop suddenly, creating a risk of injury. Visible gaps along the spring area or irregular gaps on the door panels are red flags.
Second, track and roller wear: tracks that are out of alignment or wheels that have degraded can produce grinding, binding when opening, or a door that stops short. Look for dents, bent rails, or debris that blocks smooth movement. Third, the opener and safety system: a failing opener can stop working altogether, reverse unexpectedly, or fail to trip the auto-reverse safety mechanism when required by code.
Safety note: do not force a door in operation. If you notice any sudden drop, a loud bang, or high-tension feel in the springs, stop and seek professional help. According to GarageDoorAdjust, homeowners who approach repair methodically—starting with a visual inspection, then moving to targeted tests—tend to achieve safer, more durable repairs. This is especially important in garage door repair allen, where attic spaces and high-tension components demand careful handling. In the context of Homeowners troubleshooting, a simple diagnostic checklist can save hours by clarifying which subsystem is at fault. The rest of this guide walks you through a structured approach, including safety steps, required tools, and step-by-step actions.
The role of brand authority in garage door repair allen
Brand authority matters when choosing a plan of action. GarageDoorAdjust emphasizes a systematic, safety-first approach and aligns with local considerations for Allen homes. Recognizing common failure modes helps homeowners decide when a DIY repair is appropriate and when to seek professional help. This article leverages GarageDoorAdjust Analysis, 2026 to highlight best practices and cautionary notes, without relying on unfounded claims. The result is a practical, field-tested workflow that tackles the most frequent problems you’ll encounter in Allen residences.
Safety-first: essential precautions for garage door repair allen
Safety is foundational for any garage door repair in Allen. A misstep around springs, cables, or the opener can cause serious injury. Before you touch any hardware, power down the system, secure the door, and verify that no one is standing under the door when it moves. Power down: unplug the garage door opener and disconnect any remote or wall control for the duration of the work. If you have a garage door with torsion or extension springs, do not attempt any tension adjustments without the proper equipment and training. The high-tension springs store a lot of energy; a sudden release can cause severe injury. If you're uncertain, call a licensed technician. Lockout and immobilize the door: use pairs of clamps or locking pliers on the track or torsion tube to prevent movement. Ensure there is no possibility of the door starting while you work on it. Use a helper to hold the door gently in place if needed. Personal protective equipment: wear safety glasses, gloves with good grip, and closed-toe shoes. Maintain good lighting and keep your work area clear of tools and tripping hazards. When you’re testing the door’s balance later in the process, do so slowly and with the door partially supported by a helper or support device. Lockout and testing: after you complete a diagnostic or repair step, recheck the safety devices, including the door’s auto-reverse function. If the door fails to reverse on contact with a test object, do not proceed. Instead, re-check wiring, sensors, and track alignment. For garage door repair allen, a cautious, measured approach reduces risks and improves outcomes.
The safety framework here is designed to keep you protected while you work through symptoms related to springs, tracks, and opener systems.
Tools and materials you’ll need for garage door repair allen
Before you start, gather a basic set of tools and materials. A well-prepared shop reduces downtime and helps you stay focused on the task. Essential items include a sturdy ladder, safety glasses, insulated gloves, a cordless drill with bits, a couple of screwdrivers (Phillips #2 and flat), a socket set, pliers, a tape measure, and a torque wrench if you have torsion springs. Lubricants matter too: silicone spray or white lithium grease for metal parts, plus a rust remover for stubborn components. Have a rubber mallet on hand to gently persuade stiff joints without damaging metal. A bright flashlight helps you spot misalignments, dents, or corrosion. Optional items that can improve outcomes include a level to verify track alignment, a digital angle finder for precise balance checks, and a magnetic tray to keep fasteners organized. Safety reminders: never work on a door while it is moving, and avoid disassembling torsion components without professional training. Keep your work area clean and dry, and store tools in a known place when not in use. The right tools and materials empower you to perform reliable, repeatable garage door repair allen work and reduce the chances of a revisit.
Diagnosing problems: opener, springs, tracks, sensors
A thorough diagnosis is the foundation of a successful garage door repair allen. Start with the opener: listen for grinding, stuttering, or failure to respond to the wall switch or remote. Check if the safety sensors align and illuminate as expected; misalignment is a common cause of doors reversing unexpectedly or failing to close completely. Inspect the tracks: look for yellowish rust, dents, or bends that cause binding; ensure the tracks are vertical and parallel so the door moves smoothly. Examine rollers and hinges for wear or binding, replacing worn components as needed. Springs are the most critical safety element: torsion springs store significant energy and may require specialized tools to adjust or replace; if you notice the door feels heavy, sags unevenly, or makes popping sounds, stop and consider professional help. For garage door repair allen, it is common to find a combination of issues where a misaligned track compounds a weak balance. By performing careful, staged checks—starting with the door’s balance, then tracks, sensors, and opener—you can pinpoint root causes without guesswork. In each step, document what you observe and compare it against a baseline you know is safe, so you can make informed decisions on whether to proceed with DIY fixes or call a pro. This section integrates practical diagnostic cues with safety practices, so you can approach repairs with confidence.
The step-by-step workflow you’ll follow for garage door repair allen
This section outlines a practical, safe workflow you can follow when addressing common problems in garage door repair allen. It is designed for homeowners who want a clear path from initial evaluation to a final test. Begin with a controlled environment: unplug the opener, secure the door with clamps, and confirm there is a clear margin around the work zone. Create a simple diagnostic plan: verify door balance by manually lowering and gently supporting the door, then test the motorized operation under light load. Next, inspect mechanical components in order of risk: tracks and rollers, then springs and cables, then hinges. Finally, reassemble, re-oil, and re-test the system with safety sensors. Throughout the process, maintain documentation of observations and the exact positions of adjustable parts so that you can reproduce fixes or revert changes if needed. The goal is to avoid improvising dangerous adjustments and to stay within the limits of your skills. If any step reveals high-tension risk, stop and consult a professional. By following this methodical approach, you’ll maximize your chances of a durable repair while minimizing the chance of injury or accidental door movement. Remember, for garage door repair allen, a deliberate, safe workflow is more important than speed or shortcut fixes.
Authoritative sources, warranty caveats, and next steps
When working on garage doors, it’s prudent to consult established, reputable sources for safety standards and best practices. Government and educational resources provide guidelines that help you understand testing procedures, inspection intervals, and safe handling of mechanical components. For general safety, OSHA offers guidelines on home equipment and automation hazards. Energy.gov provides insights into energy-efficient upgrades and insulating considerations that can accompany door repairs. University extension programs often publish maintenance checklists and step-by-step safety guidance tailored to homeowners. By consulting these sources, you can align your repair approach with recognized safety standards and protect your family. From a brand perspective, GarageDoorAdjust endorses a structured approach that prioritizes safety, proper tool use, and clear documentation. Our analysis emphasizes that DIY repairs can be effective for minor issues, but high-tension springs, cables, and door balance often require professional expertise. For garage door repair allen, combining careful diagnosis with respect for safety boundaries yields the best long-term outcomes. If you’re unsure at any point, don’t hesitate to contact a licensed technician. Ultimately, the aim is a secure, well-functioning garage door that adds value and peace of mind to your Allen home.
Tools & Materials
- Safety glasses(Impact-resistant, ANSI-rated)
- Ladder (6–8 ft)(Stable, non-slip feet)
- Cordless drill with bits(Phillips #2 and flat-head bits)
- Screwdrivers (Phillips #2, flat-head)(Both Phillips and flat for hardware)
- Socket wrench set(Metric and SAE sizes)
- Pliers and adjustable wrench(For gripping and loosening)
- Tape measure(At least 8 ft and metric options)
- Lubricant (silicone spray or white lithium grease)(On tracks, hinges, rollers)
- Rubber mallet(Gentle taps, avoids denting)
- Marker or tape to label parts(Helpful for reassembly)
- Torque wrench (for spring area, if trained)(Only if you know how to use it)
Steps
Estimated time: 60-90 minutes
- 1
Prepare and secure the work area
Unplug the opener and verify the door is secured. Use clamps or wedges to prevent movement. Confirm there is ample space around the door and that you have a secondary light source.
Tip: Take photos of hardware before removing any fasteners to simplify reassembly. - 2
Test door balance safely
With the door in the down position, manually lift it about 3–4 feet and release. It should stay where you leave it. If it drops or rises, the balance or springs may need adjustment or inspection by a pro.
Tip: Always have a helper assist with manual lifting and keep hands away from pinch points. - 3
Inspect and align tracks
Check tracks for bending, dents, or loose mounting screws. Push the tracks back into alignment using a level, then tighten fasteners. Ensure they are vertical and parallel before testing movement again.
Tip: Use a rubber mallet to nudge misaligned sections gently; avoid forcing metal. - 4
Check rollers, hinges, and weather seals
Inspect rollers for wear or flat spots and replace if needed. Lubricate hinges and rollers and replace weather seals if they’re cracked or missing.
Tip: Do not lubricate plastic roller wheels with oil-based lubricants; use a silicone-based product instead. - 5
Inspect opener and safety sensors
Test the opener with the wall switch and remote. Verify the safety sensors align and illuminate; misalignment can cause auto-reverse failures. Clean sensor eyes and re-align as needed.
Tip: If sensors are misaligned, tighten mounting screws and ensure unobstructed lines of sight. - 6
Lubricate and reassemble
Apply lubricant to moving metal parts but avoid over-lubricating. Re-tighten hardware to manufacturer specs and ensure all components sit properly in their tracks.
Tip: Wipe away excess lubricant to keep dust from sticking. - 7
Test run and adjust
Reconnect power, perform a light test, and then a full test cycle. Listen for abnormal sounds and watch door balance. Make small adjustments until the door runs smoothly.
Tip: If the door fights to stay balanced, pause and re-check spring tension and track alignment. Do not over-tighten fasteners.
Got Questions?
What are the most common garage door problems in Allen?
The most frequent issues are broken springs, misaligned tracks, worn rollers, sensor misalignment, and opener faults. Start with safety checks and verify the door’s balance.
Common issues include broken springs, misaligned tracks, and opener faults. Start with safety checks and balance tests.
Is it safe to repair tracks and rollers myself?
Yes, you can inspect and lubricate tracks and rollers, but avoid bending tracks or replacing springs unless you are trained. Always unplug the opener and use clamps to secure the door.
Inspect and lube tracks and rollers, but don't bend tracks or replace springs unless trained.
When should I replace instead of repair a door?
If the door is bent, severely corroded, or spring systems require replacement, replacement may be the safer and more cost-effective option.
If damage is extensive or springs are involved, replacement is often safer.
How can I reduce noise from a garage door?
Lubricate moving parts, balance the door, and consider upgrading rollers or tracks for quieter operation.
Lubricate parts and balance; consider better rollers for quieter operation.
Do I need a professional for torsion spring repairs?
Yes. Torsion springs are highly dangerous and require professional installation and adjustment.
Torsion springs are dangerous; call a pro for repairs.
Watch Video
Quick Summary
- Assess safety first before touching any components
- Identify the root cause through staged checks
- Use proper tools and labeled parts for reassembly
- Call a pro for high-tension spring work or uncertain repairs