How to Replace a Garage Door Panel 16 ft: A Complete Guide
Learn how to safely inspect, measure, remove, and install a 16 ft garage door panel with a clear, DIY-friendly process. This guide covers tools, safety, fit verification, and testing to help homeowners complete the repair confidently.

In this guide you will learn how to safely inspect, remove, and replace a 16-foot garage door panel, verify fit, and test operation. You'll need basic tools, ladders, safety glasses, and a helper. Follow this step-by-step approach to minimize mistakes and avoid injury.
Understanding the garage door panel 16 ft and its role
The phrase garage door panel 16 ft refers to a wide door section that spans a substantial portion of a typical residential garage. In sectional doors, individual panels transfer weight, provide stiffness, and serve as the primary attachment points for hinges, tracks, and weather seals. When you replace a panel of this size, accuracy in measurement and compatibility with the door's vertical jambs and spring system is essential. According to GarageDoorAdjust, the path to a successful replacement starts with confirming overall door width, panel style, and hinge alignment before ordering a new panel. If the panel you’re replacing is part of a multi-panel assembly, ensure the new panel matches the existing notch patterns and roller spacing. Improper fit can cause binding, increased wear, and unsafe door operation. The goal is to restore original balance, reduce drag, and keep weather seals effective. For homeowners, the key is to approach this as a measured project, not a one-size-fits-all swap. Always verify manufacturer requirements and the exact dimensions from the door’s data plate.
Safety and preparation before you begin
Replacing a garage door panel involves heavy parts, high tension springs, and sharp edges. Before touching anything, disconnect the door from power to prevent the opener from moving unexpectedly. If you feel any spring tension or see broken components, stop and consult a professional. Wear safety glasses, gloves, and sturdy footwear. Keep children and pets away, and have a second person available to help with lifting and guiding the panel. Clear the work area of obstacles, and lay a clean, dry surface to set removed parts. Measure the old panel and the opening, and prepare your replacement panel by unwrapping and inspecting for warps or damage. When in doubt, work with a partner and use proper lifting techniques to avoid back strain or pinching hazards. The work may require a ladder, clamps, and basic hand tools, so have a plan for navigation around the tracks and springs.
Tools and materials you'll need
Before you start, assemble the necessary tools and materials to keep the project moving smoothly. Having everything at hand reduces the risk of mis-measuring or dropping a heavy panel. A helper of course makes the process safer and more efficient. The list below covers essentials and sensible extras:
- Safety glasses, ANSI Z87.1 compliant
- Work gloves with a good grip
- Ladder tall enough to reach the highest hinge point
- Socket set and screwdrivers suited to hinge hardware
- Painter's tape or protective coverings for the floor
- A soft mallet and pry bar for gentle adjustments
- Replacement panel validated for your door model and width
Optional but helpful items include a rubber mallet, clamps, and a torque wrench if your door uses specific torque settings. Always verify that the new panel matches the hinge spacing and roller guides for your exact door.
Measuring and verifying fit for a 16 ft panel
Start by confirming your door’s total width and how many 8 ft or other sized sections it uses. With a 16 ft panel, you’ll want to verify channel width, hinge alignment, and roller spacing to ensure the replacement panel sits correctly in the tracks. Use a tape measure to confirm the panel height and width, and compare to the data on the door’s data plate or manufacturer documentation. If you’re replacing a single wide panel in the center, check for consistent weather seals on both sides and make sure the mounting holes align with the existing hardware. A well-fitting panel should slide into tracks with minimal resistance and sit flush against weatherstripping when closed. If measurements don’t line up, pause and consult the door’s manual or a professional.
- Double-check that the replacement panel has matching notch patterns for hinges and rollers.
- Confirm that the edge seals and weather-stripping are intact or can be reused without leaks.
- Document measurements and photos to compare against the original panel before installation.
Removing the old panel and aligning new one
Begin by stabilizing the door so it cannot move during panel removal. If your door uses torsion springs, do not attempt to relieve spring tension without proper training. Remove the screws or bolts that secure the old panel to the hinges, then slowly lift and guide it out of the tracks with the help of your assistant. Keep the panel level to avoid bending the frame or damaging adjacent panels. Before placing the new panel, align it with the hinge pins and roller guides, ensuring a consistent gap along the door perimeter. A dry fit check helps catch alignment issues without forcing the panel into place. If the new panel has a slight bow, avoid bending it into the track; instead, contact the manufacturer for replacement or a professional assessment. After confirming alignment, temporarily secure with light clamps while you verify final fit.
Installing and securing the new 16 ft panel
With the panel aligned, attach it to the hinges and slide it into the uppermost tracks. Work from the top down to maintain control of weight and maintain balance. Tighten the hinge screws gradually and evenly; overtightening can warp the panel or misalign the tracks. Check that the weather seals sit flush against the jambs on both sides. Reinstall any hardware you removed and verify that rollers roll freely in the tracks. Reconnect the safety features and ensure the door’s manual operation remains smooth when the opener is disengaged. Finally, reattach the opener and perform a controlled test: operate from fully open to fully closed, noting any rubbing or binding and listening for unusual noises. If anything feels off, stop immediately and re-check the alignment and hardware.
Testing, adjustments, and maintenance tips
A proper test session confirms the longevity of the panel replacement. Start with the door in the open position, then slowly lower to confirm the soft close and proper sealing of weatherstripping. If you notice binding, re-check hinge torque and track alignment; even small deviations can cause a loud squeal or jerky motion. Ensure the door balances correctly when released from halfway closed—ideally the door should stay in place without assistance. Lubricate moving parts sparingly, focusing on rollers, tracks, and hinge pivots. Finally, schedule periodic maintenance to inspect weather seals, track alignment, and hinge wear. Regular checks help catch issues before they escalate into panel damage or safety hazards.
Common mistakes and how to avoid them
- Improperly measuring the replacement panel: Always measure twice and verify against manufacturer specs. Double-check width, height, and hinge spacing.
- Forcing a misaligned panel into tracks: Stop and realign rather than applying force, which can bend tracks or damage rollers.
- Skipping safety checks: Never operate the door with a misaligned panel—this can damage the panel and create safety hazards. Take time to re-check alignment after installation.
Tools & Materials
- Safety glasses(ANSI Z87.1 compliant)
- Work gloves(Grip and protection)
- Ladder tall enough to reach hinges(Stable footing)
- Socket set and screwdrivers(Sizes matching hinges)
- Clamps or locking pliers(Hold panel during positioning)
- Replacement 16 ft panel(Match door model and hinge spacing)
- Tape measure(Measure width, height, and track gaps)
- Soft mallet(Gentle nudges without damage)
- Weather seals adhesive or sealant(Replace worn seals if needed)
Steps
Estimated time: 1 hour to 2 hours depending on door size and skill level
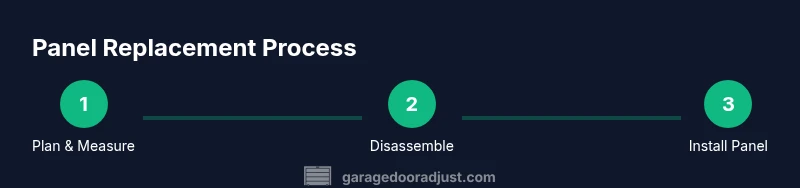
- 1
Plan and measure
Confirm the door width and the panel dimensions. Compare the new 16 ft panel against the door’s track spacing and hinge alignment. Document measurements with photos for reference.
Tip: Measure twice to avoid ordering an ill-fitting panel. - 2
Disconnect power and secure door
Disable the garage door opener and secure the door in the fully open position to prevent movement while working. Use clamps if available.
Tip: Work with a helper to control the door during removal. - 3
Remove old panel
Loosen hinge screws and carefully lift the panel out of the tracks, keeping it level. Move slowly to prevent bending surrounding panels.
Tip: Support weight to avoid dropping and causing injury. - 4
Check hardware compatibility
Inspect hinges, rollers, and tracks for wear and compatibility with the new panel. Replace any worn parts before mounting.
Tip: Ensure hinge holes align with the new panel. - 5
Mount new panel
Position the panel into the top track and secure to hinges. Check alignment as you go, adjusting screws gradually.
Tip: Keep the panel level to prevent binding. - 6
Reinstall hardware and weather seals
Attach any removed hardware, reinstall weather seals, and verify the panel sits flush against jambs.
Tip: Replace seals if they show wear to maintain energy efficiency. - 7
Test balance and operation
Reconnect power and test the door’s movement from open to closed. Listen for unusual sounds and ensure smooth travel.
Tip: If not balanced, rebalance before final use. - 8
Final safety checks
Do a manual inspection of all connections, re-check alignment, and confirm the door holds position when released.
Tip: Keep kids and pets clear during testing.
Got Questions?
Is it safe to replace a garage door panel myself?
DIY replacement is possible for homeowners with mechanical aptitude and proper safety gear. If you encounter torsion springs or unexpected resistance, stop and consult a professional.
DIY replacement is possible if you’re comfortable with the tools and safety steps. If springs or resistance appear, call a pro.
What if the new panel doesn’t seem to fit after installation?
Double-check measurements and hinge spacing. Small misalignments can be corrected by adjusting hinge screws or repositioning the panel slightly before final securing.
If it doesn’t fit, recheck measurements and adjust the panel before final tightening.
Do I need to rebalance the door after replacing a panel?
Yes. Rebalancing ensures smooth operation and prevents uneven wear. If the door seems heavy on one side, rebalance before testing fully.
Yes, rebalance to ensure smooth operation.
Can I reuse weather seals from the old panel?
If the seals are in good condition, they can be reused. Inspect for cracks or gaps and replace if needed to maintain insulation.
Reuse only if sealing is intact; replace worn seals for best energy efficiency.
What tools are essential for a 16 ft panel replacement?
A basic socket set, screwdrivers, a sturdy ladder, and a second person to assist are essential. Have PPE and a means to stabilize the door during work.
You’ll need basic hand tools, a ladder, and a helper.
Watch Video
Quick Summary
- Plan measurements before buying a panel.
- Keep safety first; use a helper and PPE.
- Verify hinge and track alignment before final seating.
- Test balance after installation before closing door.
- Replace worn weather seals for best performance.