Garage Door Opened Too Far and Is Stuck: Step-by-Step Troubleshooting
Learn safe, practical steps to diagnose and fix a garage door that opened too far and is stuck. This GarageDoorAdjust guide covers diagnostic flow, step-by-step fixes, and prevention tips for homeowners.

Most likely the issue is a misaligned track or an incorrect limit switch setting. Start by unplugging the opener and disconnecting the door from power, then check for obvious binding or obstructions. If the door still won’t reset, follow the diagnostic flow and proceed with the safe, step-by-step fixes described here.
Problem overview
The situation where a garage door opened too far and is stuck can feel alarming, especially if your vehicle or a person is nearby. The door may sit awkwardly on the track, grind or wobble, or refuse to move in either direction. According to GarageDoorAdjust, most cases start with a simple misalignment or an incorrect limit switch setting. In homes, this is surprisingly common after a minor bump, a heavy wind, or a recent power interruption. Before you panic, take a deep breath: you can diagnose and fix many of these issues with basic safety steps, common-sense checks, and a planned diagnostic flow. The goal is to restore safe, controlled movement and prevent a repeat of the problem. This guide is designed for homeowners looking to fix the issue safely and avoid costly service calls.
Immediate safety steps
Safety must come first when dealing with a stuck door opened too far. Immediately unplug the garage door opener and, if possible, disconnect the door from the automatic system by pulling the emergency release cord. Do not try to pry or lift a heavy door by hand unless you have help; doors are heavy and springs can cause serious injury. Clear the area of children and pets and keep clear of pinch points along the bottom and tracks. With power off, inspect for obvious obstructions on the floor, such as tools or debris, that might be jamming the track. If you notice visible damage to tracks, brackets, or rollers, stop and seek professional help. Once the area is clear, you can continue with careful inspection of the track and rollers, which is the safest next step.
Visual and mechanical checks to perform
Start with a visual scan for obvious misalignment: is the track bent, are the rollers jammed, is the door sagging on one side? Look for loose brackets, missing screws, or paint buildup that hides a misalignment. Check the rollers and hinges for wear or cracks; if they roll stiffly or wiggle, they may need replacement. Inspect cables and torsion hardware—do not touch or adjust torsions if you are not trained. If the door shows signs of binding during manual movement, note whether the issue is on the left track, right track, or both. These observations help narrow down the cause.
Note: If you see frayed cables, a cracked track, or any sign of spring wear, stop immediately and call a professional. These parts can be dangerous to handle without proper training.
Safety sensors and opener settings
Modern garage doors rely on safety sensors and door-open limits. If the limit switch is off, the door can end in an overextended position and appear stuck. Inspect the safety beams at the bottom of the door opening—make sure the lenses are clean and aligned. Remove any objects blocking the beam and re-align the sensor brackets if necessary. After cleaning and re-aligning, reset the opener according to the user's manual and re-test with the door at a normal height. If the door still opens too far and is stuck, continue with the diagnostic flow. Remember, if you doubt your ability to safely perform these tests, call a professional.
Diagnostic flow overview
This section maps symptoms to likely causes and practical fixes. If the door opened too far and is stuck, prioritize checking the track alignment and the opener limit switch, as these are the most common culprits. Use a simple decision tree: (1) Is the track visibly straight and securely fastened? (2) If yes, is the limit switch properly set? (3) Do safety sensors read correctly on a test cycle? The flow helps you decide which fix to attempt first and when to call a professional. Based on GarageDoorAdjust Analysis, 2026, most cases resolve after basic alignment or limit-switch adjustments.
Pro-tip: Document what you observe each time you test, so you or a technician can track changes over time and avoid repeating the same steps.
Prevention and maintenance
To reduce repeated jams, perform a light monthly inspection: wipe away dust, debris, and lubrication buildup from tracks; verify mounting screws are tight; and test the door's balance by manually raising and lowering it halfway. Lubricate moving parts with a silicone-based spray, not oil, and avoid getting lubricant on the pulleys or sensors. Schedule an annual professional inspection if you notice repeat sticking or unusual noises. Regular maintenance lowers the risk that a door opens too far and is stuck again.
Steps
Estimated time: 45-60 minutes
- 1
Disconnect power and secure the door
Unplug the opener and apply a temporary manual hold to prevent sudden movement. If possible, engage the emergency release to separate the door from the opener. Ensure the area is clear of people and objects.
Tip: Never rely on the opener for manual lifting; secure the door with a friend or a tool to hold it in place. - 2
Test manual operation safely
With the door disconnected, try to move it slowly by hand to find where it binds. Note if movement is smooth on one side or if it sticks at a certain height.
Tip: Keep hands away from springs and moving parts; wear gloves for grip. - 3
Inspect track and rollers
Look for bends, dents, or loose brackets in the track. Check rollers for wear or wobble and confirm screws are tight. Clean out any debris that may cause sticking.
Tip: Use a flashlight to catch hidden burrs or rust along the track. - 4
Adjust track alignment and brackets
If you find misalignment, loosen the track bolts slightly, reposition, and retighten. Ensure the track remains straight and parallel on both sides.
Tip: Make small, incremental adjustments and recheck door operation between attempts. - 5
Check safety sensors and limits
Inspect bottom-beam sensors for dirt and alignment. Re-clear and re-mount as needed. Reset the opener limit switch following the manual.
Tip: Avoid touching sensor optics; misalignment can cause ongoing safety trips. - 6
Reconnect power and test
Reattach the door to the opener, power up, and test movement through a full cycle. If the issue persists, stop and call a professional, especially if springs or cables show wear.
Tip: Document changes and test multiple cycles gently to confirm a fix.
Diagnosis: Garage door opened too far and is stuck
Possible Causes
- highMisaligned or damaged track
- highWrongly set limit switch on opener
- mediumStripped or broken torsion cable
- lowSensor safety beam misalignment or obstruction
Fixes
- easyRealign track and tighten mounting brackets, then test door manually before re-connecting opener
- easyReset or adjust opener limit switch following the manufacturer instructions
- mediumReplace damaged rollers, cables, or other worn components; requires professional if unsure
- easyClear sensor beams and re-align safety sensors; adjust wiring if needed
Got Questions?
What is the first thing I should do if my garage door opened too far and is stuck?
Power off the opener, disconnect from power, and inspect for obstructions or obvious damage. Then follow the diagnostic flow to identify the likely cause.
Power off the opener, disconnect from power, and inspect for obstructions before proceeding with diagnostic steps.
Can I fix a misaligned track myself?
Simple track misalignment can sometimes be corrected by adjusting the track brackets and ensuring the track is straight. If there is damage, or if you’re unsure, contact a professional.
Yes, if you can clearly see and safely correct the misalignment. Otherwise, call a pro.
Should I adjust the limit switch myself?
Limit switch adjustments should follow the manufacturer’s manual. Incorrect settings can damage the opener or cause the door to slam.
Follow your manual closely; improper settings can be dangerous.
When is it necessary to replace torsion springs?
Springs are hazardous and should only be replaced by a licensed technician. If you notice fraying or cracking, stop and call a pro.
If you see wear on springs, do not attempt replacement yourself—call a trained technician.
How can I prevent this issue in the future?
Perform regular maintenance: clean tracks, tighten brackets, lubricate moving parts, and schedule annual professional inspections.
Keep it maintained and have yearly checks to prevent future jams.
Watch Video
Quick Summary
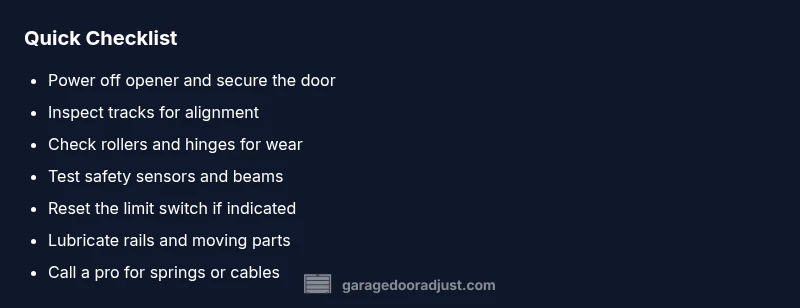
- Begin with safety-first steps and power off the system.
- Most stuck-door issues are track misalignment or limit-switch problems.
- Follow the diagnostic flow before major repairs or professional help.
- Regular maintenance prevents recurrence and extends door life.