Garage Door Not Working When Cold: Troubleshooting Guide
Is your garage door stuck in freezing temperatures? This urgent, step-by-step guide helps homeowners diagnose and fix common cold-weather issues safely, fast, and with practical tips.

When a garage door won’t work in cold weather, the most likely culprits are stiff lubrication, frozen safety sensors, or a binding track. Start by warming the rollers, clearing ice from the weatherstripping, and verifying the opener’s limit and force settings. If it still won’t move, follow the diagnostic flow for safe, effective fixes.
Why cold weather impacts a garage door
Cold temperatures make metal parts shrink slightly and lubricants thicken, which can slow or stop a door’s movement. Frost can form on safety sensors, the weatherstripping, or the track, causing misreads or binding. In many cases, problems surface first as the door sticking, taking longer to open, or a teleporting halt mid-way. According to GarageDoorAdjust, winter-related failures often begin with frozen weatherstripping and stiff lubrication that impede smooth travel. Understanding these dynamics helps homeowners act quickly and safely. This section explains the physics behind the issue and why small winter faults can escalate without immediate attention. You’ll learn which components are most vulnerable and how temperature swings influence overall door balance and opener performance.
Common symptoms you might notice
Look for signs that point to cold-related issues:
- The door hesitates, stalls, or stops partway up or down.
- The opener runs but the door doesn’t move, or moves only a few inches.
- You hear grinding, creaking, or squeaking when the door attempts to operate.
- The safety sensors show a blocked or frozen light and won’t align if frost blocks the eye.
- Weatherstripping or ice forms along the bottom seal, visibly sticking to the door or floor. These symptoms help you narrow the culprit to lubrication, sensors, or ice buildup. If you notice frayed cables or signs of spring fatigue, treat as a higher-risk scenario and proceed with professional help.
Diagnostic flow overview
A structured diagnostic flow keeps you from guessing. Start with the safest, simplest checks and move to more involved steps:
- Confirm power to the opener and disconnect to test manual operation.
- Inspect the door for ice, snow, or mud that could freeze components.
- Check weatherstripping and tracks for ice buildup.
- Test safety sensors and alignment; frost can affect sensor readings.
- If the door is heavy or difficult to lift manually, don’t force it—balance issues may require professional service. GarageDoorAdjust emphasizes a disciplined flow to catch the common early symptoms before damage occurs. This section maps a practical path from obvious causes to safer, low-risk fixes.
Step-by-step: fix most common cold-related issue
The most common cold-related fix is to address stiff lubrication and ice on the track. Start by warming the immediate area around the door and gently applying silicone-based lubricant to hinges, rollers, and the track. Clean any ice or debris from the weatherstripping and bottom seal. Manually cycle the door to distribute lubricant and verify smooth movement. Re-test the opener’s force and limit settings and ensure the door travels fully before re-engaging the opener. If the door remains resistant or shows signs of binding, discontinue attempts and seek professional help to avoid spring or cable injury.
Safety tips and mistakes to avoid
Safety cannot be overstated when working on a garage door in cold weather. Always disconnect power before manual testing, wear protective gloves, and keep hands away from moving parts. Do not try to “force” a stuck door or bypass safety sensors, as this can cause serious injury or further damage. Avoid using heat sources directly on the metal tracks or springs. If you suspect a damaged spring, broken cables, or a misadjusted balance, stop immediately and call a qualified technician.
Prevention and maintenance for winter
Prevention is easier than repair. Establish a cold-weather maintenance routine:
- Lubricate moving parts quarterly with a silicone-based lubricant, especially before winter.
- Clear snow and ice from the door edges, weatherstripping, and bottom seal daily during storms.
- Inspect tracks for misalignment and ensure fasteners stay tight.
- Test safety sensors monthly and recalibrate as needed. Following these steps reduces the chance of a cold-weather outage and keeps your door operating smoothly when temps plummet.
How to safely test the opener in cold
When testing in cold weather, do so with the door in manual mode to avoid sudden movement by the motor. Stand clear of the door path and listen for unusual noises. If the door does not freely cycle manually, do not force it; balance issues may exist. Reconnect the opener only after you confirm the door can move smoothly by hand. This approach minimizes risk and helps you decide whether to call a pro.
When to call a pro: thresholds and expectations
If you notice frayed cables, a visibly bent track, broken springs, or the door remains heavy to lift even after lubrication and ice removal, professional help is required. A qualified technician can diagnose balance, springs, and track alignment and perform safe adjustments. Expect a range of potential costs and timeframes depending on the issue and your location. The GarageDoorAdjust team recommends erring on the side of caution when winter damage is suspected.
Quick checks before you call in help
Before contacting a pro, confirm the basics: power to the unit, the remote and wall switch functionality, and visible ice on weatherstripping. Check gaskets and track cleanliness, and ensure the door moves by hand with minimal resistance. Document symptoms with notes or photos to share with the technician. These quick checks save time and help the technician diagnose faster.
Steps
Estimated time: 40-60 minutes
- 1
Check power to the opener
Verify the outlet is live and the opener receives power. If the switch or breaker tripped, reset it and test again. A simple power issue can masquerade as a cold-weather fault.
Tip: Use a multimeter or plug-in tester to confirm voltage. - 2
Inspect weatherstripping for ice
Look for ice buildup on the bottom seal and clean as needed. Ice can create a physical barrier that stops the door, especially near the floor.
Tip: Wipe with a dry cloth and use a hairdryer on low heat if needed. - 3
Lubricate moving parts
Apply silicone-based lubricant to hinges, rollers, and tracks. Cycle the door slowly to distribute the lubricant evenly and watch for smooth movement.
Tip: Avoid petroleum-based lubricants on plastic rollers. - 4
Test safety sensors
If the sensor LEDs show frost, gently defrost and realign the sensors. A misread sensor will stop the door from closing or opening.
Tip: Keep sensors clean and aligned per the manual. - 5
Check balance and manual lift
Disconnect the opener and lift the door halfway. If it’s heavy or sticks, the balance or springs may be the issue and require a pro.
Tip: Use the locking pliers to secure the door if you test manually. - 6
Review limit and force settings
Recheck the opener’s limit and force adjustments after lubrication and testing. Incorrect settings can keep the door from fully opening or closing.
Tip: Consult the manual or manufacturer support for correct values. - 7
Re-engage and retest
Reconnect power and test the door with the remote and wall control. Ensure safe travel without snagging or sudden jerks.
Tip: Stand clear of the door path during testing. - 8
Decide on next steps
If the door still won’t move or seems unbalanced, schedule a professional inspection. Cold-weather issues can indicate deeper problems.
Tip: Document symptoms to speed up diagnosis. - 9
Safety follow-up
Review safety precautions and winter maintenance plan to reduce future cold-weather outages.
Tip: Plan routine checks every 2–3 months in winter.
Diagnosis: garage door not working when cold
Possible Causes
- highlubrication has thickened in cold temperatures
- highfrozen safety sensors or misalignment due to frost
- mediumice or debris on tracks/rollers
- lowpower issues or cold-sensitive opener settings
- lowbalance issues or binding springs
Fixes
- easyWarm the area and apply silicone-based lubricant to hinges, rollers, and tracks; remove ice from weatherstripping.
- easyClear ice from sensors and ensure proper alignment; replace batteries if needed in the opener and remote.
- mediumInspect tracks for damage and ensure tracks are straight; manually cycle door to check for binding; adjust only if you know how.
- easyTest opener power, outlet, and circuit; ensure the wall control and remote transmit correctly.
- hardIf the door still binds, call a professional to assess springs and balance; do not attempt spring work yourself.
Got Questions?
Why does a garage door freeze and stop in winter?
Cold weather thickens lubricants and can freeze weatherstripping, sensors, and tracks, causing the door to bind or stall. A quick check of ice buildup and lubrication often resolves the issue, but persistent freezing may indicate a balance problem or sensor misalignment.
Cold temperatures thicken lubricant and freeze seals, which can block the door. Check ice, lubricants, and sensors, and test the balance.
Is it safe to operate the opener when sensors are iced?
Do not rely on the opener if sensors are iced or misaligned. Use manual operation after disconnecting the opener, and defrost the sensors before testing again. If misalignment recurs, consult a pro.
No. Defrost and realign the sensors before testing with the opener again.
What should I check first if the door won’t move?
Start with power to the opener, then look for ice on the weatherstripping and track, followed by sensor status. If the door moves manually with minimal resistance, the issue is likely the opener; otherwise, think balance or track problems.
Check power, ice, and sensors first; if it moves well by hand, contact to inspect the opener.
Can cold weather affect springs or cables?
Yes, cold weather can make springs feel stiffer and cables more brittle. If you notice unusual noises, gaps, or the door is very hard to lift, avoid DIY spring work and call a professional.
Cold can affect springs and cables; don’t DIY spring work if you hear loud noises or see wear.
How can I prevent cold-weather issues?
Perform regular lubrication, keep ice off seals, clear snow from the door path, and test safety sensors monthly during winter. A simple routine reduces the chance of a cold-related outage.
Lubricate moving parts and defrost sensors regularly to prevent winter problems.
When should I call a professional?
If you hear grinding, see frayed cables, bent tracks, or the door remains hard to move after basic maintenance, contact a professional. Cold-weather issues can mask serious safety concerns that require trained technicians.
Call a pro if you notice damage or persistent resistance after basic checks.
Watch Video
Quick Summary
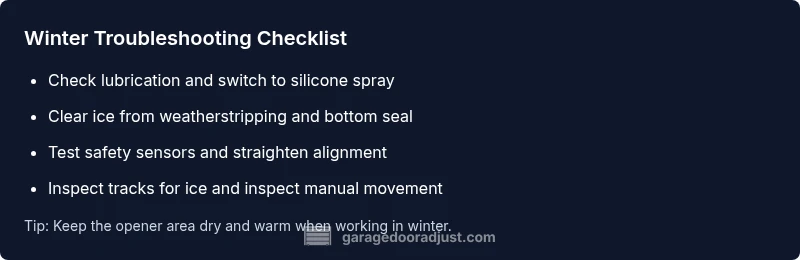
- Lubrication and ice removal are the first fixes for cold issues
- Safety sensors and tracking alignment are common culprits in winter
- Manual testing helps distinguish between balance issues and opener faults
- Call a pro for springs, cables, or persistent binding