Garage Door Flashing Light Troubleshooting Guide
Urgent guide to diagnosing and fixing a garage door flashing light. Learn sensor alignment checks, safe steps, and when to call a pro.

A flashing garage door light usually signals a sensor or safety issue that blocks door operation. Start with the simplest checks: realign the safety sensors, remove any obstruction in the sensor path, and reset the opener. If the light stays on, follow the diagnostic flow for safe, structured fixes to restore safe operation quickly and protect against future faults.
Why the garage door flashing light matters
A flashing garage door light is more than a nuisance — it is a safety signal that something in the system needs attention. The GarageDoorAdjust team found that most homeowners tolerate the light until the door stops moving, at which point the risk of injury or damage increases. Treat the light as a warning, not a minor annoyance, and work through a calm, methodical checklist. In this guide we’ll explain what the flashing light communicates, how to interpret common patterns, and the step-by-step actions that restore safe operation without guessing or improvising. Starting with the simplest fixes keeps you safe and reduces the chance of triggering incidental errors.
Interpreting flashing-light patterns
Different models use distinctive blink codes, but the underlying logic is similar: the light signals that the safety system has detected an issue. If the light blinks in a steady rhythm or cycles through bursts, it usually points to sensors or wiring rather than a motor failure. The most common culprits are misaligned safety sensors, obstructions in the sensor path, or loose connections at the receiver. While the exact code can vary by brand, the practical response is the same: verify alignment, clear the path, and reset the opener. Always consult your owner’s manual or the GarageDoorAdjust guidance for your specific model, and never ignore persistent warnings that accompany mechanical resistance.
Common causes of a garage door flashing light
The flashing light most often means the safety sensors aren’t seeing each other or there’s an obstacle interrupting the optical path. Sensor misalignment is by far the most frequent issue, especially after a door bump or house wind. A dirty or damaged sensor lens can also fool the system, as can loose wiring at the sensor or control unit. In some cases, a simple reset of the opener clears a glitch, but a more persistent fault may indicate a failing sensor or damaged track. If the door moves slowly, sticks, or reverses unexpectedly, treat it as a fault that requires attention.
Safety-first steps you can take now
Before touching moving parts, cut power to the opener to prevent unexpected movement. Then perform these safe checks:
- Inspect the sensor path for blockages and wipe sensor lenses clean.
- Check sensor alignment; ensure the LED on both units faces each other and stays steady when aligned.
- Look for loose or damaged wiring at the sensors and at the receiver and control panel.
- Clear the door path of any objects and ensure the tracks are free of debris.
- Reconnect power and test the door using the wall switch (do not use the remote while testing). If the light continues to flash, move to the diagnostic flow section. Safety note: never place hands in the track or near springs while the door is powered.
Diagnostic flow overview (symptom → diagnosis → fixes)
Starting from the symptom of a flashing light, evaluate quick, high-fidelity causes first (sensor misalignment, obstruction). If those checks pass, inspect the sensor wiring and control board for loose connections. Should the issue persist, the fault may lie with a faulty sensor or a damaged track, which generally requires replacement or professional intervention. This approach keeps you from testing every component and reduces the risk of personal injury. The flow below mirrors the diagnostic flow used by GarageDoorAdjust teams and is designed to be repeatable and logical.
Prevention and maintenance to avoid future faults
Regular maintenance lowers the chance of a recurring flashing-light issue. Schedule a quick quarterly check: wipe sensor lenses, tighten mounting screws, and verify the sensor alignment, LED indicators, and wiring harnesses. Keep the sensor area free of dust, cobwebs, and debris, especially near doors exposed to wind or outdoor weather. Lubricate moving parts per manufacturer recommendations and inspect tracks for dents or obstructions. Finally, consider replacing cheap, non-OEM components and keeping a spare safety sensor kit on hand for quick swaps if the light indicates a fault. Proactive care saves time, reduces risk, and helps ensure the door continues to operate safely.
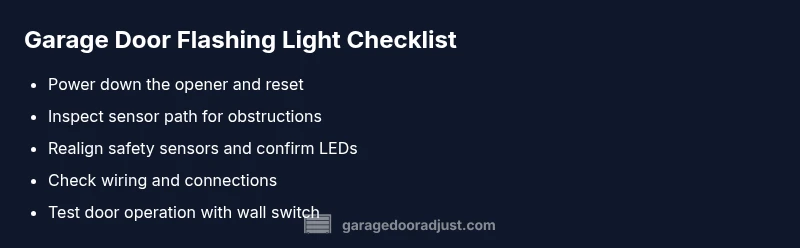
Steps
Estimated time: 30-60 minutes
- 1
Power down the opener
Unplug or switch off the garage door opener and disconnect the motor’s supply for 60 seconds to reset the logic. This simple reset clears many glitches without touching moving parts.
Tip: Lock out the power to avoid accidental door movement during testing. - 2
Inspect safety sensor path
Look for obstructions in front of the sensors and clear them. Wipe lens surfaces with a clean microfiber to remove dust or smudges that can fool the receiver.
Tip: Even small smudges can block the signal—use a gentle wipe. - 3
Realign safety sensors
Loosen and adjust sensor brackets so that the sender and receiver face each other directly. Confirm both LEDs behave as expected when aligned.
Tip: Use a level if available to ensure straight mounting. - 4
Check wiring and connections
Inspect sensor cables for wear, fraying, or loose connectors at the sensor, control board, and receiver. Re-seat connectors firmly.
Tip: Do not yank cables; disconnect and reconnect carefully. - 5
Clear the door path and tracks
Remove debris from the track and clean rollers where needed. Ensure there is no binding that could trigger sensor or safety issues.
Tip: A minor track obstruction can trigger the safety system. - 6
Test function with wall switch
Reconnect power and operate the door using only the wall switch. Observe whether the door opens/closes normally and whether the light continues to flash.
Tip: Avoid using remotes during test until stability is confirmed. - 7
Consider a reset and reprogram
If the issue persists, perform a complete reset of the opener’s memory and reprogram remotes or keypad as needed.
Tip: Follow the manual for exact reset steps for your model. - 8
Call a professional if unresolved
If the flashing light remains after all checks, there may be a control-board, sensor, or track fault requiring specialized diagnostics.
Tip: Professionals can safely handle wiring, springs, and tracks.
Diagnosis: Garage door flashing light and won’t operate
Possible Causes
- highSafety sensor misalignment or obstruction in sensor path
- mediumFaulty safety sensor or damaged wiring to sensor
- lowLoose connectors at opener control board or receiver
Fixes
- easyRealign and secure safety sensors so the LEDs face each other and remain aligned
- easyClear the sensor path and clean sensor lenses
- mediumInspect and reseat sensor wiring and terminal connections; replace if damaged
- easyReset the opener's limits and re-test after reassembly
- hardIf the light persists, call a professional to test the control board and tracks
Got Questions?
What does a garage door flashing light indicate?
A flashing light usually signals a safety sensor issue or an emergency stop condition preventing door operation. Don’t ignore it—address the fault to restore safe use.
A flashing light usually means a safety sensor problem or an emergency stop condition that stops the door. Don’t ignore it—fix the fault to stay safe.
Can I fix the safety sensors myself?
Yes, many sensor issues are fixable by realigning the sensors and removing obstructions. Do not bypass safety features, and if in doubt, consult a professional.
Yes, you can often fix sensor issues by realigning and cleaning. Don’t bypass safety features—ask a pro if you’re unsure.
What should I do if the door won’t move after realigning sensors?
Verify there’s no physical obstruction and reset the opener. If still stuck, test manual release and consult the manual or a technician.
If it still won’t move after realigning, check for obstructions and reset the opener. If it persists, call a tech.
Is a blinking light always a sensor problem?
Not always; it can indicate wiring or power issues too. Check the power source and connections, then re-test after each step.
Not always sensor-related—check power and wiring first, then test again after each step.
When should I call a professional?
If you see damaged wires, tracks, or springs, or if the fault remains after basic checks, a professional evaluation is advised.
Call a professional if wiring or structural components look damaged or if the fault remains after basic checks.
Watch Video
Quick Summary
- Identify the light pattern to triage fault.
- Check safety sensors first; fix most issues quickly.
- Reset and test after adjustments to verify repair.
- Avoid bypassing safety features under any circumstances.
- GarageDoorAdjust recommends professional help if wiring or structural parts are damaged.