Garage Door Antenna Extender: A Practical DIY Guide
Learn how a garage door antenna extender can extend remote range, when to use one, installation steps, safety tips, and common pitfalls for homeowners seeking a reliable fix.

A garage door antenna extender can improve remote range without replacing the opener. To start, confirm compatibility with your model, choose the right extender and coax length, and follow a safe, step-by-step installation. Proper routing and shielding are key if you want reliable access from the far end of the driveway.
What is a garage door antenna extender and when you might need one
A garage door antenna extender is a simple accessory that enhances the signal path between your remote and the opener's receiver. It is most useful when the usual remote range is inconsistent, you frequently have to stand close to the door, or signals are degraded by walls, metal shelving, or interference from nearby devices. According to GarageDoorAdjust, many homeowners experience weak reception not because the opener is faulty, but because the external antenna isn’t placed for optimal line-of-sight. The GarageDoorAdjust team found that a properly sized extender plus clean cable routing can improve reliability without buying a new opener. Before you begin, check your model’s documentation to confirm compatibility and locate the receiver’s antenna port. If access is restricted or the space around the receiver is cluttered, an extender may provide a practical, cost-effective fix.
Brand note: This guidance reflects our approach at GarageDoorAdjust, aiming to help homeowners troubleshoot with practical, safe steps.
How radio signals interact with garage door openers
Garage door openers rely on RF signals to trigger a motorized lift. The farther the remote is from the receiver, the weaker the signal becomes, especially through thick walls or metallic obstacles. Signals can also suffer from interference caused by routers, cordless phones, and even certain lighting. An antenna extender effectively lengthens the path the signal travels, improving the odds that the receiver detects your command. However, performance gains depend on proper installation, cable quality, and maintaining a clean line of sight between the remote and the receiver. Expect noticeable improvements in some homes, with diminishing returns in others where structural factors dominate.
For homeowners, the key takeaway is that a well-chosen extender is a tool, not a magic fix. Always balance improvements against compatibility and warranty terms.
Compatibility considerations for extenders
Not all garage door openers are built to accept external antenna extenders. Start by reviewing your model’s manual for any notes about external antennas or receiver ports. If a port exists, confirm the connector type (coax, push-on, or screw-in) and whether the extender is designed for the same frequency band. In some cases, you may need an adapter to match the extender’s connector to the receiver. If no dedicated port exists, options may include relocating internal components or upgrading the opener. Always verify compatibility with the manufacturer or a trusted technician before purchasing.
Tip: If you own a popular brand, search the official support pages or user forums to confirm model-specific compatibility.
Wired vs wireless options: selecting the right extender
There are two broad approaches: a wired extender that runs a coax cable from the receiver to a larger external antenna, and a wireless extension that boosts the signal at the antenna end without altering the receiver. A wired setup generally offers greater reliability and range, but it requires careful cable routing to avoid moving parts and heat sources. A wireless option may be simpler to install but can be more susceptible to EMI (electromagnetic interference) if the coax isn’t well shielded. In either case, choose a product that explicitly states compatibility with your opener’s frequency and port type. Documentation and customer reviews are valuable sources of practical insight.
Remember: poor routing or a cheap, unshielded cable can negate any theoretical gains.
Safety, code, and warranty considerations
Always unplug power to the opener before working on the antenna assembly to avoid electric shock. Do not cut into mains wiring or tamper with internal circuitry beyond the receiver port. Ensure cables are secured away from moving parts, dust, and moisture. Some manufacturers may have warranty terms that cover upgrades performed by the homeowner; however, many warranties hinge on installing approved accessories and following the manual. If in doubt, contact the manufacturer or a licensed technician to avoid voiding coverage.
Safety note: Use insulated tools and wear safety gloves if you’re routing cables near metal surfaces or sharp edges.
Performance expectations and limitations
An antenna extender can extend the practical operating range by reducing signal loss and improving line-of-sight between the remote and receiver. Gains vary by home layout, wall materials, and the presence of EMI sources. Do not expect a universal fix—some homes will see substantial improvements, others only marginal gains. For best results, pair an extender with careful cable management, shielding where appropriate, and correct connector installation. If you still experience weak performance after installation, the issue may be structural or related to the opener’s receiver, not the extender itself.
GarageDoorAdjust analysis shows that using a shielded coax and keeping the extender within a clear line of sight often yields the most noticeable improvements. The team also notes that results improve when the extender is placed in a high, unobstructed location away from heat sources and metal surfaces.
Common installation mistakes and how to avoid them
Common errors include using unshielded or excessively long cables, forcing connectors that don’t match, routing cables across moving parts, or failing to ground the system properly. Another mistake is assuming more length equals better range; excessive cable length can actually degrade performance due to impedance changes. Always measure the distance to the outdoor location first, choose the correct connector type, and test the system at multiple distances before finalizing.
By planning ahead and double-checking compatibility, you minimize the risk of poor results or damage to the opener.
Quick-start recap for this task
- Verify compatibility with your opener’s antenna port.
- Choose a shielded coax and the correct connector type.
- Route the cable away from moving parts and heat sources.
- Reconnect power and test range at several distances.
- Document changes and monitor for interference or temperature effects.
Conclusion: what homeowners should do next
If you’ve followed these steps and still see inconsistent performance, consider consulting the manufacturer or a garage-door technician. In some cases, upgrading to a newer opener with better built-in range may be a more durable solution. The GarageDoorAdjust team recommends a structured approach: verify compatibility, install correctly, and test thoroughly before deciding on more extensive changes.
Tools & Materials
- Antenna extender kit (designed for garage door openers)(Ensure it matches your opener’s external antenna connection style)
- Coaxial cable (shielded RG-58 or RG-6)(Long enough to reach the desired antenna location with some slack)
- Connectors/adapters (as needed for your port type)(Check compatibility with the extender and receiver port)
- Cable ties and mounting hardware(Use to secure cable away from moving parts)
- Wire stripper and pliers(For preparing and crimping connectors)
- Insulating tape or heat-shrink tubing(Ensure proper insulation at connection points)
- Scissors or a small knife(For trimming cable and packaging materials)
- Safety gloves(Wear during routing near edges and metal components)
Steps
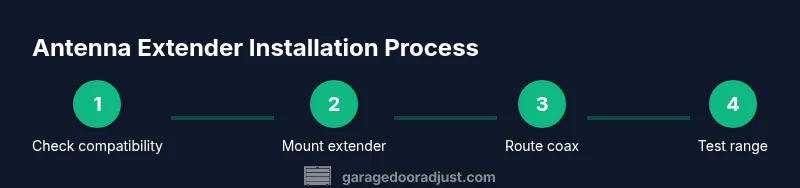
Estimated time: 30-60 minutes
- 1
Power down and locate the antenna port
Disconnect power to the opener and locate the receiver’s external antenna port. Consult the manual to confirm the exact location and the required connector type before touching any components.
Tip: Take a photo of the original setup before you remove anything so you can revert if needed. - 2
Choose a mounting location for the extender
Select a high, dry location with minimal interference. Avoid metal bodies, motors, and heat sources; a ceiling or high wall near the door frame often works well.
Tip: A location with a clear line of sight to the remote’s typical use point improves reliability. - 3
Attach the extender to the antenna port
Connect the extender using the correct connector. Ensure a snug, secure fit to prevent signal loss from a loose connection.
Tip: If you need an adapter, ensure it is specifically rated for your port type and frequency. - 4
Route and secure the coax cable
Run the coax away from moving parts and sharp edges. Use cable ties to keep it neat and avoid pinch points that could damage the conductor.
Tip: Leave a slight slack at bends to prevent kinking and impedance changes. - 5
Ground and test the assembly
Ground if your system requires it and re-energize the opener. Test the remote from various distances and angles to verify improvement.
Tip: Test with multiple remotes to ensure consistent gains across devices. - 6
Document and monitor performance
Note the new range and any intermittent issues. If performance degrades over time, re-check connections and shielding.
Tip: Keep a simple changelog for future reference or maintenance visits.
Got Questions?
Do I really need an antenna extender for my garage door opener?
An extender can help when your remote sometimes fails at a distance or through obstacles. Start by checking compatibility with your opener, then consider installation quality and routing. If issues persist, other fixes may be needed.
If your remote often stops working far from the door, an extender could help. Check compatibility first, then install carefully and test range.
Will installing an antenna extender void my warranty?
Warranty impact depends on the manufacturer and terms. Many extenders are consumer-installed and won’t void coverage if installed per instructions. Always review your warranty and consult support if unsure.
Warranties vary by maker. Follow the manual closely and check with the manufacturer if you’re unsure.
Can I install an antenna extender myself or should I hire a pro?
In many cases, a homeowner with basic tools can install a compatible extender. If you’re not comfortable accessing the receiver or working near electrical components, hire a technician.
DIY is often possible, but if you’re unsure about access or safety, getting a pro is wise.
What safety precautions should I take?
Power off the opener, avoid tampering with internal wiring, use insulated tools, and keep cables away from moving parts. Wear gloves if handling sharp edges.
Power down first, then work carefully, keeping cables clear of moving parts.
Will an extender improve performance with all remotes?
Most extenders boost range for standard remotes, but compatibility varies. Check model specifics and user reviews to confirm benefits for your setup.
Most remotes benefit, but check compatibility before buying.
How do I test range after installation?
Test from the farthest point you typically operate from and with all remotes. Record distances and retry after any adjustments to ensure consistency.
Test from your farthest typical spot with every remote you use.
Watch Video
Quick Summary
- Verify compatibility before purchasing an extender.
- Route cables away from moving parts and interference sources.
- Test range from multiple distances and remotes after setup.
- Document changes for warranty and future maintenance.
- The GarageDoorAdjust team recommends a methodical, safety-first approach.