Craftsman Garage Door Opener Repair: A Complete How-To Guide
A practical, safety-first guide to diagnosing and repairing Craftsman garage door opener issues, with tool lists, step-by-step instructions, maintenance tips, and guidance on when to call a pro.

By following this guide, you will diagnose and repair common Craftsman garage door opener issues with safe, low-risk fixes. You’ll verify power, sensors, limit settings, and basic mechanical wear, perform essential adjustments, and test operation before deciding if a professional service is needed. This snippet helps search engines answer quickly while guiding homeowners through a structured repair flow.
What is a Craftsman Garage Door Opener?
A Craftsman garage door opener is a popular mid-range unit that combines a motor, drive system (chain or belt), safety sensors, and a wall-mounted control. When it functions well, it provides reliable, quiet operation and convenient control from remotes or smart devices. The term 'craftsman garage door opener repair' covers a range of tasks—from replacing worn gears inside the unit to adjusting travel limits and recalibrating safety sensors. Understanding the basic roles of each component helps you diagnose issues quickly. The opener receives power from a standard outlet and signals the door to move via a logic board; the drive system translates motor torque into linear motion; safety eyes detect obstructions and reverse the door. Common problems often stem from simple causes: dead batteries, misaligned sensors, dirty tracks, or worn gears. With proper safety precautions, homeowners can perform many fixes without specialized tools.
Common Symptoms You Might Encounter
Is your Craftsman garage door opener acting up? Common symptoms include a remote that won’t respond, a wall control that does nothing, or a door that starts to move but stalls, reverses, or stops before fully opening. You might hear grinding, buzzing, or chirping from the unit, or you notice the door opening unevenly or binding along one side. Some issues stem from simple battery changes or sensor misalignment, while others come from mechanical wear in gears or worn sprockets in the drive train. By observing when the problem occurs (on cold mornings, after a recent impact, after a long period of inactivity) you can narrow down the root cause. It’s also useful to note if the issue affects only one function (e.g., remote) or all functions (e.g., wall button) to decide whether the problem is electronic, sensor-based, or mechanical.
Safety Essentials Before You Begin
Before you touch any moving parts, ensure your area is clear and the power is off. Unplug the opener from the outlet or switch off the circuit to avoid accidental movement. Keep kids and pets away and wear safety glasses. Use a sturdy ladder and good lighting. Never attempt repairs when you are unsure about components, especially around wiring or the torsion spring system. If anything feels dangerous, stop and seek professional help. This section emphasizes that staying safe always comes first in craftsman garage door opener repair.
Understanding Your Opener's Wiring and Sensors
Your opener relies on a simple control circuit, safety sensors, and wiring harnesses that connect the wall switch, remote, and motor. Misaligned safety eyes will trigger a reverse or no-go response, while loose wires and corroded contacts can create intermittent failures. Inspect the eye sensors for dirt, ensure they face each other directly, and verify the LED indicators on the sensors. Check the control wiring at the terminal strip for loose screws and damaged insulation. A clean, well-connected wiring harness minimizes false triggers and improves reliability. Remember: never bypass safety features; they protect people and pets from injury.
Diagnosing Problems Without Tools
Start with the basics: confirm power availability, verify the wall switch works, and swap remote batteries to eliminate electronic power issues. If the remote and wall switch both fail, focus on the door’s travel path, track alignment, and signs of mechanical wear. Listen for unusual noises that indicate worn gears or a failing drive belt. Check for obstructions on the track and ensure the door is balanced manually when the opener is off. This approach helps you separate electronic, sensor, and mechanical problems without specialized equipment.
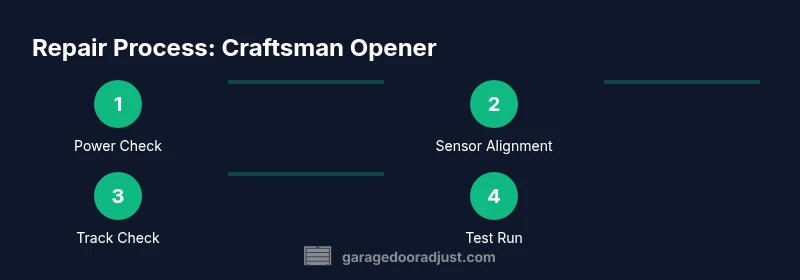
The Step-By-Step Troubleshooting Flow
This section provides a high-level troubleshooting flow you can follow before diving into tool-heavy repairs. Start with power checks, then sensor alignment, track cleanliness, and limit settings. If the door operates manually but stalls under the opener, the issue likely lies with the opener’s drive train or control circuitry. If it reverses on contact, sensor alignment or miscalibration is the culprit. By documenting symptoms and test results, you’ll have a clear path for either a DIY fix or professional service. Always prioritize safety and avoid touching torsion springs unless you are a trained technician.
When to Call a Pro for Craftsman Equipment
Some issues require professional expertise: torsion spring work, major motor failures, or uncertain electrical diagnostics. If you observe frequent resets, burn smells, smoking, frayed wires, or inconsistent sensor behavior after attempts to repair, contact a pro. A qualified technician can safely test the limits, replace worn gears, and address structural problems without risking injury or voiding warranties. This section explains clear criteria for escalating from DIY to professional service.
Maintenance Habits for Longevity
Regular maintenance extends the life of your Craftsman garage door opener. Schedule biannual checks to verify power, sensor alignment, and track cleanliness. Lubricate moving parts with a silicone-based product, not oil-based compounds on nylon wheels. Keep the area free of debris and inspect brackets for looseness. Periodically reprogram remotes and test safety sensors. A proactive maintenance routine reduces sudden failures and keeps the system operating smoothly.
Quick Safety Checklist After Repair
After completing repairs, perform a quick safety checklist: restore power, run the door several times to observe travel, verify the door reverses on contact with a test object, and confirm the sensors illuminate and align correctly. Confirm the door stays balanced when moved manually and does not drift. If any test fails, re-evaluate the root cause or seek professional assistance.
Tools & Materials
- Phillips and flat-head screwdrivers(Assorted sizes for opener housing and mounting screws)
- Adjustable wrench set(For brackets and hardware adjustments)
- 5/16-inch and 1/4-inch socket set(Helpful for hardware on the opener and track brackets)
- Multimeter or voltage tester(To verify power and sensor circuit integrity)
- Ladder(Reach the ceiling-mounted opener safely)
- Silicone-based lubricant(Lubricate rails and moving parts; avoid petroleum-based products)
- Replacement safety sensors or LED eyes(Have spares on hand if sensor alignment is an issue)
- Wire nuts and electrical tape(For wiring connections as needed)
- Torx/hex keys(Some Craftsman models use Torx screws)
Steps
Estimated time: 60-90 minutes
- 1
Power down and secure the door
Unplug the opener from the outlet or switch off the circuit. Verify the door cannot move by manually locking it in a closed position if possible. This prevents unexpected movement while you inspect components.
Tip: Always confirm power is disconnected using a tester before touching any wiring. - 2
Test the wall control and remote
Use the wall control and a remote to verify basic response. If there is no response, replace the remote batteries and re-pair with the opener according to the model's instructions.
Tip: Keep track of the pairing sequence and any error codes displayed on the unit. - 3
Check safety sensors alignment
Inspect both safety eyes; clean, align, and ensure they face each other directly. Misalignment is a common cause of automatic reversal or non-response problems.
Tip: If the LEDs on the sensors indicate a fault, adjust until the light is steady. - 4
Inspect limit and travel settings
Locate limit screws on the opener and verify travel ends align with the fully closed and fully open positions. Incorrect settings can cause improper stopping points or reversal.
Tip: Make small adjustments and test the door between attempts; overcorrection is common. - 5
Inspect tracks and adjust alignment
Look for obstructions, dents, or debris on the rails. Ensure tracks are parallel and mounted securely. Clean and realign as needed.
Tip: Use a straight edge to verify tracks run true from top to bottom. - 6
Lubricate moving parts
Apply silicone lubricant to rollers, hinges, and the track where metal parts rub. Wipe away excess to prevent dust buildup.
Tip: Avoid oil-based lubricants on nylon wheels and plastic components. - 7
Inspect the drive system components
Look for worn gears or a frayed belt/chain inside the opener housing. Do not attempt large repairs; note any wear and plan for professional replacement if needed.
Tip: Document noises and wear; this helps when you call for service. - 8
Reconnect power and test operation
Restore power and run the door through several cycles. Observe for smooth movement, proper stopping, and safe reversal on contact.
Tip: If anything still feels unsafe or inconsistent, stop and seek professional help.
Got Questions?
Why won’t my Craftsman garage door opener respond to the remote?
Begin by checking the batteries and repairing the remote with the opener. If there is still no response, confirm the receiver inside the unit is functioning and ensure the antenna is intact. Intermittent or non-existent response may indicate a sensor or control issue that requires deeper inspection.
If the remote isn’t working, swap the batteries first and re-pair it with the opener. If it still fails, further inspection of the receiver and control circuits may be needed.
How do I reprogram a Craftsman garage door opener remote?
Enter programming mode on the opener (usually by pressing a learn button) and then press the remote button to pair its signal with the receiver. Hold the remote until the indicator light confirms a successful connection, then test operation.
Put the opener into programming mode, press your remote button, and test it to ensure it’s paired correctly.
Is it safe to lubricate the tracks and hinges myself?
Yes, use a silicone-based lubricant on metal tracks and hinges. Avoid petroleum-based products and avoid lubricating nylon rollers if the manufacturer warns against it. Lubrication reduces friction and noise but should be done sparingly.
Lubricate with silicone on metal parts, but check your model’s guidelines for rollers.
What should I do if the door is unbalanced or binding?
An unbalanced door can strain the opener and cause unsafe operation. If you notice binding or difficulty lifting, stop using the opener and inspect tracks and hinges. If imbalance persists, seek professional assistance.
If the door binds or doesn’t balance properly, stop using it and get a pro if needed.
When should I call a pro for Craftsman opener repair?
Call a pro if you encounter torsion spring work, persistent electrical faults, or sensor misalignment that you cannot resolve with basic troubleshooting. A licensed technician can safely diagnose and replace worn components.
Call a pro if there’s spring work or unresolved electrical or sensor issues.
How often should I perform maintenance on my Craftsman opener?
Plan simple maintenance every 3 to 6 months: test operations, clean tracks, lubricate moving parts, and check hardware. Regular upkeep helps prevent major failures.
Do light maintenance every few months to keep it running smoothly.
Watch Video
Quick Summary
- Inspect power, sensors, and limits before heavy repairs
- Perform basic maintenance to extend opener life
- Use silicone lubricant on moving parts, not oil-based products
- Test after every repair and document results
- Call a pro for springs or major electrical concerns