How to Diagnose and Repair a Craftsman Garage Door Open
Learn to diagnose, repair, and safely maintain a Craftsman garage door opener with a step-by-step approach, practical tips, and safety guidance for homeowners.

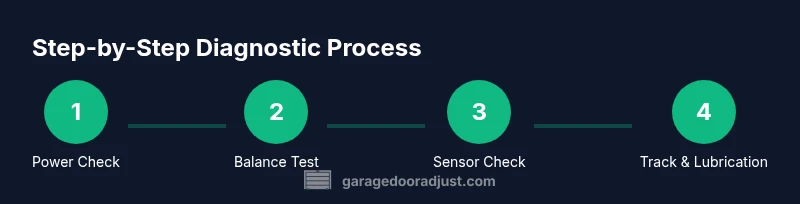
This step-by-step guide helps homeowners diagnose and repair a Craftsman garage door open safely. You’ll verify power, test the opener limits, check safety sensors, inspect tracks and rollers, and perform basic lubrication—covering common causes from misalignment to sensor faults. Follow the sequence to minimize risk and avoid costly mistakes.
Understanding the Craftsman garage door open system
A Craftsman garage door open system is a coordinated set of components that includes the electric opener, a door assembly with tracks and rollers, springs for balance, and safety features like photo-eyes. When a craftsman garage door open stops responding, the root cause is often simple and related to power, alignment, or sensor signals. According to GarageDoorAdjust, the most reliable way to approach a problem is to start with the basics: confirm power, verify that the door is balanced manually, and test safety sensors before making adjustments. This approach minimizes risk and helps homeowners identify whether the issue is with the opener, the door hardware, or the electronic safety features. Throughout this guide, you will see how to diagnose while keeping your family safe and preserving the door’s longevity.
This article uses the phrase craftsman garage door open repeatedly to emphasize the specific system type and to support search relevance for homeowners troubleshooting a Craftsman opener.
noteTagId”:null},{
description
Tools & Materials
- Safety glasses(ANSI Z87+ rated to protect eyes from debris during inspection and testing.)
- Work gloves(Grip and protect hands when handling springs, tracks, or heavy parts.)
- Ladder or reach tool(Access high components safely without overreaching.)
- Flathead screwdriver(Assist in sensor alignment and panel access.)
- Phillips screwdriver(General hardware adjustments and alignment.)
- Adjustable wrench(Tighten mounting bolts and hardware on the opener. Note: avoid over-tightening to prevent stripping threads.)
- Socket set(Remove or install nuts on track brackets or motor assembly.)
- Multimeter (optional)(Check wiring continuity and sensor voltage if you suspect an electrical fault.)
- Lubricant spray (silicone or white lithium grease)(Lubricate tracks, rollers, and hinge points for smooth operation.)
- Rags or shop towels(Clean dust and debris from tracks and sensors.)
- Torque driver or drill with bits (optional)(If mounting screws or brackets loosen, use controlled torque.)
Steps
Estimated time: 60-90 minutes
- 1
Power down and prepare
Unplug the opener or switch off the circuit breaker and unplug the remote receiver if applicable. Confirm the outlet is live with a tester. This prevents accidental activation during inspection and protects you from shocks while you test components.
Tip: Always start with power off when accessing the motor and internal wiring. - 2
Test manual balance
Disengage the door from the opener by pulling the emergency release handle. Manually lift the door halfway; it should stay in place without dropping. If the door sinks or rises on its own, the balance system (springs or cables) may be faulty.
Tip: Do not force the door. If it feels heavy or unstable, wait for a pro to handle spring work. - 3
Inspect tracks and rollers
Look for dents, debris, or misalignment in the vertical and horizontal tracks. Slide a straight edge to check for gaps. Clean and re-seat rollers if they appear worn or binding occurs.
Tip: Lubricate the rollers lightly after cleaning if they’re metal; avoid over-lubricating plastic rollers. - 4
Check sensor alignment and wiring
Ensure photo-eye sensors are clean and aligned facing each other within 6 inches. Inspect wiring for wear or disconnection at the sensor and terminal block.
Tip: Dirty sensors or loose wires commonly cause the door to stop or reverse unexpectedly. - 5
Test opener limits and force settings
With the door fully closed, adjust the limit screws per manufacturer’s guide to ensure the door travels to the correct fully open and fully closed positions. Verify the force setting is appropriate so the door doesn’t slam or stall.
Tip: Make very small adjustments and re-test after each change. - 6
Lubricate and reassemble
Lightly lubricate all moving parts—hinges, rollers, and track rails. Reconnect the emergency release and test the door with the opener engaged.
Tip: Wipe off excess lubricant to avoid attracting dust. - 7
Power up and perform a full test
Plug the unit back in or restore power, then run the door through several cycles using the remote and wall control. Listen for unusual noises and watch for smooth, consistent operation.
Tip: If any cycle fails, re-check safety sensors and track alignment before calling a pro.
Got Questions?
What should I do first if my Craftsman garage door opener won’t respond?
Start by ensuring the power is on and the opener is receiving electricity. Check the remote and wall switch for correct pairing and test the opener manually after disconnecting it from the chain/belt. If there’s no power or the device won’t respond, inspect safety sensors and wiring.
First, check power and basic controls; if still unresponsive, test sensors and wiring before proceeding with more advanced checks.
Why does my Craftsman door reverse when closing?
Reversal during closing usually points to misaligned safety sensors, a misadjusted close limit, or an obstruction in the path. Clean and align the photo-eyes, adjust the close limit slowly, and remove any debris blocking the door path.
If it reverses, focus on safety sensors, then limit settings, and check for obstructions.
Can I adjust springs or tracks myself?
Do not attempt to adjust torsion springs yourself. Springs are under high tension and can cause serious injury. For tracks, you can inspect alignment and debris, but for major repairs, contact a licensed technician.
Springs are dangerous; leave adjustments to professionals; you can check tracks for alignment and debris safely.
How do I reset a Craftsman garage door opener remote or wall console?
Use the dealer’s pairing procedure described in your manual—typically involves holding a learn/pairing button while the door is in a specific state. Re-pair the remote and test the range.
Resetting usually means re-pairing the remote with the opener using a small button on the unit.
What maintenance should I perform regularly on a Craftsman garage door opener?
Inspect the balance, track condition, and safety sensors every 3-6 months. Lubricate moving parts, check belt/chain tension, and replace worn rollers to extend life and ensure safe operation.
Do periodic checks and lubrication to keep things running smoothly.
When is it time to replace a Craftsman garage door opener?
If the opener is noisy, unreliable, or repeatedly fails even after adjustments, or if safety features no longer work, it’s wise to consider replacement with a newer model for reliability and energy efficiency.
If it keeps failing or feels unsafe, consider upgrading to a newer model.
Watch Video
Quick Summary
- Verify power and safety before any inspection
- Balance and sensor checks are pivotal to diagnosing a craftsman garage door open
- Keep the door manual balanced; if it doesn’t hold position, call a pro
- Address track and hinge wear promptly to prevent bigger damage
- Always test after each adjustment and document changes for future maintenance