Chamberlain RJO70: Install, Diagnose, and Repair Guide
A comprehensive, step-by-step guide to diagnosing, installing, and maintaining the Chamberlain RJO70 garage door opener, with safety notes, tools, and expert tips from GarageDoorAdjust.

In this guide, you’ll learn to diagnose, install, and tune the Chamberlain RJO70 garage door opener. You’ll cover safety shutdowns, rail alignment, sensor calibration, belt/chain tension, and routine maintenance. Before you begin, assemble basic hand tools and a helper if possible. According to GarageDoorAdjust, proper setup minimizes opener strain and extends system life, especially for the chamberlain rjo70 model.
Understanding the Chamberlain RJO70: design, compatibility, and symptoms
The Chamberlain RJO70 is a popular residential garage door opener known for its quiet operation and reliable performance. When diagnosing issues with the chamberlain rjo70, homeowners should first understand the system’s core components: the motor unit, drive belt or chain, rail assembly, torsion or extension springs in the door, safety sensors, and limit switches. Recognizing common symptoms—unusual noises, slow travel, opener reversals, or failure to respond to remotes—helps narrow the cause to one of a few subsystems. According to GarageDoorAdjust, most issues originate from misalignment, insufficient lubrication, or sensor miscalibration, rather than a failed motor. This section outlines how the RJO70’s architecture influences troubleshooting, repair steps, and maintenance planning for durable operation.
Safety-first foundation: power, wiring, and sensor safety
Safety is non-negotiable when working on any garage door opener. Always disconnect power before inspecting mechanical parts or wiring, and keep hands clear of the track while testing. The RJO70 employs photoeye sensors that detect obstructions; misalignment or damaged wiring can trigger false beeps or prevent door reversal. Use a voltage tester to confirm the power is off, and verify that the sensors have an unobstructed path between them. A small amount of silicone-based lubricant on moving metal parts reduces friction and wear, but avoid getting lubricants on sensor lenses or the tracks themselves. A deliberate, cautious approach reduces the risk of injury and costly mistakes.
Tools and environment: preparing your workspace
Preparing the right space and tools speeds up completion and minimizes risk. Choose a clean, dry area with good lighting and enough room to work on both the opener and the door. Gather essential items such as screwdrivers (Phillips and flathead), adjustable wrench, pliers, a voltage tester, safety glasses, a step ladder, a flashlight, and silicone-based lubricant. Keep a digital camera or smartphone handy to document presets and screw locations. If you encounter stubborn fasteners, apply penetrating oil and allow a few minutes for it to work, but never force components that seem stuck. A calm, methodical setup improves accuracy and safety.
System overview: rails, opener, belt/chain, gears, and safety sensors
Knowing how the RJO70 components fit together makes diagnosis easier. The drive system (belt or chain) moves the trolley along the rail; the trolley connects to the door via a curved arm or linkage. Gears and limit switches control travel and force, while safety sensors monitor obstruction and auto-reverse. If any part is misaligned or dirty, the whole system compensates awkwardly, producing sounds, jerky motion, or delayed responses. Regularly inspecting rails for dents, cleaning buildup, and ensuring fasteners remain secure helps maintain smooth operation. Remember that springs carry most of the load; only a trained professional should service springs due to high tension.
Diagnostic checklist: signs your RJO70 needs attention
A structured diagnostic helps isolate issues quickly. Check for: (1) noisy operation or grinding sounds; (2) door not staying in balance when opened manually; (3) inconsistent reversals or arcing sensor beams; (4) slow door movement or stopping mid-travel; (5) loose hardware or visible wear on gears and wheels. Record any patterns, such as issues occurring after temperature changes or after a remote control change. Use the checklist to decide whether to perform simple maintenance, recalibrate settings, or seek professional assistance. This proactive approach reduces downtime and extends the life of the opener.
Installation basics: when replacement is appropriate
If the RJO70 is aging or frequently failing, a replacement can be more cost-effective than repeated repairs. Begin by verifying compatibility with your door height, weight, track type, and wiring. Remove power, detach the old opener safely, and reassemble the new unit according to the manufacturer’s instructions. Mount the rail securely, re-connect the trolley coupler, and verify the drive belt or chain tension is within the recommended range. Always follow local electrical codes and store removed parts safely for future reference.
Maintenance routines to extend life
Preventive maintenance pays off in reliability and quiet operation. Schedule periodic lubrication of bearings, gears, and moving joints with silicone-based products; inspect and tighten brackets; clean sensors and lenses; and recalibrate travel limits if you notice drift. Regular balance checks reduce stress on springs and motor; if the door pulls unevenly, address hinge wear or a misaligned track. Keeping a maintenance log helps identify patterns over time and supports smarter replacements when needed.
Troubleshooting common failures and fixes
Most chamberlain rjo70 issues fall into a few categories: power or remote problems, sensor misalignment, and mechanical wear. Power issues often stem from a dead remote or depleted batteries, but also from outlet faults or circuit resets. Sensor problems are frequently caused by misalignment or dirty eyes; re-center and clean the sensors and check for obstructions. Mechanical wear, including track damage or worn rollers, typically requires cleaning, realignment, or component replacement. For persistent problems that don’t resolve with basic maintenance, consult a professional to avoid unsafe repairs.
When to upgrade or call a pro and budgeting tips
If the RJO70 shows frequent outages, unpredictable travel, or failing safety tests, upgrading to a newer, energy-efficient model can reduce energy use and service calls. Budget for parts like sensors, rollers, and weather seals, as well as potential professional labor if springs or structural components require service. Keep receipts and maintenance records; many homeowners recover the cost of upgrades through improved reliability and added home value. The GarageDoorAdjust team recommends planning a preventive maintenance window each year to catch issues early before they escalate.
Tools & Materials
- Phillips head screwdriver(For screws on covers and brackets.)
- Flathead screwdriver(Helpful for stubborn fasteners.)
- Adjustable wrench(Used for bracket bolts and mounting hardware.)
- Pliers(Crisp grip for removing pins and wires.)
- Voltage tester(Verify power is off before touching electrical components.)
- Safety glasses(Protect eyes from debris and springs.)
- Step ladder(Adequate height to reach the opener and tracks.)
- Silicone-based lubricant(Lubricate moving parts; avoid tracks and sensors.)
- Lint-free cloth(Wipe dust and grime without leaving fibers.)
- Camera or smartphone(Document presets and alignment before adjustments.)
Steps
Estimated time: 60-90 minutes
- 1
Disconnect power and secure the door
Turn off the opener at the wall switch and unplug the unit. If the door is heavy, secure it with clamps or have a helper hold it from the floor. This prevents movement while you inspect components and reduces the risk of injury.
Tip: Always confirm power is off using a voltage tester before touching any electrical parts. - 2
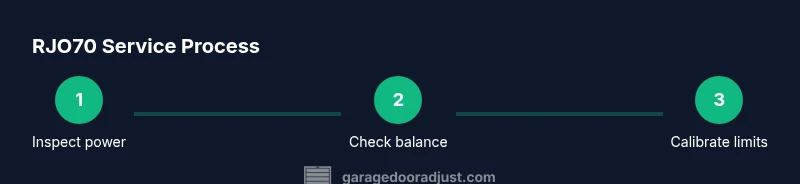
Check door balance manually
With the opener unplugged, lift the door halfway up and hold it there. The door should stay in place or require only light effort to support it. If it drifts or is hard to hold, the springs or tracks may need service by a professional.
Tip: Do not attempt to adjust springs yourself; misadjustment can cause serious injury. - 3
Inspect and clean the rail and tracks
Look for dents, rust, or debris along tracks and rollers. Use a dry cloth to wipe away grime, then realign any bent sections so the door rolls smoothly. Misaligned tracks cause binding and noisy operation.
Tip: Keep tracks clean and straight to prevent premature wear on the roller assembly. - 4
Test safety sensors and wiring
Ensure the photoelectric eyes are aligned, unobstructed, and wired securely. A misaligned sensor can trigger false reversals or prevent the door from closing entirely.
Tip: Be sure no objects are blocking the sensor beams during alignment checks. - 5
Lubricate moving parts
Apply a light coat of silicone-based lubricant to rollers, hinges, and the carriage. Avoid getting lubricant on the tracks or sensor lenses. Lubrication reduces friction, noise, and wear.
Tip: Use a little goes a long way; over-lubrication can attract dust. - 6
Reconnect power and perform a test run
Plug the unit back in and run a few cycles using the wall control, remotes, and keypad if available. Observe smooth travel, quiet operation, and proper reversal when encountering an obstacle.
Tip: If you hear grinding or see jerky motion, pause and reassess alignment before continuing. - 7
Calibrate travel limits and force
Access the opener’s limit and force settings and make incremental adjustments. Test again, ensuring the door fully opens and closes without stopping mid-travel or reversing unexpectedly.
Tip: Make small adjustments and test after each change to avoid overshooting the correct settings. - 8
Final safety check and cleanup
Confirm the safety sensors return to proper operation, tighten any loose mounting screws, and clean the area. Document changes for future reference and store old parts safely.
Tip: Keep a maintenance log to track wear and scheduled service.
Got Questions?
What is the typical lifespan of the Chamberlain RJO70?
Lifespan depends on usage and maintenance. Regular lubrication, sensor alignment, and timely part replacements can extend life. Avoid forced operations and address misalignment early.
With proper maintenance, the Chamberlain RJO70 lasts longer; address issues early to prevent wear.
Why won't my remote work with the RJO70?
Check the batteries in the remote, ensure the opener is receiving power, and confirm the remote is synced. If needed, re-pair the remote to the receiver following the manual.
Start with batteries, then re-pair the remote if it’s not detecting the opener.
How do I reset the RJO70 to factory settings?
Refer to the user manual for the specific reset procedure; factory resets vary by model and may require a sequence of button presses on the keypad or remote. Be prepared to reprogram remotes after resetting.
If you need to reset, follow the manual exactly to avoid losing remote programming.
Is it safe to lubricate the tracks?
Lubricate only moving parts and joints; avoid lubricating the tracks themselves, as buildup can cause binding. Use silicone-based lubricant and wipe away excess.
Only lubricate moving parts, not the rails, to prevent slippage.
When should I call a pro for spring issues?
Springs are under high tension and require professional handling. If you notice uneven door lifting, unusual sounds, or lingering spring stress, contact a qualified technician.
Springs can be dangerous to handle; call a pro for safety and proper repair.
Watch Video
Quick Summary
- Inspect and secure power before any work
- Balance the door manually to diagnose springs/tracks
- Keep tracks clean and aligned for smooth operation
- Calibrate travel limits and forces in small steps
- Use proper lubrication and safety sensors for reliability