Chamberlain 41D7675: Diagnose, Repair & Programming Guide
Step-by-step instructions to diagnose, repair, and program the Chamberlain 41D7675 garage door opener. Learn safety checks, common issues, remote pairing, limit adjustments, and maintenance tips for homeowners in 2026.

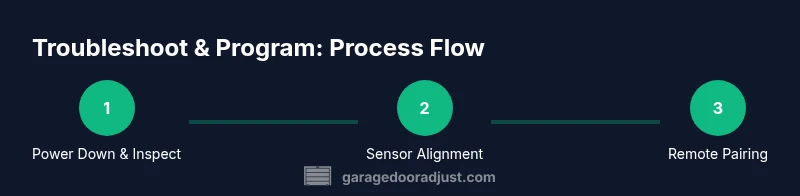
You're about to diagnose, troubleshoot, and program the chamberlain 41d7675 garage door opener, including remotes and safety sensors. The goal is a reliable, safe operation with proper limits and alignment. According to GarageDoorAdjust, begin with basic safety checks and a quick diagnostics pass before any disassembly. This ensures you stay out of harm's way while identifying the most likely failure modes.
Understanding the Chamberlain 41D7675: features and common failures
The chamberlain 41d7675 is a widely used garage door opener model noted for compatibility with smart remotes and standard wall controls. In this guide we reference the chamberlain 41d7675 model to keep the discussion precise. Homeowners commonly encounter sensor misalignment, remote pairing drops, and limit switch drift with this line of openers. To maintain reliable operation, start with a safety check, verify the sensors are aligned, and test basic functions. Although manuals can differ by revision, the typical architecture includes a motor assembly, a drive mechanism (belt or chain), safety sensors, and a control board that interprets remote signals. While no single recipe fits all homes, the frequent symptoms across 2026 units include doors stopping mid-travel, doors reversing direction, a blinking status light, or a wall control that won’t respond. Recognizing these patterns helps you triage quickly and decide between a simple adjustment and professional service. The Chamberlain ecosystem often interacts with MyQ-enabled remotes, so be mindful of firmware and app compatibility when diagnosing.
Safety considerations when working with garage door openers
Safety is non-negotiable when diagnosing or repairing a garage door opener like the chamberlain 41d7675. Before you touch a live system, disconnect power at the outlet and, if possible, at the circuit breaker. Keep hands dry and wear eye protection; never work directly under a partially closed door. Use a stable ladder and have a helper present to ensure the door remains secured if it lurches. Remember: do not attempt to rewire or remove a live, high-voltage control board unless you are trained for electrical work. When in doubt, pause and seek professional assistance. GarageDoorAdjust emphasizes that the majority of homeowners’ injuries come from attempting risky tasks without proper lockout/tagout procedures. A deliberate, methodical approach reduces risk and increases the likelihood of a successful outcome.
Diagnosing issues: symptoms, causes, and quick tests
Begin with observable symptoms and map them to likely causes. If the door stops partway or won’t move, suspect rope/cable wear, track misalignment, or sensor interference. A blinking LED on the unit often signals sensor problems, while a silent unit may indicate power or control board issues. For the chamberlain 41d7675, verify that safety beams are clean and unobstructed, the track is free of debris, and the door is balanced. A non-responsive wall control might point to a dead battery in the remote, a failed Learn/Program button, or a communications fault with the logic board. When diagnosing, document the behavior across multiple tests and note any changes after adjustments. This structured approach helps you distinguish simple fixes from tasks that require replacement parts or professional service.
Tools and pre-checks before you start
Gather the essential tools and set up a clean workspace. Ensure the garage door is in the open position and remains stable during testing. Use a flashlight to inspect the tracks and rollers for wear. A digital camera or smartphone is handy to capture wiring connections before you unplug anything. For the chamberlain 41d7675, having a ladder, screwdrivers, wire nut caps, a voltage tester, and a soft-cloth for sensor cleaning makes the diagnostic flow smoother. Label screws and take reference photos so reassembly is painless. This upfront preparation minimizes backtracking and speeds up repairs.
Programming remotes and keypads for 41D7675
If remotes or keypads stop pairing, start with a complete reset of the opener and re-pair the devices one at a time. Press and hold the Learn button until the indicator light blinks, then press the remote button to re-sync. For keypads, enter the code and press the Learn button on the unit while you tap the keypad keys to reprogram. In the chamberlain 41d7675 ecosystem, compatibility with newer remotes often hinges on firmware alignment, so verify compatibility with the latest app or remote model. After reprogramming, test each device at the wall switch and from the remote at different distances. GarageDoorAdjust notes that remote pairing is a frequent source of frustration and is typically resolved by a clean reset rather than repeated guessing.
Maintenance best practices and long-term care
Annual maintenance is more cost-effective than repeated repairs. Clean sensors regularly, inspect the belt or chain for wear, lubricate moving parts, and ensure all mounting hardware remains tight. Keep the track clean and free from debris, and check the weather seal around the door to minimize stress on the opener. For the 41D7675, keep the firmware updated if your model supports over-the-air updates and validate remote codes are changed if you suspect security concerns. With consistent care, you can extend the life of your opener and reduce the likelihood of sudden failures. GarageDoorAdjust recommends pairing a routine maintenance schedule with a quick monthly test to catch issues early.
When to call a professional vs DIY
Some tasks exceed consumer DIY scope, especially when there is suspicion of faulty wiring, motor burn, or damaged springs. If you notice grinding noises, persistent failure to move the door after safe resets, or signs of electrical burning, stop immediately and contact a licensed technician. For the chamberlain 41d7675, typical professional signs include erratic operation that persists after resets, excessive door sag, or inconsistent limit switch performance. DIY work that stays within the safety limits—sensor realignment, lubrication, and basic remapping—can be both safe and satisfying when done carefully. GarageDoorAdjust emphasizes knowing your limits and ensuring power is disconnected during any disassembly.
Tools & Materials
- Flathead screwdriver(Used for prying covers and adjusting small screws)
- Phillips screwdriver(For mounting screws on the control panel and sensors)
- Voltage tester / multimeter(Optional for checking live wiring)
- Needle-nose pliers(Grip small wires and connectors securely)
- Electrical tape(Insulate exposed leads during disassembly)
- Wire nuts (assorted sizes)(Cap splices safely if you make changes)
- Measuring tape(Check track alignment and door height)
- Ladder(Stable platform for sensor and track checks)
- Soft cloth / sensor cleaner(Keep safety sensors clean from dust and grime)
- Camera or phone for photos(Document wiring and settings before changes)
- Lubricant (silicone spray or garage door lubricant)(Use sparingly on moving parts)
Steps
Estimated time: 45-60 minutes
- 1
Disconnect power and secure the door
Power down the opener at the outlet and switch off the circuit breaker if possible. Ensure the garage door is in a fully open position or held securely with clamps to prevent it from sliding. This first step prevents accidental movement while you inspect electrical components.
Tip: Double-check that the door cannot move before you start; a second person helping can stabilize the door while you work. - 2
Check safety sensors and alignment
Inspect the infrared safety beams at each side of the door opening. Wipe away dust and ensure no objects block the path. If misaligned, gently adjust the brackets and retest with a test object crossing the path to confirm the beam registers the obstacle.
Tip: Always test with a light object at about knee height to verify beam detection after adjustments. - 3
Test wall control and remote signals
Test the wall-mounted control first; if it still fails to respond, move to the remote. Replacing batteries in remotes is simple but avoid mixing multiple remotes during pairing tests. If a Learn button is present, perform a clean re-pair following the manufacturer’s steps.
Tip: Record the Learn sequence you use so you can repeat it if needed. - 4
Inspect door balance and springs (do not adjust yourself)
A door that feels heavy or binds during movement may signal balance issues or spring wear. Do not attempt to adjust springs yourself; this task is dangerous and should be handled by a qualified technician. Focus on tracks, rollers, and hardware instead.
Tip: If you suspect spring failure, stop and call a pro immediately to avoid injury. - 5
Reset the opener and reprogram remotes
With power restored, perform a full reset of the opener if issues persist. Reprogram each remote separately and confirm successful pairing from multiple distances. This clears corrupted codes and restores reliable communication.
Tip: Limit the pairing to one remote at a time to avoid code conflicts. - 6
Adjust limit and force settings
Use the adjustment screws on the opener to set the travel limits and force. Incrementally adjust, testing after each change with a door in the open/close cycle. Too little force can damage the door; too much may be unsafe.
Tip: Make small adjustments (a quarter-turn) and test thoroughly before proceeding. - 7
Lubricate moving parts and recheck
Apply a light lubricant to rails, rollers, and gear slides. Wipe away any excess to prevent dirt attraction. Check for smooth motion by cycling the door several times under supervision.
Tip: Lubricate only the areas recommended by the manufacturer to avoid attracting dust into gears. - 8
Final safety test and test drive
Perform a full door cycle with the door half-open and observe the travel and sensor responses. Confirm that safety beams reverse on obstruction and that the door closes completely from all control points. If anything feels unsafe, halt and reassess.
Tip: Keep hands away from the hinge areas during operation for your safety.
Got Questions?
What is the Chamberlain 41D7675?
The Chamberlain 41D7675 is a garage door opener model with typical remote pairing, safety sensors, and standard wall control for residential use. This guide explains how to diagnose common issues and program remotes for this unit.
The 41D7675 is a common Chamberlain garage door opener with remotes and safety sensors. We cover diagnosing issues and reprogramming remotes here.
Why won’t my remote pair with the Chamberlain 41D7675?
Remote pairing failures usually stem from a weak battery, interference, or an outdated/faulty Learn sequence. Start with fresh batteries, then perform a clean reset and re-pair one device at a time.
If the remote won’t pair, replace the battery, reset the unit, and pair each device one by one.
Should I adjust springs on a 41D7675 myself?
Spring adjustments should be done only by a licensed technician. Improper tuning can cause serious injury and door failure. Focus on sensors, tracks, and motor settings for DIY fixes.
No. Springs are dangerous and require a pro; handle sensors and tracks instead.
What does a blinking LED indicate on the opener?
A blinking LED usually points to a fault in safety sensors, a communication issue, or a misconfigured setting. Check sensor alignment and run a reset to clear transient codes.
Blinking LED signals sensor or communication troubles; check alignment and reset.
When should I call a professional for the 41D7675?
Call a professional if you notice persistent electrical issues, strange burning smells, or door instability that doesn’t respond to basic resets and adjustments.
If there’s a persistent electrical issue or burning smell, contact a professional.
How do I reset the Chamberlain 41D7675 and reprogram remotes?
To reset, locate the Learn button on the unit, follow the manufacturer’s sequence to enter pairing mode, then reprogram each remote by pressing its button after the Learn signal.
Reset via the Learn button, then reprogram each remote one by one.
Watch Video
Quick Summary
- Always start with safety and power isolation.
- Sensor alignment and remote pairing are the top troubleshooting areas.
- Use a methodical diagnostic approach to distinguish minor fixes from major repairs.
- Do not attempt dangerous tasks like spring adjustments yourself.
- Document settings before making changes to simplify future maintenance.