Can You Change Battery in a Garage Door Opener? A Step-by-Step Guide
Learn how to safely replace the battery in your garage door opener remote or keypad with our homeowner-friendly step-by-step guide from GarageDoorAdjust.

Yes. You can usually change the battery in most garage door opener remotes and keypads yourself. The process involves confirming the correct battery type, safely opening the housing, replacing with a fresh battery, and testing the opener to ensure reliable operation. On older models, batteries may be integrated or require professional service, but for most consumer openers the battery is user-replaceable.
Why Battery Replacement Matters
Can you change battery in garage door opener? Yes. Battery power is the quiet backbone of your garage door's daily reliability. When the remote or keypad dies at an inconvenient moment, you may be left waiting or stuck outside. According to GarageDoorAdjust, routine battery checks and replacements are a simple, low-cost maintenance step that prevents unexpected failures. The GarageDoorAdjust team found that most issues with garage doors failing to open relate to battery power or sensor alignment, not motor wear. Regular replacement is a practical part of responsible garage-door maintenance that homeowners can perform themselves, saving time and avoiding service calls. By understanding the basics of what to replace, where to access it, and how to test, you’ll regain dependable control of your door with minimal downtime.
Can You Change Battery in Garage Door Opener: Scope
Many people ask whether can you change battery in garage door opener components like remotes and keypads. In most cases, yes, you can replace removable batteries in remotes and wall-mounted keypads without a technician. The exact battery type varies by model, but most common remotes use coin cells such as CR2032 or CR2025, while some use standard AA or AAA cells. If your opener has a built-in battery or a non-replaceable pack, replacement may require professional service or parts from the manufacturer. For the majority of homes, you’ll be able to complete the swap yourself using simple tools. As you proceed, keep in mind the orientation and contact points to avoid repeating a failed replacement. The GarageDoorAdjust team recommends verifying compatibility in your user manual or on the device label before purchasing a new battery.
Common Battery Types for Garage Door Openers
Garages vary, but there are a few battery types you’re likely to encounter. Coin-cell batteries, especially CR2032, CR2025, or CR1025, power many remotes and keypads due to their compact size and long shelf life. Some older remotes may use AAA or AA cells. If your keypad is integrated into the wall panel, it might rely on a single swap-in battery or a rechargeable pack. Always check the device label or the owner’s manual to confirm the exact type and polarity. GarageDoorAdjust analysis shows that using the correct cell and replacing it promptly reduces nuisance calls and ensures consistent operation. If you’re unsure, start by opening the device and inspecting the old battery for markings.
Tools and Safety Precautions
Before you begin, gather a few basics and observe safety practices. Use the exact replacement battery specified by the device, handle batteries with care, and avoid shorting the contacts. Ensure the area is well lit and dry, and place the device on a non-conductive surface. If you’re replacing a coin-cell battery, use a non-metal tool or your fingernail to pop the battery out—avoid prying metal contacts. Do not attempt to force the housing apart if it feels stubborn; refer to the manual. The door itself should be in a safe position—ideally fully open—to minimize pinch hazards while you work. GarageDoorAdjust recommends testing the remote after replacement to confirm proper function and to ensure the door responds reliably.
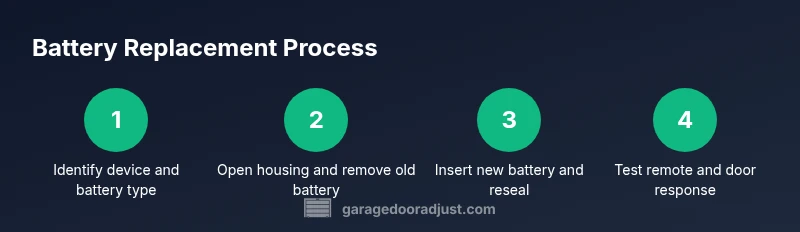
Step-by-Step: Replacing the Battery in a Remote or Keypad
Follow these steps to replace the battery in a typical garage door opener remote or wall keypad. The steps cover common coin-cell and small-button battery configurations. If your device uses a different format, adapt the steps to your model while preserving orientation and safety checks. Remember to label the battery if you remove more than one so you can reuse it later if needed.
Troubleshooting After Replacement
If the remote still doesn’t work after battery replacement, recheck battery orientation, especially polarity. Inspect the battery contacts for corrosion or dirt and gently clean with a dry cloth. Confirm you replaced the correct battery type and that the housing is fully seated. Some remotes require re-syncing or re-pairing with the opener; if your model requires this, follow the pairing steps in the manual. Persistent issues may indicate a separate problem with the transmitter, receiver, or sensors, and calling a professional may be the best option.
Maintenance Tips to Extend Battery Life
To maximize battery life: keep a spare on hand, replace batteries before they become weak, and test the system monthly. Store spare batteries in a cool, dry place away from metal objects. Avoid exposing batteries to excessive heat, moisture, or direct sunlight, which can shorten life. Maintaining a simple replacement schedule can prevent failed opens and reduce downtime.
Disposal and Recycling
Used batteries must be disposed of properly. Local recycling centers often accept CR2032, AAA, and AA batteries. Do not throw them in regular trash. If you’re unsure where to recycle, contact your local waste authority for guidelines. Proper disposal is a small but important step toward environmentally responsible garage maintenance.
Tools & Materials
- Replacement battery (exact type per device, e.g., CR2032, CR2025, or AA/AAA)(Check the device label or manual for the correct size and polarity)
- Flat-head or small Phillips screwdriver (as needed)(Some remote housings are screwless; others require a tiny screwdriver)
- Lint-free cloth or dry microfiber(Used to wipe contacts if there’s light corrosion)
- Non-conductive removal tool (optional)(Helpful for coin-cell removal without bending contacts)
- Label or marker(Label the battery orientation for future reference)
Steps
Estimated time: 15-25 minutes
- 1
Identify the correct battery type
Inspect the device label or open the housing to locate the battery type. If the label is unclear, consult the manual or manufacturer website. Getting the right battery is essential to avoid fit and contact issues.
Tip: If you’re unsure, photograph the old battery before removal for reference. - 2
Open the remote or keypad housing
Carefully pry open the housing using your fingers or a non-conductive tool. Do not force plastic clips; instead, work around the edges to release retention clips gently.
Tip: Work on a soft surface to prevent damage and keep small parts from rolling away. - 3
Remove the old battery
Take out the old battery, noting its orientation (which side is up). If there’s corrosion, wipe contacts with a dry cloth and set the battery aside for proper disposal.
Tip: If the battery is difficult to remove, use a small non-conductive tool to lift from the edge. - 4
Inspect and clean contacts
Check the metal contacts for corrosion or residue. A brief wipe with a dry cloth or a soft eraser can improve contact. Ensure the contacts are dry before inserting the new battery.
Tip: Do not use liquids or solvents near electronics. - 5
Insert the new battery with correct polarity
Place the new battery in the holder, aligning the positive and negative terminals as shown in the device. A reversed orientation can prevent operation or cause damage.
Tip: Double-check orientation before pressing the battery into place. - 6
Reassemble the housing
Snap the housing back together, ensuring all clips engage and the seal is intact. If screws were present, tighten them to the specified torque.
Tip: Test the seal by gently pressing around the edges to ensure it sits flush. - 7
Test the device and door response
Test the remote or keypad to confirm the door opens and closes as expected. If your system supports it, run a quick test module to verify sensor alignment.
Tip: Keep the door in an open position during the initial test to avoid accidental closure. - 8
Troubleshooting if it still fails
If replacement doesn’t fix the issue, recheck orientation, check for contact corrosion, and verify the pairing if required by your model. Consider professional inspection if the opener still misbehaves.
Tip: Document the steps you’ve taken and any codes shown on the opener’s panel.
Got Questions?
Do I need to unplug the garage door opener before replacing the battery?
No. Replacing the battery in a remote or keypad does not require disconnecting the main opener power. The battery provides the remote’s power, and the main unit can remain plugged in during replacement. Exercise standard safety practices and ensure you’re handling the device with dry hands.
No, you don’t need to unplug the opener; just handle the battery replacement safely and test the device afterward.
What battery types are compatible with most remotes?
Most remotes use CR2032 or CR2025 coin cells, while some older remotes may use AA or AAA batteries. Always verify the exact type on the device label or in the manual before buying replacements.
Most remotes use CR2032 or CR2025 coin cells; check your label or manual to confirm.
How often should I replace the battery in my remote?
Typically every 1-2 years, depending on usage and device quality. If the range drops noticeably, it’s a good time to replace the battery.
Most people replace every year or two, or when range drops.
My remote still doesn’t work after replacement. What should I check?
Recheck orientation, inspect contacts for corrosion, and confirm the battery type matches your device. Some models require re-pairing with the opener after battery changes.
Check orientation, contacts, and pairing; batteries aren’t the only culprit.
Is it safe to replace a built-in battery?
Built-in or sealed batteries typically require professional service or parts from the manufacturer. Do not attempt to open sealed packs as this can be hazardous and void warranties.
Built-in batteries usually need a pro; don’t try to open sealed packs yourself.
What if I can’t find the model manual?
Visit the manufacturer’s website or contact customer support for model-specific battery type and replacement instructions. You can also search for your model number online for official PDFs.
If the manual isn’t on hand, check the maker’s site or search for your model online.
Watch Video
Quick Summary
- Check device for the exact battery type before opening.
- Replace with the correct orientation and reseal the housing.
- Test the remote after replacement to confirm reliable operation.
- Keep spare batteries and recycle old ones responsibly.