Can t Get Garage Door Open: Troubleshooting Guide
A practical, step-by-step guide to diagnose why your garage door won’t open and fix common issues safely. Quick checks, diagnostic flow, and when to call a pro.

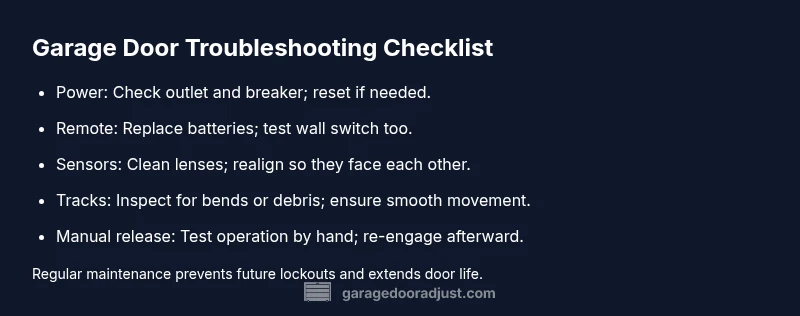
Most likely causes when the door won't open are power or sensor problems, or a misadjusted limit switch. Begin with quick fixes: verify the outlet and reset the breaker, check the wall switch and remote batteries, and ensure the photo-eye sensors have a clear line of sight. If these steps fail, follow the diagnostic flow below.
Why the garage door won't open: common culprits and how it happens
A garage door that won’t open can throw off your whole day. In many homes, the failure comes from three broad areas: power and electronics, safety sensors, or mechanical limits. The GarageDoorAdjust team notes that most non-opening events trace back to these categories, often triggered by a storm, a power outage, or a simple misalignment. When you hear a quiet click or a hum but the door stays put, you’re likely facing one of these root causes. In practice, you might notice the door refusing to move only when you use the wall switch, or the remote may still show a green light while the door remains closed. If you ever see the exact phrase can t get garage door open on the keypad or remote, treat it as a malfunction that requires targeted checks rather than a random fault.
- Power issues: Tripped breakers or an unplugged transformer disrupt the opener's brain.
- Sensor problems: Dirty or misaligned photo eyes can stop the door from moving, even if the motor sounds active.
- Mechanical limits: Worn cables or misaligned tracks can prevent the door from lifting fully.
Starting with these categories helps you quickly decide what to fix first. If you’re unsure about any step or if the door moves but behaves erratically, move to the diagnostic flow section for a structured path forward.
Safety-first checks you can perform today
Before you touch any moving parts, prioritize safety. Unplug the opener if you need to inspect mechanical components, and keep kids and pets away from the door during testing. Wear eye protection and gloves. If you’re uncomfortable with any step, don’t hesitate to contact a professional.
- Verify power: Confirm the outlet is live and the outlet you use for the opener has power. If you’re unsure, test with a lamp or other device.
- Breaker check: A tripped circuit breaker is a common culprit. Reset the breaker and try again. If the breaker trips again, there may be a more serious electrical issue.
- Remote battery check: Replace batteries in handheld remotes and test both remote and wall switch.
- Sensor alignment: Ensure the photo-eye sensors have an unobstructed path and are aligned+clean. A misaligned sensor can prevent opening or closing.
If these basics don’t restore function, proceed to the diagnostic flow to pinpoint the exact cause and safe fixes.
Reading the symptoms: what they tell you about the problem
Not all non-opening symptoms point to the same fix. A motor that hums but won’t lift the door usually signals a mechanical or limit-sensor issue. If the door moves slightly but stalls, the issue may be track binding or a weak spring. A remote that never responds points toward power, receiver, or battery problems, while a dead wall switch suggests a control wiring fault. By correlating the symptoms with likely causes, you can avoid unnecessary steps and escalate to the right remedy. Remember, if the problem involves torsion springs or cables, this is not a DIY friendly situation—call a pro.
- Hums but no movement: likely a mechanical limit or track issue.
- Partial movement or stall: track binding, binding due to debris, or a weak spring.
- Remote only fails: battery, receiver, or wiring problem.
- No response from any control: power or main operator fault.
If any symptom matches, move to the diagnostic flow to confirm and fix safely.
Do-it-yourself fixes you can try now
If you’re comfortable and the problem seems electrical or sensor-related, you can try these fixes. Always unplug the opener before working on it and reset the system after each change. If you encounter resistance, stop and seek professional help.
- Fix power and reset: Confirm outlet power and reset the breaker. Unplug and replug the opener box, then test.
- Re-address the sensors: Clean the photo-eye lenses with a soft, dry cloth. Realign the sensors so they face each other directly and there’s no obstruction.
- Check the track and balance: Look for visible obstructions, debris, or kinks. Lubricate moving parts with a silicone-based lubricant and wipe away excess.
- Test the manual release: Pull the emergency release cord and try to open manually. If the door opens smoothly by hand, the issue is within the opener system, not the door.
If the door remains stubborn or you hear unusual noises, contact a professional before continuing with more advanced work.
When to call GarageDoorAdjust and what to expect
If basic checks don’t restore operation, it’s time to bring in a pro. The GarageDoorAdjust team recommends a staged approach: confirm power and safety sensors first, then inspect tracks, springs, and the door balance. A licensed technician will safely disengage the door, test the spring tensions, and verify the opener’s force and travel limits. Expect a concise assessment, a transparent estimate, and a repair timeline. Our guidance emphasizes safe handling and long-term reliability over quick, risky fixes. The GarageDoorAdjust team can tailor a plan to your door type and opener model, with an emphasis on safety and enduring performance.
- Pro assessment: Identify root cause with specialized tools.
- Transparent pricing: Clear estimate before work begins.
- Safety-first: Handling springs and cables should be left to professionals.
Pro tip: If you’ve recently had a power outage, ask the technician to inspect for latent electronics quirks that can affect auto-reclose functionality.
Maintenance to prevent future lockouts and extend life
Regular maintenance reduces the odds of future failures. Schedule seasonal checks and address wear before it becomes costly. Clean and lubricate moving parts, replace worn components, and test the door balance monthly. Use a professional service every 1–2 years for a thorough inspection, especially if you have a torsion spring system or an older opener. A proactive approach saves time, prevents sudden lockouts, and keeps your garage door safe for your household.
- Clean and lubricate rollers, hinges, and tracks.
- Check balance and spring tension with a professional when needed.
- Test safety sensors and opener limits every month.
- Schedule annual inspections with a trusted technician like GarageDoorAdjust.
Quick recap: why this approach works
By addressing power, sensors, and mechanical limits in a structured way, you can troubleshoot most garage door opener problems without expensive visits. The method minimizes risk by prioritizing safety and using a diagnostic flow to confirm each potential cause before moving on. This approach is the cornerstone of reliable, long-lasting operation for most residential systems.
Steps
Estimated time: 60-90 minutes
- 1
Verify power and reset the system
Start by confirming the outlet is live and the circuit breaker is not tripped. If needed, unplug the opener for 30 seconds and plug it back in, then test the wall switch and remote again.
Tip: A simple power reset fixes many electronics glitches. - 2
Check wall switch and remote
Test both the wall switch and the remote. Replace remote batteries and try different remotes if available. Ensure you’re operating within the expected range and that the receiver is responsive.
Tip: Some remotes have a tiny reset button—check the user manual. - 3
Inspect sensors and clear the path
Inspect the photo-eye sensors for dust, spider webs, or misalignment. Clean with a soft cloth and adjust so they face each other directly with a clear line of sight.
Tip: A dirty sensor is the most common reason for opener misbehavior. - 4
Check tracks and balance
Look for bent tracks, loose hardware, or debris blocking the rollers. Manually move the door slightly to feel for binding. Lubricate rollers and hinges with silicone spray if necessary.
Tip: Avoid lubricants that attract dust (oil-based) on the tracks. - 5
Test manual release and re-engage
Pull the emergency release cord to disengage the door and lift it manually. If it opens smoothly, the issue is in the opener mechanism rather than the door itself.
Tip: After manual testing, reconnect the opener and test again. - 6
Reset the opener and test controls
Follow model-specific reset steps. Reprogram remotes if needed and test door function using both the wall switch and remotes.
Tip: Keep a quick reference card with model-specific reset steps. - 7
Call a pro if needed
If you encounter spring tension, cable issues, or persistent electrical faults, stop and schedule a professional visit. torsion springs are dangerous to handle without training.
Tip: Prioritize safety; a pro can diagnose and repair quickly and safely.
Diagnosis: Garage door won't open when using the wall switch or remote; door remains closed or motor hums without lifting.
Possible Causes
- highPower issue or tripped breaker/outlet inactive
- highMisaligned or blocked safety sensors (photo-eye)
- mediumFaulty wall switch, receiver, or remote control
- lowMechanical binding or misadjusted limits
Fixes
- easyCheck outlet power and reset the circuit breaker. If the outlet is dead, restore power and test again.
- easyInspect safety sensors: clean lenses, re-align, and ensure the path is unobstructed.
- easyTest and replace remote batteries; test wall switch; check wiring connections at the opener.
- easyInspect tracks and rollers for obstructions; ensure tracks are parallel and not bent; lubricate moving parts.
- easyIf the door still won't open, perform a manual release test and re-engage the opener after adjustments.
- easyReset the opener according to model instructions and re-test all control interfaces.
Got Questions?
Why won’t my garage door open even though the motor hums?
A humming motor with no movement usually points to a mechanical issue, a misadjusted limit, or track binding. Check the track alignment and limit settings first, then inspect the springs if you’re trained to do so safely. If the door still won’t move, call a pro.
If you hear a hum but no movement, check mechanical limits and tracks. If it persists, contact a professional for safe inspection.
How do I reset the garage door opener?
Reset steps vary by model. Generally, unplug the opener, wait 30 seconds, plug back in, and reprogram remotes. Refer to the model manual for exact button sequences and safety checks.
Unplug, wait, plug back in, and reprogram remotes. Check your model's manual for exact steps.
Can a low battery affect the remote?
Yes. A weak battery can prevent the remote from sending a strong signal. Replace with the correct battery type and test from different distances.
Low batteries can stop the remote from working. Replace them and test again.
Is it safe to manually open a stuck door?
Manual opening is possible with the emergency release, but springs and cables can be dangerous. If the door is heavy or you hear popping noises, stop and call a pro.
Manual release can help, but springs are dangerous. If in doubt, call a pro.
Why would cold weather affect opening?
Cold temperatures can thicken lubricant and slow door movement. Ensure moving parts are well-lubricated and free of ice or debris. If the door sticks near the ground, inspect weatherstripping and track clearance.
Cold can slow things down. Lubricate and clean moving parts to restore smooth operation.
When should I call a professional?
Call a professional if you hear grinding, see visible track damage, or suspect spring or cable failure. Electrical faults should also be diagnosed by a licensed technician. Early expert input saves time and ensures safety.
If you hear grinding or suspect springs, call a pro. Electrical faults also need a licensed technician.
Watch Video
Quick Summary
- Diagnose power, sensors, and limits first
- Safety comes before DIY fixes
- Use the diagnostic flow before major disassembly
- Call a pro for springs or electrical faults
- Regular maintenance prevents future lockouts