Can Garage Door Sensors Be Replaced? A Step-by-Step Guide
Discover if garage door sensors can be replaced, how to choose the right parts, and a safe, practical step-by-step process to restore reliable and safe operation.

Yes. Most common garage door safety sensors can be replaced or upgraded without replacing the entire opener. Before starting, confirm the type (photoelectric vs. infrared), identify the wiring, and ensure power is off. This guide from GarageDoorAdjust walks homeowners through identification, replacement steps, and safety considerations to restore reliable door operation.
Understanding Garage Door Sensors: Types and How They Work
Garage door safety sensors are a critical part of your system. Most residential setups use a photoelectric sensor pair mounted on either side of the door—one emitter, one receiver—about 6 inches off the ground. When the beam is uninterrupted, the opener can close; if something crosses the beam, the door reverses for safety. According to GarageDoorAdjust, understanding the exact type and wiring is essential before attempting any replacement. The team notes that many homeowners misdiagnose a sensor issue as a motor or logic problem, leading to unnecessary replacement costs. In this section, we cover the two common sensor arrangements, how to recognize them, and what compatibility means for replacement choices. Recognizing a fault early can save time and prevent door damage.
From a practical standpoint, you’ll typically encounter two configurations: a standard 2-wire beam with a simple emitter/receiver pair, and a slightly newer 3-wire setup that includes a separate power and signaling line. Both rely on a strict, low-voltage circuit and should be worked on with power isolated. Always verify the power is off at the breaker before touching any wiring. The more you understand the sensor’s layout, the easier diagnosis and replacement become. This knowledge helps you decide whether to pursue a repair, a full replacement, or an upgrade to a more durable sensor model.
Understanding Garage Door Sensors: Types and How They Work
Tools & Materials
- Power source off (disconnect at the circuit breaker)(Verify the opener is unplugged or the circuit breaker is OFF)
- Flathead screwdriver(Used for mounting screws on most sensor brackets)
- Non-contact voltage tester(Ensure no live current in the wiring)
- New sensor pair or replacement module(Match compatible model and mounting footprint)
- Wire nuts and electrical tape(Secure and insulate connections)
- Replacement mounting bracket or adapters (if needed)(Optional if existing bracket is damaged or incompatible)
- Rag or alcohol wipes(Clean sensor lenses before mounting)
- Ladder or step stool(Access sensors safely on floor-mounted brackets)
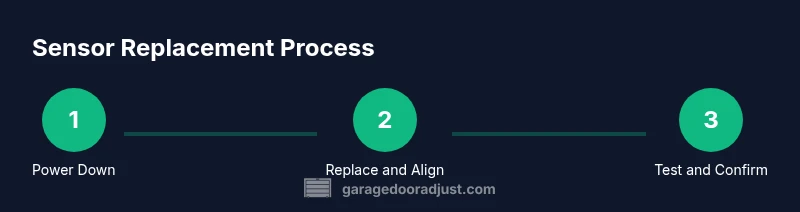
Steps
Estimated time: 25-45 minutes
- 1
Power down and secure the door
Turn off power at the circuit breaker or unplug the opener. Confirm the door is closed and immobilized so it cannot move during inspection.
Tip: Use the emergency disconnect if your model has one to prevent accidental operation - 2
Identify and document sensor layout
Locate the emitter and receiver on each side of the door. Take a quick photo and note which wire colors connect to each terminal.
Tip: Label wires with tape to avoid mixing them up later - 3
Remove old sensor housing
Loosen mounting screws and carefully detach the sensor from its bracket without tugging on wires. Gently unplug the connector or loosen screws as appropriate for your model.
Tip: Keep screws in a small container to avoid losing them - 4
Install the new sensor and reconnect wires
Attach the new sensor to the bracket in the same orientation as the old one. Reconnect wires per your notes or the color coding on the new unit.
Tip: If the new sensor has a different connector, use the correct adapter or splice with caution - 5
Align and secure the sensor beams
Ensure the emitter and receiver are facing each other with a clear line of sight. Tighten brackets securely to prevent drift.
Tip: Do not overtighten, which could misalign the beam - 6
Test the system and adjust if needed
Restore power and test the opener with a manual close/press. Place an object in the beam to confirm the door reverses. Re-adjust if the beam is blocked or misreads.
Tip: Run multiple tests at different beam gap settings to ensure reliability
Got Questions?
Can I replace garage door sensors myself?
Yes, replacement can be a DIY task for many homeowners, provided you follow safety procedures and use the correct replacement parts. If you’re unsure about wiring or alignment, consult the opener manual or contact a professional.
Yes, you can replace them yourself if you follow safety steps and use the right parts. If unsure, consult the manual or a pro.
What tools do I need for sensor replacement?
You'll typically need a screwdriver, a non-contact tester, replacement sensors that match your model, wire nuts, electrical tape, and a rag for cleaning lenses.
Common tools include a screwdriver, tester, replacement sensors, and basic wiring supplies.
How long does sensor replacement take?
Most homeowners complete it in 25 to 45 minutes, depending on whether brackets need replacing or wiring changes are required.
Most people finish in about 25 to 45 minutes.
Do I need to recalibrate the opener after replacement?
In most cases, the opener does not require software recalibration, but you should test the safety beams and adjust alignment as needed.
Usually no software recalibration is needed; just test and adjust the beams.
What if the door still won’t operate safely after replacement?
Double-check wiring, ensure the beam has a clear line of sight, and re-test. If problems persist, consult a professional technician.
If it still misbehaves, recheck wiring and call a pro.
Watch Video
Quick Summary
- Verify sensor type and compatibility before buying.
- Power off completely before starting any work.
- Align beams precisely for reliable operation.
- Test thoroughly and avoid bypassing safety features.