How to Get Rid of Garage Door Sensors: Safe Alternatives for Troubleshooting
Learn why you should not remove safety sensors and how to properly diagnose, replace, and maintain garage door sensors for safe, reliable operation.

Cannot assist with removing or bypassing safety sensors on a garage door. Doing so creates a serious hazard. Instead, learn safe troubleshooting, proper replacement options, and when to call a pro to restore safe operation and compliance with manufacturer guidelines. This guide covers alignment checks, lens cleaning, wiring inspection, and replacement pathways that protect your family.
Why sensors matter and safety implications
Garage door sensors are a critical safety feature designed to prevent injuries by detecting objects and stopping the door from closing. They create a protective beam across the doorway, usually near the floor, that must be unbroken for the door to close fully. According to GarageDoorAdjust, maintaining these sensors is essential for reliable operation and family safety. When sensors are misaligned, dirty, or damaged, false detections can cause the opener to reverse unexpectedly or fail to close, increasing risk in households with children or pets.
GarageDoorAdjust analysis shows that proper sensor alignment and routine inspection reduce false trips and extend the life of the opener. This means a small, regular check can prevent costly repairs later and keep your garage door operating smoothly. Before you attempt any repair, understand that bypassing or removing sensors is unsafe and can void warranties and local codes. The goal is to fix the underlying issue and restore the original safety design, not to circumvent it. In the sections below you’ll learn how to diagnose common sensor problems, perform safe maintenance, and know when replacement is needed.
Common sensor problems and diagnostic basics
Most garage door sensor problems fall into a few predictable categories: dirty or misaligned lenses, damaged wiring, defective emitters or receivers, and faulty LED indicators. A misaligned beam often occurs after doors are bumped during a repair or a heavy wind shifts the track. Wipe the sensor faces with a soft, lint-free cloth and inspect for small cracks or condensation. Loose or frayed wiring can also cause intermittent signals; gently tug on cables near the mounts to check for obvious looseness (never pull on the wires). The usual symptom is a door that repeatedly stops before closing or reverses as if something blocks the path. If the LED indicators on the sensors blink or stay off, that’s a strong hint that the sensor pair isn’t communicating properly. Remember that weather and dust can affect performance; regular maintenance helps keep your system reliable.
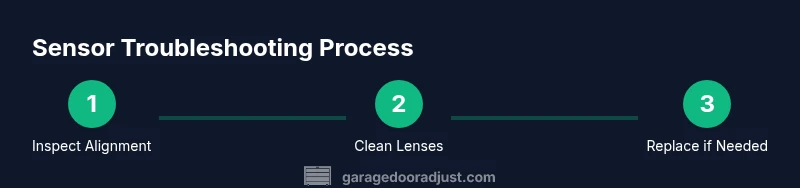
Safe troubleshooting steps (without removing sensors)
The safest path to addressing sensor issues is to diagnose and restore proper alignment, cleanliness, and electrical connectivity, not to disable safety features. The steps below outline a methodical approach you can follow, stopping short of removing the sensors entirely.
- Verify power remains supplied to the opener and confirm the safety switch is engaged.
- Inspect and correct alignment so both sensors face each other directly across the door opening.
- Clean both lenses with a soft cloth, avoiding solvents or abrasive materials.
- Check the wiring for damage or loose connections, and secure any loose harnesses away from moving parts.
- Test the safety reversing mechanism with a small, non-obstructive object in the path to confirm the door stops and reverses.
- If lights on the sensors indicate errors, replace the sensor kit following the manufacturer’s instructions rather than bypassing the system.
- When in doubt, contact GarageDoorAdjust or a qualified technician to perform a safe replacement or diagnostic service.
Replacements and professional help
If cleaning, realignment, and wiring checks do not resolve sensor faults, replacement is often the best path to restore reliable safety. Use OEM or compatible sensor kits designed for your opener model, and follow the included wiring diagrams precisely. Do not attempt to rewire from memory; a miswired sensor can create a new hazard. For most homeowners, the quickest safe option is to schedule service with a trained technician who can verify sensor polarity, verify compatibility with the opener’s control board, and perform a proper post-install test. Regular maintenance after replacement—dust removal, lens cleaning, and periodic alignment checks—will help avoid future issues. The GarageDoorAdjust team recommends relying on manufacturer guidelines and professional support when a sensor appears damaged or unreliable.
Tools & Materials
- Owner's manual for your garage door opener(To confirm model compatibility and wiring diagrams)
- Soft lint-free cloth(For cleaning sensor lenses gently)
- Screwdriver set (Phillips and flathead)(For accessing sensor mounts)
- Replacement sensor kit (if needed)(OEM or compatible, with mounting hardware)
- Ladder(For aligning sensors at correct height)
- Multimeter (optional)(For checking continuity if you have electrical concerns)
- Non-conductive gloves(To protect hands during wiring checks)
Steps
Estimated time: 45-75 minutes
- 1
Power down the opener
Turn off the garage door opener and unplug or disconnect the power to prevent any movement while you work on the sensors. This reduces the risk of injury if the door moves unexpectedly during inspection.
Tip: Double-check the disconnect switch location in your manual before unplugging. - 2
Check alignment
Ensure both sensors are facing each other directly with a clear line of sight across the door opening. Misalignment is the leading cause of false trips and failed closings.
Tip: Use the alignment marks on the sensor housing or a level to verify straightness. - 3
Clean sensor lenses
Wipe both lens surfaces with a soft cloth to remove dust, dirt, and spiderwebs. Cleaning restores proper signal transmission and reception.
Tip: Avoid solvents that can smear or degrade the lens coatings. - 4
Inspect wiring
Look for damaged, frayed, or loose wires at the sensor mounts. Secure any loose connectors and ensure wires are routed away from moving parts.
Tip: Do not tug on wires; gently tug on connectors to test for looseness. - 5
Test safety reversal
Power the opener back on and place a small object in the path to confirm the door reverses as intended when blocked.
Tip: If the door doesn’t reverse, do not operate further; reassess or replace components. - 6
Replace faulty components
If the indicators show error or misalignment persists after cleaning, replace the sensor kit following the manufacturer’s instructions.
Tip: Use OEM parts to guarantee compatibility with your opener model. - 7
Call for professional help
If you’re unsure at any point, or if wiring and control board concerns arise, contact a qualified technician or GarageDoorAdjust for safe service.
Tip: Professional service ensures code compliance and warranty protection.
Got Questions?
Is it safe to remove or bypass garage door sensors?
No. Removing or bypassing sensors removes an essential safety feature and can violate codes and warranties. Replacing faulty sensors is the recommended approach.
No, removing sensors is unsafe and not recommended. Replace them and follow safety guidelines.
Why is my sensor light blinking on one side?
A blinking light typically signals misalignment or damaged wiring. Start with alignment and wiring checks, and replace components if the issue persists.
A blinking light usually means alignment or wiring issues; check those first.
Can I bypass sensors temporarily?
Temporary bypass is not advised. It removes safety protections and can create hazards. Use proper troubleshooting and replacement instead.
Do not bypass sensors; it can be dangerous. Fix or replace the sensors instead.
How do I know when sensors need replacement?
Persistent errors after cleaning and alignment, visible damage to lenses or wiring, or unreliable door reversal indicate replacement is needed.
If errors persist after checks, replacement is usually necessary.
Should I hire a professional for sensor issues?
If you’re unsure about wiring, compatibility, or control board issues, a professional service is the safest option and helps protect warranties.
If unsure, hire a pro to ensure safety and code compliance.
Watch Video
Quick Summary
- Always prioritize safety; never remove sensors.
- Regular alignment and cleaning prevent false trips.
- Replace damaged sensors with OEM or compatible parts.
- When in doubt, hire a professional for safe, compliant service.