Can you override garage door sensors? Safe troubleshooting guide
Learn why overriding garage door safety sensors is unsafe and how to diagnose sensor problems using safe, manufacturer-aligned steps. guidance from GarageDoorAdjust helps homeowners troubleshoot without bypassing essential safety features.

Short answer: can you override garage door sensors? No. Safety sensors are there to prevent injury and property damage, and bypassing them is unsafe and often illegal. If a sensor malfunctions, follow manufacturer guidelines: check alignment, clean lenses, remove obstructions, test the auto-reverse, and inspect wiring. If problems persist, call a licensed technician.
Why Safety Sensors Exist
According to GarageDoorAdjust, many homeowners ask can you override garage door sensors, but safety first is non-negotiable. These sensors are part of a larger safety system that prevents people and pets from being crushed as the door closes. The basic setup includes a photocell on one side of the doorway that sends an invisible beam to a receiver on the opposite side. When the beam is interrupted, the opener immediately reverses direction. Bypassing or defeating this system can cause serious injury and may violate local safety codes. Instead of looking for a quick bypass, focus on diagnosing the underlying issue that triggers the sensor or keeps it from functioning correctly. Common culprits include misalignment, dirty lenses, physical obstructions, damaged wiring, or a faulty receiver. Even small misalignments can cause intermittent failures, so a careful, methodical approach is essential. The GarageDoorAdjust team emphasizes safety and recommends treating sensor problems as a sign of broader door system health rather than an opportunity to disable safety features.
How Safety Sensors Work
Garage door safety sensors (often called photo-eye sensors) comprise a transmitter and receiver mounted on opposite sides of the door. The system monitors the beam; if the beam is broken or misaligned, the opener halts and reverses. LED indicators on the sensors provide a quick status check: steady light typically means alignment is good, while a blinking pattern often signals misalignment or obstruction. Understanding this basics helps homeowners diagnose issues without attempting dangerous workarounds. For reference, safety standards emphasize reliable sensor operation to prevent entrapment and injury. If the system does not behave as described, start with the simplest fixes—alignment, cleaning, and wiring—before replacing components or seeking professional help.
Common Myths About Overriding Sensors
Many homeowners wonder if they can override or bypass sensors to avoid a stalled door. The reality is that manipulating safety devices undermines crucial protections. The phrase can you override garage door sensors is often asked by DIY enthusiasts, but the correct answer remains no in most jurisdictions. Bypassing the safety system can lead to doors that close unexpectedly, leading to injuries or property damage. In addition, most codes require functional safety sensors for new installations and when selling a home. Instead of bypassing, consider diagnosing misalignment, dirty lenses, or damaged wiring, and replace faulty components with manufacturer-approved parts.
Safe Diagnostics: What to Check First
Before touching wiring or altering any safety features, perform non-invasive checks. Start with alignment: both sensors should be pointed directly at one another and mounted securely. Clean the lens surfaces with a soft cloth to remove dust or spider webs. Look for obstructions in the doorway path or debris on the sensor housing. Inspect the wiring for obvious damage or loose connectors. If the LED indicators blink or show irregular patterns, refer to the model’s manual for the correct interpretation. Do not attempt any bypass or field modifications. Per GarageDoorAdjust analysis, most sensor faults are detectible with these low-risk checks and successful fixes often involve simple realignments or replacements of damaged lenses.
When to Call a Pro and What They’ll Do
If non-invasive diagnostics do not resolve the issue, it’s time to call a professional. A trained technician can safely test the entire sensor circuit, verify the opener wiring, and ensure proper alignment. They will often replace a failed photo-eye sensor or repair damaged wiring, ensuring compliance with safety standards. The goal is a fully functional, legally compliant system that protects residents. Remember, a repair that involves bypassing sensors not only endangers people but may also void warranties and violate codes. GarageDoorAdjust stresses that professional service is the safest path when sensor integrity is questionable.
What to Tell a Technician
When you book a service call, note any patterns you’ve observed: the LED behavior, whether the door reverses with a test object, and any recent impacts or renovations. Provide the model number, installation date, and a short history of the issue. This information helps the technician diagnose faster and reduces the need for unnecessary component replacements. Mention that you want a safety-compliant fix, not a workaround that disables protection. Clear documentation supports a safer, longer-lasting repair.
Authority Sources and Best Practices
To ensure accuracy, consult official safety resources while debugging sensor problems. The following sources provide guidance on safe operation, code compliance, and best-practice maintenance for garage doors:
- https://www.osha.gov
- https://www.cpsc.gov
- https://extension.oregonstate.edu
GarageDoorAdjust Analysis, 2026 reinforces that safety sensors are integral to door operation and that bypassing them undermines overall system safety. Always prioritize safe diagnostics and professional service when in doubt.
Brand-Guided Safety Mindset (GarageDoorAdjust)
GarageDoorAdjust’s approach centers on safety-first diagnostics and compliance with local codes. By focusing on legitimate fixes—alignment, cleaning, and component replacement—you protect family members and pets while preserving warranty coverage. Our team’s guidance emphasizes avoiding any instruction that enables sensor bypass. If the issue persists after safe troubleshooting, seek professional help promptly. Your door system works best when every component is correctly aligned and condition-checked, not when a safety feature is disabled.
Tools & Materials
- Safety glasses(to protect eyes during testing and adjustments)
- Soft microfiber cloth(for lens cleaning without scratches)
- Lens cleaner or mild soap solution(avoid harsh chemicals near electrical components)
- Screwdrivers (flathead and Philips)(for mounting bracket adjustments)
- Step ladder(safe access to sensors and brackets)
- Voltage tester or multimeter(only if you have electrical wiring experience)
- Owner’s manual or sensor model documentation(for model-specific alignment and reset steps)
- Cardboard or soft obstacle for tests(use to simulate obstruction safely)
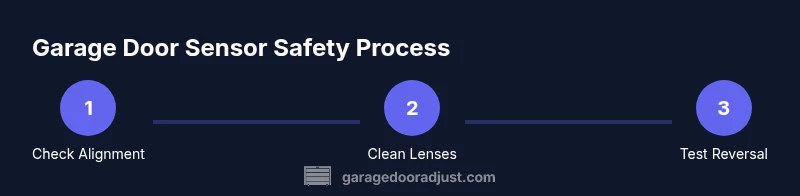
Steps
Estimated time: 30-45 minutes
- 1
Power down and secure
Turn off the garage door opener at the wall control and unplug the unit if possible. Lock or prop the door in the closed position to prevent unexpected movement while you inspect the sensors.
Tip: Lock the door or use a buddy to hold it closed while you work; never rely on fingers near moving parts. - 2
Check sensor alignment
Inspect that the photo-eye brackets are straight and facing each other with a clear line of sight. Slight misalignment is a common cause of false triggers and can often be corrected without replacement.
Tip: Use a straightedge or level to verify both brackets are on the same plane. - 3
Clean sensor lenses
Wipe both sensor lenses gently with a soft microfiber cloth. Dust, spider webs, and fingerprints can distort the beam and trigger false readings.
Tip: Do not use abrasive cleaners—gentle cleaning preserves optical accuracy. - 4
Clear the beam path
Remove any objects or debris from the door track and from the sensor housings. Even small obstructions can interrupt the beam and cause the opener to stop.
Tip: Check outdoors for branches or cobwebs that may have accumulated during windier days. - 5
Test auto-reverse with a safe object
Place a thin cardboard piece on the floor near the door’s path and close the door. The opener should reverse when the beam is interrupted. Do not rely on manual force to test; use the safety object.
Tip: If the door does not reverse, do not proceed with further testing; stop and re-check alignment and wiring. - 6
Inspect wiring and connectors
Look for loose or damaged wires at the sensor and control box. Loose connections or brittle insulation can cause intermittent failures and inaccurate sensing.
Tip: Power off before touching any wiring; use a multimeter only if you have training. - 7
Reset or reprogram the opener if allowed
Some models offer a sensor reset or alignment procedure in the owner’s manual. Follow the manufacturer’s reset sequence precisely to re-establish proper sensor operation.
Tip: Only perform manufacturer-approved resets to avoid safety or warranty issues. - 8
Decide on next steps
If tests indicate a faulty sensor or persistent misalignment, plan for sensor replacement or professional service. Do not attempt any bypass.
Tip: Document model numbers and symptoms to expedite service.
Got Questions?
Is it legal to bypass garage door sensors?
In most places, bypassing safety sensors is prohibited and can lead to fines or legal action. Bypassing also voids warranties and creates significant safety risks. Always aim to diagnose and repair rather than disable safety features.
Bypassing safety sensors is generally illegal and unsafe. It can void warranties and create dangerous conditions. Focus on safe diagnostics and professional repair.
What causes the sensor to fail to reverse?
Common causes include misalignment, dirty lenses, obstructions in the beam path, damaged wiring, or a faulty receiver. Start with alignment and cleaning before testing wiring. If issues persist, replace the sensor.
Most reversal failures come from misalignment or dirty lenses. Check the beam path and replace the sensor if needed.
Can I test sensors safely without bypassing?
Yes. Use a safe object placed on the floor and verify the door reverses when the beam is interrupted. Do not ignore a failure to reverse or attempt to disable the safety features.
Always test with a safe object and never disable safety features.
Should I replace sensors myself?
Sensor replacement is feasible for those with electrical experience, but many installations require precise alignment and wiring. If in doubt, hire a qualified technician to ensure code compliance and warranty coverage.
If you’re not comfortable with electrical work, hire a professional to replace sensors.
When is it time to call a pro?
Call a professional when tests indicate persistent misalignment, damaged wiring, or a faulty sensor that cannot be corrected through cleaning or realignment. A licensed technician ensures safety and code compliance.
If tests don’t fix the issue, a pro is the safest option.
Watch Video
Quick Summary
- Avoid overriding safety sensors; safety first.
- Start with alignment, cleaning, and obstruction checks before replacing parts.
- Use manufacturer-approved procedures and seek professional help when in doubt.
- Document symptoms and model details for quicker service.