Can You Remove Garage Door Sensors? Safe, Responsible Guidance
Learn whether you can remove garage door sensors, the safety risks, and safer alternatives. This comprehensive how-to covers steps, troubleshooting, and when to call a pro for guaranteed safety.

Removing a garage door sensor is technically possible but not recommended except during planned replacement or a supervised diagnostic. Bypassing safety sensors can prevent the door from reversing on impact, violate safety codes, and create serious injury risks. If you must proceed for a legitimate repair, follow proper shutdown procedures, replace the sensor promptly, and restore full safety features immediately.
Why removing sensors isn't recommended
Safety sensors are a critical part of the garage door’s automatic reversal system. According to GarageDoorAdjust, removing or bypassing these sensors increases the risk of injury and can violate local safety codes. The photoelectric eyes detect objects in the door’s path and instruct the opener to reverse. Without them, a child, pet, or object under the door could be crushed. Even temporarily disconnecting the sensors can create an unsafe setup that doesn’t re-enable automatically when you reconnect. If you’re troubleshooting, aim to repair or replace the sensor rather than remove it entirely. In most jurisdictions and with most residential models, permanent removal is not sanctioned by manufacturers in the installation documents. Keep the sensors in place whenever the door is connected to an automatic opener.
How garage door sensors work
Most residential systems use a sender and receiver mounted opposite each other along the door track. A beam crosses the doorway; when an object interrupts it, the opener receives a fault signal and stops or reverses. The alignment, cleanliness, and unobstructed path are essential for proper operation. Warnings lights on the sensor housing indicate status. If the beam is misaligned or dirty, you may get false triggers or failure to reverse. Proper maintenance includes keeping the lens clean, adjusting as needed, and replacing damaged components with compatible units from the same model family. This knowledge helps homeowners troubleshoot without bypassing the safety feature.
Legal and safety implications
Many local codes require functioning safety sensors for automatic doors. Bypassing or removing sensors can put you at risk of liability if someone is injured or if an insurer questions the home safety system. The GarageDoorAdjust analysis shows that homes with nonfunctional sensors tend to have higher risk factors during inspections. Before attempting any removal, check your local code and the door’s manual. If the sensor or wiring is damaged, the safest approach is replacement rather than removal, ensuring that the device operates within its rated tolerances and that the safety circuit remains intact.
When removing might be considered for replacement
In some scenarios, you may need to remove a sensor temporarily to replace a damaged lens or to access wiring, but this should be paired with an immediate replacement. If you’re upgrading to a newer sensor model or converting to a different control system, plan to reinstall the safety sensors or install a compatible alternative. Do not leave the door without a functional sensing mechanism. The goal is to restore safety and performance, not create a gap where the door operates without a protective reverse signal.
Safer alternatives to bypassing sensors
Instead of bypassing, consider: 1) Replacing the sensor with an identical or compatible unit; 2) Realigning the emitter and receiver if misalignment is the cause of faults; 3) Cleaning the sensor lenses to restore a proper beam; 4) Verifying the wiring and connectors for corrosion or wear. If the opener appears to be tripping alarms or showing fault codes, consult the unit’s manual and pursue a replacement rather than a bypass. These steps preserve safety while addressing the underlying problem.
Assessing sensor damage and identifying the model
Begin by inspecting the sensor housing for cracks, water ingress, or loose mounting. Note the model number from the sticker or label on the sensor itself or from the opener’s manual. Matching the replacement to the exact model helps ensure correct beam angle, voltage, and connector type. If you’re unsure, photograph the components and consult the manufacturer’s compatibility charts. This reduces the risk of incompatibility that could lead to improper operation or safety concerns.
Step-by-step: safely disconnecting a sensor for replacement
- Power down and unplug the opener, then switch off the circuit at the breaker. 2) Photograph both ends of each sensor’s wiring and its mounting to aid reinstallation. 3) Remove the mounting screws and gently pull the sensor away from its bracket. 4) Disconnect the wires using the proper connector type; cap exposed conductors with wire nuts. 5) Label each wire and store the sensor components securely. 6) Install the new sensor in the same orientation and secure mounting. 7) Reconnect wiring, restore power, and realign with the opposite unit. 8) Test the beam with a small object in the doorway and confirm the opener reverses correctly. 9) Re-test after a reboot of the system and ensure no fault codes remain. 10) Document the replacement and verify full safety operation before regular use.
Step-by-step: handling wiring and safety precautions
Wiring tasks require caution: avoid touching live conductors, use insulated tools, and keep moisture away from circuits. 2) Use a voltage tester to confirm power is off before handling any wires. 3) Keep a clean workspace and avoid twisting or pinching wires during reassembly. 4) If your setup uses a junction box, maintain secure connections with approved nuts and avoid copper-to-aluminum contact without appropriate adapters. 5) Do not reuse damaged connectors; replace them with identical or compatible parts. 6) Re-check all connections after reinstallation to prevent arcing or intermittent faults.
Testing after removal or replacement
With power restored, observe whether the safety beam indicator lights behave as expected. Place a temporary obstacle in the doorway and trigger the opener to verify automatic reversal. Confirm that the door stops and reverses when the beam is broken, and check for any fault codes on the opener’s display or associated app. If the beam fails to respond or misaligns during test, recheck mounting and wiring. A successful test ensures ongoing safety and proper operation.
Common mistakes to avoid
Common mistakes include leaving exposed conductors, failing to disconnect power, misaligning the sensor after reinstall, and using incompatible replacement parts. Avoid taping over sensors or using aftermarket housings not rated for your model. Do not skip the test sequence after any sensor work. Always ensure that the system resumes correct operation before closing the door.
Maintenance and long-term care for safety sensors
Regular cleaning of sensor lenses, periodic alignment checks, and testing the reversing function should become part of your home maintenance routine. Keep the sensor area free of dust and debris, and ensure weather seals are intact to prevent moisture intrusion. Schedule inspections if the door’s reversal becomes inconsistent or if you notice fault codes frequently. Proper upkeep helps prevent emergencies and extends the life of the system.
When to call a pro
If you encounter persistent sensor faults, water intrusion, damaged wiring, or uncertain model compatibility, contact a trained technician. A pro can diagnose electrical issues, confirm code compliance, and safely replace sensors without compromising system integrity. The GarageDoorAdjust team recommends seeking professional help when dealing with high-voltage components or uncertain wiring configurations.
Tools & Materials
- Flathead and Phillips screwdrivers(Assorted sizes to match mounting screws)
- Voltage tester(Verify power is off before touching wiring)
- Multimeter(Optional for diagnosing sensor circuits)
- Ladder(Stable, non-slip for reaching sensors)
- Replacement sensor kit(Compatible with your opener model)
- Wire nuts and electrical tape(Secure and insulate spliced wires)
- Wire stripper/cutter(Prepare wires for nut connections)
- Zip ties(Organize wires neatly)
- Camera or smartphone(Document wiring before removal)
- Safety glasses(Protect eyes from debris)
Steps
Estimated time: 1.5-2.5 hours
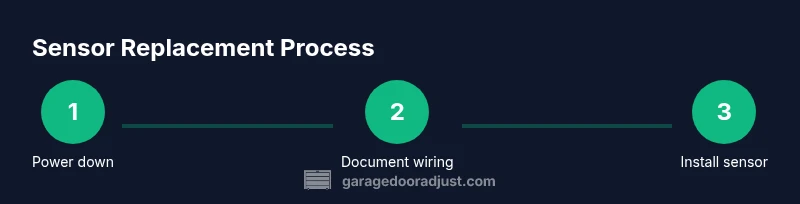
- 1
Power down the opener
Turn off the garage door opener at the wall unit or unplug the unit. Then switch off the circuit breaker for the door. This ensures there is no live current while you work.
Tip: Always verify with a voltage tester before touching wires. - 2
Document the current wiring
Take clear photos of both sensor units and the wiring harness. Label wires if needed to simplify reinstallation and avoid cross-connections.
Tip: A photo log reduces reassembly errors and saves time. - 3
Disconnect and remove the sensor
Loosen mounting screws and carefully detach the sensor from its bracket. Gently pull the wires free without tugging on the connectors.
Tip: Avoid pulling on the wires themselves; disconnect at the connector if possible. - 4
Cap and isolate wires
Cap exposed conductors with appropriately sized wire nuts and secure with electrical tape. Keep the terminals protected and away from moisture.
Tip: Double-check insulation and ensure no bare copper is exposed. - 5
Install replacement or new sensor
Mount the new sensor in the same orientation as the old one and reconnect the wiring according to your documentation. Ensure the beam path is clear of obstructions.
Tip: Use the exact model and verify compatibility with the opener. - 6
Reconnect power and test alignment
Restore power and align the emitter and receiver so the beam is uninterrupted when doors are closed. Use a small object to verify the door reverses when the beam is broken.
Tip: Make micro-adjustments until the LED indicators reflect proper operation. - 7
Run a safety test
With the door fully closed, place a test object in the doorway to trigger the sensor and observe automatic reversal. Confirm no fault codes appear.
Tip: If the door does not reverse, power down and recheck wiring and alignment. - 8
Finalize wiring and clean up
Tidy up the wiring, secure with zip ties, and confirm all components are mounted firmly. Recheck that the area is dry and free of debris.
Tip: A neat installation reduces wear and accidental disconnections. - 9
Document the replacement
Record the sensor model, date of replacement, and any codes observed during testing. This aids future maintenance.
Tip: Keeping a maintenance log helps track sensor life span. - 10
Know when to call a pro
If you encounter persistent misalignment, corrosion, or nonfunctional safety features, contact a licensed technician. Improper wiring can create serious hazards.
Tip: Professional help is recommended for high-voltage or uncertain wiring routes.
Got Questions?
Can you safely remove garage door sensors without replacing them?
Removals without replacement can create dangerous conditions and may violate local codes. Replacement is strongly recommended to maintain safety and compliance.
You can remove sensors, but it's unsafe to do so without replacing them. Replacement is strongly recommended to stay compliant and protect safety.
Is removing sensors illegal in some areas?
Many jurisdictions require functional safety sensors for automatic doors. Always check local building codes and the door manufacturer’s guidelines before altering the system.
In many places, you must have working sensors. Check local codes and the door’s manual before making changes.
What should I do if the door won’t reverse after sensor removal?
Stop using the door and inspect the wiring and mounting. Reconnect sensors or replace them, then re-test to ensure automatic reversal works.
If the door won’t reverse, stop using it, check wiring, and replace sensors. Test the reversal again.
How long does sensor replacement typically take?
Replacement duration depends on model and access, but a typical job runs under an hour for a single sensor with proper tools and a replacement unit.
Replacement usually takes under an hour if you have the right parts and tools.
What safety steps should I take before starting?
Power off the opener, test for voltage absence, wear protective eyewear, and keep water away from electrical components. Follow the manufacturer’s guidelines.
Power off the unit, check there’s no voltage, wear eye protection, and follow the manual.
Watch Video
Quick Summary
- Understand why sensors are essential for safety.
- Document wiring and model numbers before removal.
- Replace with a compatible unit; avoid bypassing the system.
- Call a professional if wiring or safety concerns arise.