Broken Garage Door Opener: Diagnose and Fix Fast (2026)
Step-by-step guide to diagnose and safely fix a broken garage door opener. Quick checks, diagnostic flow, and when to call a pro. Urgent solutions for homeowners.

If your garage door opener is broken but the door still won’t move, start with power, remote, and sensor checks. The most likely causes are a power issue, dead remote batteries, or misaligned safety eyes. Try unplugging and replugging the unit, test the wall control, and verify sensor alignment before moving to the full diagnostic flow.
Why a broken garage door opener happens
According to GarageDoorAdjust, many breakdowns start with simple power or signaling issues. Most homeowners notice that the opener light is on but the door stays put, or the remote won’t trigger the drive. Common root causes include power supplies that have tripped, dead batteries in remotes, misaligned photo eyes, or worn-out limit switches. Understanding these basics sets the stage for a fast fix and helps homeowners avoid unnecessary replacements.
This section also clarifies the scope of a typical failure: it is usually the opener system’s electronics or sensing components, not the door hardware itself. Recognizing the difference is essential because it dictates whether you can safely DIY or if a professional is needed. The GarageDoorAdjust team emphasizes starting with the simplest checks first to minimize risk and cost.
Quick checks you can do safely
Before you dive into diagnostics, perform a few low-risk checks that cover most everyday failures.
- Power: Confirm the outlet is live. If the opener is on a GFCI circuit, reset the outlet and press the wall button to rule out a tripped circuit.
- Remote and wall console: Replace remote batteries and re-pair if needed. Test the wall switch and ensure the lock feature isn’t engaged.
- Manual operation: If possible, disconnect the opener to operate the door manually (use care). If the door is hard to move manually, the issue may be spring or track related and require a pro.
- Sensors: Look at the safety eyes near the bottom of the door track. Clean the lenses and ensure the cables are intact and aligned. Misaligned sensors can prevent the door from moving even if the opener seems powered.
- Reset and re-test: After making adjustments, unplug the unit for 60 seconds, then plug back in and test with the remote and wall control.
If these steps don’t restore function, proceed with the diagnostic flow below or call a pro if you encounter springs, cables, or circuitry that you’re uncomfortable handling.
Diagnostic-flow primer
A structured diagnostic approach helps you identify root causes without unnecessary steps. Start with symptoms, then map them to likely causes, and finally apply fixes in a safe sequence. This approach reduces risk and saves time. As you follow the flow, document what you tested and the results so you don’t repeat steps. In many cases, a power or sensor issue is the culprit, but occasionally a worn control board or wiring fault requires professional assessment.
Step-by-step approach to fix common causes
This section outlines a practical sequence to address the most frequent problems observed with a broken garage door opener. It aligns with the diagnostic flow and provides concrete actions you can take to restore operation while maintaining safety standards.
- Recheck power and reset outlets if the opener shows signs of life but won’t operate. A simple reset often resolves transient faults.
- Inspect and recalibrate safety sensors. A misalignment or dirty lens can block operation. Align the eyes and test door reversal after alignment to confirm operation.
- Test remotes and re-pair the remote to the opener. If pairing fails, replace the remote battery and re-sync using the manual guide for your model.
- Verify the door balance and track alignment. If the door drifts or binds manually, do not attempt to fix the springs yourself; call a professional.
- Check for error codes on the opener’s display, if available. Many models provide fault codes that guide you toward a specific subsystem (power, sensors, or logic).
- When all else fails, consult the opener’s manual or contact a qualified technician for a diagnostic service call to prevent injury and damage.
Safety, warnings, and when to call a professional
Garage door systems contain high-tension springs and heavy components. Do not attempt spring or cable work unless you’re trained and equipped. Disconnect power before any inspection that involves wiring. If you notice frayed wires, bent tracks, or inconsistent door balance, stop and call a pro. Using the wall control while a safety fault exists can cause unexpected door movement and injuries.
Maintenance to prevent future breakdowns
Regular maintenance reduces the odds of a sudden failure. Create a simple quarterly routine: clean and lubricate moving parts, inspect rails and rollers for wear, replace batteries in remotes annually, and test auto-reverse and sensors monthly. Keep the remote’s firmware up to date if your model supports updates. A proactive approach keeps your system reliable and extends its life.
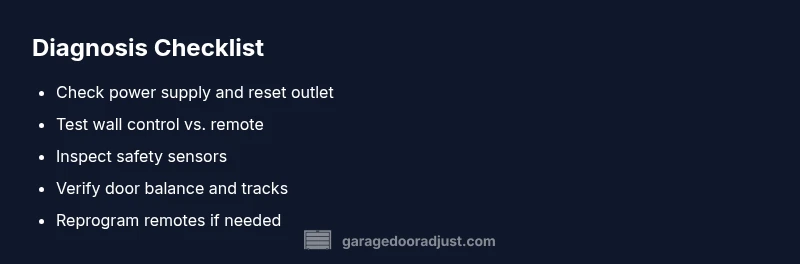
Troubleshooting checklist you can print
- Verify power and reset the circuit.
- Test wall switch and remote, re-pair if needed.
- Inspect safety sensors for misalignment or dirt.
- Manually test door balance and tracks (do not touch springs).
- Check for error codes and consult the manual if shown.
Steps
Estimated time: 30-60 minutes
- 1
Power check and reset
Unplug the opener, wait 60 seconds, plug back in, and test the wall control. If the opener has a reset or test button, use it according to the manual.
Tip: A cold reboot often clears transient faults. - 2
Remote and wall control test
Test both the remote and the wall switch. Replace remote batteries, re-pair if necessary, and ensure the wall switch isn’t stuck in the 'lock' position.
Tip: Keep a second remote as a backup. - 3
Sensor inspection
Inspect the photoelectric sensors at the door base. Wipe lenses, straighten misaligned sensors, and ensure there’s nothing blocking the beam.
Tip: Even a small speck can stop operation. - 4
Door balance check
Manually lift the door about halfway. It should stay in place. If it sags or binds, a spring or track issue may exist and requires a professional.
Tip: Do not adjust springs—professionals only. - 5
Re-test and reprogram
After sensor and power checks, re-test operation and reprogram remotes if needed. Follow model-specific pairing steps in the manual.
Tip: Document the steps for future reference. - 6
Final safety test
With the door closed, use the opener to verify auto-reverse on contact with a small object placed on the floor.
Tip: If auto-reverse fails, stop and call a pro.
Diagnosis: Garage door opener won’t move or respond to remote/wall control
Possible Causes
- highPower issue or dead outlet
- mediumRemote pairing or battery issue
- mediumSafety sensor misalignment or obstruction
- lowDoor balance or track problem
Fixes
- easyCheck outlet, reset GFCI, and power cycle the opener
- easyReplace remote battery and re-pair with the opener
- easyClean and align safety sensors, verify clear path for door
- hardInspect tracks and balance; do not adjust springs yourself
Got Questions?
Why won't my garage door opener respond even though the light is on?
Light on but no movement usually points to a power issue, remote pairing problem, or sensor fault. Start with basic power cycling, remote battery check, and sensor alignment before pursuing more complex fixes.
If the light is on but nothing moves, start with power, remote, and sensor checks, then proceed with the diagnostic flow if needed.
How do I safely reset my garage door opener?
Refer to your model's manual for the reset sequence. Typically, this involves unplugging, waiting, and re-plugging, followed by re-pairing remotes and re-programming limits if required.
Unplug, wait a minute, plug back in, and re-pair remotes. If your model has a reset button, use it as directed in the manual.
Can broken sensors prevent the door from opening?
Yes. Misaligned or dirty sensors can block door operation for safety reasons. Clean and realign the sensors and test door reversal after alignment.
Sensors can stop the door for safety. Clean and realign them, then test that the door reverses on obstacle.
Is it safe to replace the springs myself?
Spring and cable work is dangerous. Do not attempt it unless you are trained with proper safety equipment. Call a professional for spring repairs.
No, spring work is dangerous. Call a professional for spring repairs to avoid serious injury.
What maintenance should I perform monthly?
Lubricate moving parts, check tracks and rollers, test auto-reverse, and ensure remotes are working. A quick monthly check prevents many problems.
Do a quick monthly check: lubricate, inspect tracks, test auto-reverse, and verify remotes.
What should I do if the opener still won’t work after following steps?
If fixes don’t restore function, shut down the system and contact a licensed technician for a formal diagnostic and repair.
If it still won't work after trying these steps, call a licensed tech for a full diagnostic.
Watch Video
Quick Summary
- Inspect power first, then signaling devices.
- Misaligned safety sensors are a frequent culprit.
- Avoid DIY spring or high-tension repairs.
- Maintain a simple maintenance routine to prevent future failures.