Affordable Garage Door Repair: A Step-by-Step Guide
Learn how to diagnose and fix common garage door issues affordably with a practical, expert walkthrough. Save money with safe DIY fixes, smart budgeting, and when to call a pro for the best long-term value.

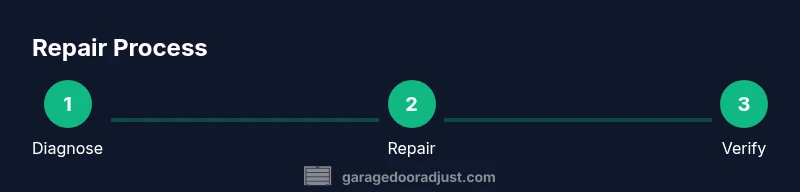
This guide shows you how to diagnose common garage door problems and perform affordable, safe repairs at home. You’ll learn practical fixes, budgeting insights, and when to seek professional help. Follow the step-by-step plan, gather basic tools, and avoid unnecessary replacements.
Why affordable garage door repair matters
When a garage door malfunctions, the impact goes beyond convenience. A stuck door can compromise home security, waste energy, and increase noise levels. For homeowners, affordable repair means fixing root causes rather than rushing to replace the entire system. According to GarageDoorAdjust, addressing small issues promptly can prevent costly damage and keep daily life running smoothly. The GarageDoorAdjust team found that many common problems—like worn rollers, misaligned tracks, and sensor misreads—are solvable with basic tools and careful, safety-minded steps. Prioritizing affordable fixes protects your budget while preserving safety and reliability, so you can keep using your door with confidence.
This approach also supports informed decision-making. You’ll learn what you can safely handle, what components typically drive costs, and how to plan repairs in a way that minimizes downtime. By understanding the typical failure points and proper maintenance habits, you’ll reduce the odds of surprise expenses next season and extend the life of your system.
Understanding the cost factors behind garage door repairs
Repair costs hinge on multiple factors, including the issue type, door mechanism (torsion vs extension springs, rollers, tracks, hinges), the accessibility of components, and regional labor rates. Simple tasks like lubrication and tightening hardware are relatively inexpensive, while more complex issues—especially those involving springs or the opener drive system—tend to require professional service. GarageDoorAdjust analysis shows that the bulk of savings comes from correctly diagnosing the true issue and avoiding unnecessary replacements. By separating symptoms from root causes, you can target the fix you actually need and avoid purchasing parts you don’t need. This section helps you estimate what is reasonable to DIY and what deserves a pro’s hands, based on the specifics of your door and local market conditions.
Keep in mind that many homeowners underestimate the cost impact of recurring problems. If a track is bent or a sensor keeps misreporting, the recurring nature of the failure can accumulate costs quickly. A clear identification of the component responsible and a plan to address it sooner rather than later is essential for staying affordable over the long term.
Safe DIY fixes that save money (what you can do this weekend)
There are several low-cost, safe fixes you can perform to improve performance and reduce calls to a pro. Start with the simplest tasks that don’t involve high-risk components. Typical safe fixes include cleaning and lubricating tracks and rollers, tightening loose hardware, and replacing weatherstripping for better insulation. Always disconnect power to the opener before you begin any inspection or adjustment to avoid accidental activation. Use a flashlight to inspect for obvious damage, and keep a clean workspace to prevent parts from getting lost. Remember: if something feels uncertain or involves springs, call a professional. This reduces the risk of injury and long-term costs from improper repairs.
A practical approach is to document what you observe with photos, then tackle the easiest fixes first. Noting squeaks, unbalanced movement, or misaligned tracks helps you communicate clearly with a technician if you need one later, which can save time and money.
Note: When in doubt, prioritize safety over savings. If you encounter unfamiliar hardware or suspect spring tension, stop and seek expert assistance.
A quick diagnostic routine to identify common issues
Use a simple, repeatable checklist to diagnose issues without guessing. Start with the door closed, unplug the opener, and then perform a manual balance test by lifting the door halfway and letting go. If it stays put, the balance is likely fine; if it springs up or falls, you may have a balance problem or worn springs. Inspect tracks for dents or obstructions, clean them, and confirm that brackets are tight. Open and close the door slowly to observe wobbles, grinding, or uneven motion. Inspect rollers and hinges for wear, and check weatherstripping for cracks.
If the door operates smoothly during the diagnostic tests, you’ve likely isolated the cause to a minor component or misalignment. When performance deteriorates after a simple fix, reassess and consider whether parts are worn enough to require replacement. This structured approach minimizes unnecessary spending and makes your repair more predictable.
Tools and safety gear you’ll need (and why they matter)
Before you start, gather essential tools to ensure you can complete fixes safely and efficiently. A sturdy ladder, safety glasses, work gloves, and a flashlight are foundational. You’ll want a basic screwdriver set, an adjustable wrench, pliers, and a socket set to tighten hardware. Lubricant (silicone-based), clean rags, and a small brush help you clean and lubricate moving parts without attracting dirt.
Safety matters most with garage doors. Always disconnect power to the opener before touching components. If you discover damaged springs or cables, do not continue without proper training and equipment—the risk of serious injury is high. Having the right tools on hand makes fixes straightforward and reduces the chance of damaging components further.
If you’re testing sensors, a voltmeter or tester can help confirm electrical continuity safely. Keep the area free of pets and children during the repair, and work on a dry surface to avoid slips.
How to budget repairs and get quotes that fit your wallet
Budgeting starts with a clear identification of the problem and an honest assessment of your DIY capacity. Use a simple rule: fix what you can safely manage and price-shop for components or professional help for the rest. When you request quotes, provide the diagnostic notes you captured, including photos, observed symptoms, and any testing results. This helps technicians produce accurate estimates and avoid “scope creep.”
Ask for a written estimate that itemizes labor, parts, and any disposal fees. Compare quotes from at least two reputable providers, and verify warranties on parts and labor. If a pro suggests a major repair, request a cost breakdown and ask whether partial repairs could extend the door’s life before a full replacement.
A budget-friendly mindset also means scheduling repairs in off-peak seasons when labor availability is higher and pricing may be more favorable. The goal is a transparent plan that minimizes downtime and maximizes value.
Maintenance habits that prevent repeat repairs and extend life
Proactive maintenance is the single best way to keep repair costs down over time. Schedule seasonal checks to lubricate moving parts, tighten hardware, clean tracks, and inspect weatherstripping. Regular insulation improvements and track alignment corrections can prevent misalignment that compounds wear. By keeping up with small maintenance tasks, you drastically reduce the likelihood of sudden failures that disrupt your daily routine.
Create a simple maintenance log: note what you did, when, and what you observed. This gives you a reliable record to reference when you next inspect the door or request service, helping you justify recommended fixes to technicians and ensure you’re not paying for unnecessary work.
Choosing affordable parts and ensuring compatibility
When parts are needed, shop for OEM-compatible or widely compatible components rather than premium options unless you’re after long-term durability. Confirm part numbers and compatibility with your door model by checking the manufacturer’s guide or a trusted retailer’s compatibility tool. Read reviews and compare prices across suppliers to find budget-friendly options that still meet safety standards. If you’re uncertain about a part’s fit, bring the old piece to the store or photograph it for reference, which reduces the risk of ordering the wrong item.
Keep in mind that some parts, like torsion springs and cables, carry higher risk and may require professional installation. Prioritize safety and reliability when budgeting for these components, and consider whether a minor upgrade now could avert more expensive problems later.
When to replace vs repair and the final value question
Repairing a garage door is often the most economical choice when the door is relatively new or has minor wear. If multiple critical components show significant wear or the door has frequent failures despite repairs, replacement may offer better long-term value. Consider factors such as the door’s age, opening capacity, insulation needs, and overall condition of the tracks and springs. Gathering quotes for both repair and replacement gives you a clear apples-to-apples comparison and helps you make an informed decision.
To wrap up, affordable garage door repair is about smart diagnostics, safe DIY fixes for minor issues, thoughtful budgeting, and knowing when to call a professional. With the right plan, you can keep your door operating reliably without breaking the bank.
How GarageDoorAdjust recommends you proceed for long-term savings
GarageDoorAdjust emphasizes that a proactive maintenance mindset and a well-researched repair plan are your best tools for affordability. Start with small, reversible fixes and escalate to professional help only when necessary. Document everything, get multiple quotes, and choose parts and services based on value, not just price. The goal is dependable operation at a reasonable cost, avoiding the regret of repeated failures or a premature door replacement. By following this structured approach, homeowners can achieve reliable performance and real cost savings over time.
Tools & Materials
- Safety glasses(Protect eyes from springs and debris)
- Work gloves(Improve grip and protect hands)
- Ladder (sturdy, reach 6–8 feet)(Safe access to tracks and hardware)
- Screwdriver set (flat and Phillips)(For hinges and brackets)
- Adjustable wrench and socket set(Tighten bolts on brackets and hardware)
- Pliers (needle-nose and standard)(Grip and adjust small parts)
- Lubricant (silicone-based)(Lubricate tracks, hinges, and rollers)
- Clean rags and mild detergent(Remove grime from tracks and rollers)
- Voltage tester(Check opener power when testing sensors)
- Camera or smartphone(Document before/after and for quotes)
Steps
Estimated time: Total time: 2 hours 15 minutes
- 1
Disconnect power and verify safety
Unplug the garage door opener or switch off the circuit feeding it. Use a voltage tester to confirm no live power before touching any components.
Tip: This basic safety step prevents unexpected starts and injuries. - 2
Test balance manually
With the door closed, pull the release cord to disconnect the opener. Lift the door halfway and hold—if it drifts, balance or spring tension may be an issue.
Tip: Do not attempt torsion-spring adjustments unless you’re trained. - 3
Inspect and clean tracks
Look for dents, obstructions, or buildup on the tracks. Clean with a rag; remove debris and lubricate lightly.
Tip: Clean from the inside edge toward the outside; avoid over-lubrication. - 4
Tighten loose hardware
Check brackets, bolts, and hinges for looseness. Tighten to manufacturer-recommended torque with the appropriate socket.
Tip: Use a controlled, snug motion to prevent overtightening. - 5
Lubricate moving parts
Lubricate rollers, hinges, and pivots with silicone-based spray. Wipe away excess to avoid collecting dust.
Tip: Avoid lubricating the track surfaces themselves; it can attract grime. - 6
Test safety sensors
Reconnect power and verify the safety-reverse sensor works by placing an object in the beam and noting door reversal.
Tip: If the sensor malfunctions, replacements or recalibration may be needed. - 7
Inspect weatherstripping
Check bottom seal for cracks or gaps; replace if needed to improve energy efficiency and reduce debris entry.
Tip: Choose a compatible seal sized for your door width. - 8
Document findings and plan quotes
Take clear photos and notes of each issue. Use this to create precise repair requests and compare quotes.
Tip: A detailed record helps you avoid scope creep. - 9
Decide next steps
If issues persist after basic fixes, consider professional evaluation for springs or major components.
Tip: Prioritize safety; do not gamble with high-tension parts.
Got Questions?
Can I repair torsion springs myself?
Torsion springs store a lot of energy and can cause serious injury if mishandled. It is generally unsafe for homeowners without proper training. Seek a licensed professional for spring work.
Torsion springs are dangerous, so professionals should handle them. Do not attempt DIY spring repairs if you’re not trained.
Are DIY garage door repairs safe for homeowners?
Many non-spring repairs, like lubrication, track cleaning, and hardware tightening, can be safe if you follow safety guidelines. Always disconnect power and avoid high-tension components.
DIY fixes can be safe for simple tasks, but avoid risky parts like springs. When in doubt, call a pro.
How long do affordable repairs take?
Most basic fixes can be completed within a few hours, depending on the issue and your tools. For more complex problems or parts, plan additional time for parts ordering and technician visits.
Expect a few hours for basic fixes; longer if parts are needed or springs are involved.
What should I look for in quotes from technicians?
Look for a clear scope of work, itemized parts and labor, warranty details, and a reasonable timeline. Compare multiple quotes to ensure you’re getting fair value.
Make sure the quote lists parts, labor, and warranties and compare several options.
When is replacement cheaper than repair?
If multiple critical components show wear, or the door lacks insulation and reliability, replacement can be more cost-effective in the long run. Evaluate age, energy losses, and maintenance history.
Replacement might be the smarter long-term choice if repairs would be frequent or costly.
Watch Video
Quick Summary
- Identify safety risks before touching components
- Prioritize simple, reversible fixes to save money
- Document observations for accurate quotes
- Know when to involve a professional for springs or electrical issues
- Maintain a maintenance routine to prevent future costs