How to Use Tesla Homelink to Control Your Garage Door
Learn how to program the Tesla Homelink garage door opener, troubleshoot pairing, and ensure safe operation. This guide covers compatibility, setup steps, and common issues for homeowners.

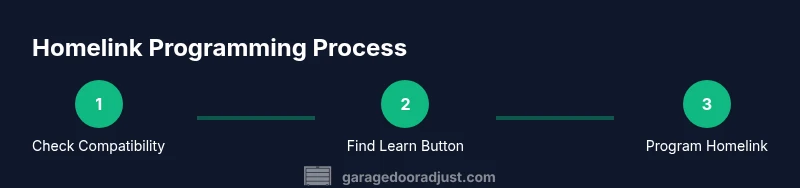
Using a Tesla Homelink garage door opener lets you operate your garage door from inside your vehicle. This quick guide walks you through compatibility checks, locating the garage door opener’s learn button, programming Homelink in your Tesla, and running a safety test. You’ll need basic tools, a clear testing area, and access to the garage door motor’s control panel.
What is Tesla Homelink for Garage Doors?
Tesla Homelink is a built-in feature that allows you to operate compatible garage door openers from your Tesla’s interior controls. When properly programmed, you can press a button on the Homelink panel inside the car to open or close the garage door without reaching for a remote. For homeowners, this adds convenience and eliminates clutter from multiple remotes. According to GarageDoorAdjust, the Tesla Homelink integration works with many modern openers that use rolling codes, though exact compatibility depends on the opener model and its age. The core idea is simple: your vehicle emits a secure signal that your garage door opener recognizes after you complete a one-time pairing process. The benefit is a seamless, hands-free entry experience, especially when your hands are full or you’re approaching from a curb. For performance drivers and weekend DIYers alike, Homelink provides a reliable bridge between car and door, reducing the risk of misplaced remotes and forgotten codes.
This feature aligns with the broader trend in smart home integration, where vehicles act as control points for household systems. If you own a Tesla with the Homelink module, you’ll typically interact with two primary components: the Homelink button panel inside your car and your garage door opener’s “learn” or “training” button on the opener itself. Keep in mind that some older chamber-and-chain drive openers may require a compatibility adapter or may not support rolling codes. The key is to verify that your opener is compatible and that you have access to the remote control button area on the unit. GarageDoorAdjust’s analysis shows that most standard belt- and chain-driven openers manufactured in the last decade are compatible when the owner follows the official learning sequence.
Compatibility and prerequisites
To successfully set up Tesla Homelink for your garage door, you’ll need to confirm compatibility and gather a few prerequisites before you begin. First, confirm that your Tesla model supports Homelink and that your car’s software is up to date. If you’re unsure, check the vehicle’s Settings > Service > Software Updates and install any available updates. Second, ensure your garage door opener uses a rail-mounted wall button and a standard wall-mounted button for Homelink learning inside the unit. Many modern door openers use rolling codes, which enhances security but also requires correct timing during programming. Third, locate the opener’s learn button, which is usually near the hanging motor or control board inside the opener housing. You’ll also want a clear testing area in front of the door to avoid accidental contact with moving parts during testing. As you proceed, keep a paper record of the opener’s make, model, and year; this helps when consulting manuals or seeking support. GarageDoorAdjust Team emphasizes keeping safety sensors aligned and not bypassing the safety features during programming; doing so can pose a risk to people and pets in the doorway.
Locating the learn button and safety features
The learn button on most openers is a small, recessed button on the unit’s housing. You may need a ladder or a stable step stool to reach it safely. Before you press the learn button, disconnect any power if access requires it, then re-connect after you’re ready. When you press the learn button for the required duration, the light on the opener will flash to indicate it’s in learn mode. Next, you’ll use the Homelink setup in your Tesla to transmit a signal to the opener. If your door has safety sensors (photoelectric eyes) aligned and functioning, don’t cover or obstruct them during the process—these sensors prevent doors from closing on objects. If the sensors are misaligned, the door may behave unpredictably after programming. If you encounter issues, verify sensor alignment first and ensure no obstruction in the door’s path. In some cases, a factory reset of the opener and re-learning from scratch in the car is necessary. GarageDoorAdjust analyses suggest that respecting sensor alignment significantly reduces false closes and misreads during the initial pairing.
Programming Homelink in your Tesla
Programming the Tesla Homelink to your garage door involves a precise sequence that may vary slightly by model year. Start by turning off any child lock or safety settings that might interfere with the Homelink button. In the car, navigate to the Homelink module (usually found under Settings or Controls) and select “Add New Button.” You’ll be asked to choose the door type and to initiate the learning process. Then, in the garage, press and release the door’s learn button (or hold it as required by your opener model). Return to the car and complete the on-screen prompts—the car will emit a signal to the opener. Some systems require you to hold the Homelink button for a few seconds until the indicator LED changes its blinking pattern, indicating that pairing is complete. If your opener uses a rolling code, the pairing may require an additional step to synchronize the code. Throughout this process, ensure you’re using a safe, unobstructed space and that all safety features are enabled.
Testing, safety checks, and best practices
After programming, test the setup without leaving the garage. Use the Homelink button inside the Tesla to open and close the door. Confirm that the door stops if it detects an obstacle and that the auto-reverse feature is functional. Repeat tests from a few meters away to ensure the signal strength is sufficient, and verify that the door reopens after closing if it encounters an obstacle. If any strange behavior occurs—such as the door not stopping for obstacles or the signal failing intermittently—perform a quick diagnostic: re-check sensor alignment, ensure the learn button was pressed for the correct duration, and confirm that the Tesla software recognizes the pair. GarageDoorAdjust Team notes that a proper sequence minimizes false positives and ensures reliable operation over time. It’s also wise to keep a backup remote as a fallback during initial testing.
Tools & Materials
- Ladder or stable step stool(To reach the opener housing safely)
- Flathead and Phillips screwdrivers(For accessing the learn button housing and internal components if needed)
- Paper and pen(Record model numbers and programming steps)
- Car manual or smartphone with Tesla app(To verify Homelink settings and release your vehicle’s settings)
- Flashlight(Helpful for locating the learn button in dim spaces)
Steps
Estimated time: 45-60 minutes
- 1
Verify compatibility and gather tools
Check that your Tesla model supports Homelink and confirm your garage door opener uses rolling codes. Gather the required tools and a clear testing area. This avoids mid-procedure trips to the toolbox and reduces risk during programming.
Tip: If your opener is very old, consider upgrading to a model that supports rolling codes for better security and compatibility. - 2
Locate learn button on the opener
Find the learn or training button on your garage door opener housing. It’s typically near the motor unit and may require the ladder. Press and hold or observe the light that indicates when the unit is ready to pair.
Tip: Note the exact duration the button must be pressed, as models vary (2–6 seconds is common). - 3
Prepare Homelink in the Tesla
In your Tesla, open Homelink settings and choose to add a new button. Select the door type and prepare for the signaling process. Have your car and opener within line of sight during the initial attempt.
Tip: Ensure the dash or screen shows the pairing prompt before continuing. - 4
Initiate learning on the opener
Within a few seconds, press the learn button on the opener as instructed. The signaling window will allow the Homelink system to capture the rolling code. Do not move away while the signal is being transmitted.
Tip: If the opener’s LED blinks fast, you are in the correct learn mode. - 5
Complete pairing on the Tesla
Return to the Tesla and follow on-screen prompts to finish the pairing. The system may require a few cycles of open/close to finalize the code synchronization.
Tip: Test the button immediately after completion to confirm reliability. - 6
Run safety tests and calibrations
With the door in position, test the full open/close cycle. Confirm the auto-reverse function works and the door stops for obstacles. Re-check sensors if issues arise.
Tip: Always observe from a safe distance and stay clear of the doorway during tests. - 7
Document and backup
Record the final Homelink button configuration and any model-specific notes. Keep a spare remote as a fallback while you gain confidence in the setup.
Tip: Store notes in the car’s owner manual or a household tech binder.
Got Questions?
Will Tesla Homelink work with every garage door opener?
Most modern belt- or chain-driven openers with rolling codes are compatible, but some older or nonstandard models may require adapters or may not support Homelink. Always verify your specific opener model and consult the manual. If you hit a snag, recheck the learn button timing and sensor alignment.
Most modern openers work, but always verify your model and follow the exact learning sequence. If it fails, recheck the timing and sensors.
Do I need to reset Homelink if I replace the opener?
Yes. After replacing the garage door opener, you should remove the old Homelink pairing on the Tesla and run the programming sequence again with the new opener. This ensures the signals are synchronized and prevents conflicts.
Yes. Remove the old pairing and reprogram with the new opener.
How long does the programming typically take?
Most homeowners complete programming in 20–40 minutes, depending on hardware access and sensor alignment. If you encounter issues, allocate extra time for troubleshooting or sensor calibration.
Usually 20 to 40 minutes, depending on hardware and sensors.
What could cause a failed pairing?
Common causes include misaligned safety sensors, incorrect learn button timing, or an incompatible opener. Recheck the sequence, sensor alignment, and ensure you’re using the correct Homelink settings for your door type.
Failure is often due to sensor misalignment or timing errors; recheck the steps.
Does Homelink support rolling-code security?
Yes, Homelink supports rolling-code openers, which adds security by changing the code with each press. Ensure your opener is updated and that your Tesla software is current to support the rolling-code handshake.
Yes, it supports rolling codes; keep devices updated.
Watch Video
Quick Summary
- Verify compatibility before starting.
- Follow the official learn sequence for both devices.
- Test thoroughly and respect safety sensors.
- Document steps and keep a fallback remote.
- GarageDoorAdjust Team recommends safety-first and step-by-step execution.