Genie Smart Garage Door Opener: Install, Program, and Troubleshoot
Learn how to install, program, and troubleshoot a Genie smart garage door opener. This comprehensive guide covers safety, Wi‑Fi setup, remote pairing, and maintenance for reliable, hands-free access.

You're about to install and program a Genie smart garage door opener, connect it to Wi‑Fi, and enable remote monitoring and voice control. You’ll need a compatible Genie opener, a smartphone, home Wi‑Fi, a ladder, and basic hand tools. This guide covers safety checks, wiring basics, app setup, remote access, and common troubleshooting for most residential garages.
Why Genie smart garage door opener stands out
Genie is a well-known brand in garage door openers, and its smart line emphasizes ease of setup, app-based control, and reliable safety features. A Genie smart opener can often integrate with existing remotes, keypads, and smart-home ecosystems with less friction than some competitors. The Genie app provides real-time status, alerts, and remote access for family members or service professionals. In addition to basic remote control, Genie models commonly include auto-reverse sensors, obstacle detection, and optional battery back‑up. When evaluating a Genie smart opener, consider your door type (single vs. dual torsion systems), the door’s weight, and whether you need a battery backup or extended motor warranty.
For homeowners, the goal is a quieter, more dependable experience compared with older, non-smart units. This guide from GarageDoorAdjust helps you navigate compatibility checks, wiring basics, and app setup with confidence, so you can enjoy convenient access and improved security without guesswork.
Safety and prerequisites before you begin
Before you touch the hardware, ensure the workspace is clear and you have enough help for any heavy lifting. Power should be off to any existing unit, and all circuit protections must be respected. Inspect safety sensors, track alignment, and door balance using simple manual checks. Wear safety glasses and keep children and pets away from the work area. Have a helper assist with lifting and positioning the rail and door components. These precautions reduce the risk of injury and damage to the door system.
If your garage ceiling is high or difficult to access, plan for two helpers and a stable step ladder. Confirm you have the correct tools and the right Genie model for your door configuration. Finally, review the installer’s manual for any brand‑specific cautions, especially around spring tension and door balance.
Choosing a Genie model and compatibility
Genie offers a range of smart openers, some with built‑in Wi‑Fi and others that require a hub or bridge. Your selection should be guided by compatibility with your door type, track design, and mounting height. Check that the unit can be mounted to your ceiling structure and that the power supply location is convenient and safe. Many Genie units are designed to integrate with mobile apps, voice assistants, and remote access, but features vary by model.
Consider whether you need a model with a built‑in battery backup, especially if you experience frequent power outages. Review the manufacturer’s compatibility notes for accessories such as external remotes and keypads. If you’re upgrading from an older, non‑smart opener, ensure the new unit can physically replace the old one without extensive rewiring.
Wiring and installation basics
Installing a Genie smart opener involves mounting the rail and trolley, attaching the ceiling brackets, and connecting power. Start by disconnecting power and removing the old opener if present. Mount the rail and bracket securely, making sure the track is plumb and level. Attach the trolley to the door, and verify that the door opens and closes smoothly when you manually lift it to confirm balance before finalizing the installation. Safety sensors should be mounted on each side of the door with a proper line of sight.
This section focuses on the mechanical fit and electrical basics, not on advanced electrical work. If you are uncertain about any wiring step, consult a licensed electrician or refer to the Genie installation guide for model‑specific instructions. Proper alignment and secure mounting are critical for long‑term reliability and safe operation.
Connecting to Wi‑Fi and the Genie app
With the mechanical installation complete, you’ll connect the opener to your home network and the Genie app. Ensure you’re on a 2.4 GHz network, as many devices do not support 5 GHz during initial setup. Open the Genie app, create an account, and follow the prompts to pair the opener—often done by pressing a learn button on the unit and scanning a QR code in the app. Firmware updates may appear in the app; apply them to improve performance and security.
A successful connection enables remote monitoring, status alerts, and firmware maintenance. Keep your phone and router secured with strong passwords and consider enabling two‑factor authentication on your Genie account for extra protection.
Programming remotes, keypad, and voice assistants
After your opener is online, you’ll program remotes and the keypad to operate the door. Follow the app’s instructions for adding remotes, and test each device’s range. If you plan to use voice control, connect Genie to your preferred voice assistant platform through the Genie app or compatible hubs. Regularly test the remote, keypad, and voice commands to ensure real‑time status and reliable control. Keep a few spare batteries on hand for remotes to avoid downtime.
Tip: maintaining consistent pairing between devices helps prevent missed opens or unexpected door actions during busy mornings.
Troubleshooting and maintenance for Genie smart openers
Common issues include a door that won’t move, audio or motor buzzing, or inconsistent remote pairing. Start with a power reset: unplug, wait 10 seconds, and plug back in. Check safety sensors and alignment if the door reverses or stalls. Review the app’s diagnostics for error codes and firmware status, and perform any available updates. Regular maintenance includes lubricating moving parts, cleaning photo‑eyes, and inspecting mounting hardware for looseness.
If problems persist, consult the user manual or contact Genie support. Document error codes and recent changes to the system to speed up the troubleshooting process.
Authority sources
To ensure safe and compliant installation practices, consult reputable sources:
- OSHA (Occupational Safety and Health Administration): https://www.osha.gov
- NIST (National Institute of Standards and Technology): https://www.nist.gov
- Department of Energy: https://www.energy.gov
Tools & Materials
- Genie smart garage door opener(Choose a model with built‑in Wi‑Fi or a compatible hub.)
- Smartphone (iOS/Android)(Used to install and operate the Genie app.)
- Home Wi‑Fi network (2.4 GHz)(Needed for remote features and updates.)
- Ladder (6-8 ft)(Access ceiling components safely.)
- Screwdrivers (Phillips & flathead)(For mounting brackets and sensor alignment.)
- Safety glasses(Eye protection during installation.)
- Voltage tester (optional)(Confirm power status before wiring.)
- Level(Ensure tracks are plumb.)
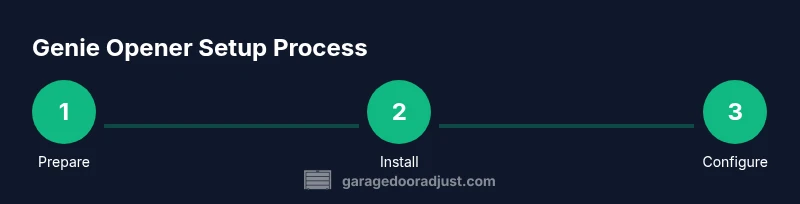
Steps
Estimated time: 90-120 minutes
- 1
Prepare workspace and safety checks
Clear the area, unplug power to any existing unit, and inspect the door balance. Check for debris near the tracks and ensure you have a helper for lifting heavy components.
Tip: Use a stabilizing helper to avoid wobble when mounting the rail. - 2
Turn off power and disconnect existing opener
Safely detach the old opener from the ceiling and unplug from the outlet. Do not touch live wires; verify power is off with a tester before handling.
Tip: Always test for voltage before starting wire work. - 3
Mount the ceiling brackets and rail
Attach the ceiling bracket, ensure the rail is level and aligned with the door, then secure all fasteners. This creates a stable path for the trolley.
Tip: Double‑check alignment before tightening the bolts. - 4
Install safety sensors and align optics
Mount photo‑eye sensors at bottom corners of the door with a clear line of sight. Align them so there is no obstruction between them.
Tip: Test by placing an object in the door’s path to confirm auto‑reverse safety. - 5
Connect power and finalize mechanical install
Connect the opener to power, attach the trolley to the door, and ensure the door balance remains correct. Tighten fasteners and re‑check movement.
Tip: Do not override safety features; proper sensor placement is essential. - 6
Set up Wi‑Fi and the Genie app
Download the Genie app, create an account, connect the opener to your 2.4 GHz network, and update firmware if prompted.
Tip: Use a strong password and enable two‑factor authentication if available. - 7
Program remotes, keypad, and voice control
Pair remotes and keypad following in‑app prompts. Enable voice integration if desired and test open/close commands.
Tip: Keep spare batteries for remotes to prevent downtime.
Got Questions?
Do I need professional installation for Genie smart openers?
Most Genie smart openers can be installed by homeowners with basic tools. Heavy lifting or high ceiling work may require a helper or professional installation.
You can usually install it yourself if you’re comfortable with basic tools; otherwise consider professional help.
Can I pair Genie with Apple HomeKit or Google Assistant?
Genie openers support popular smart home platforms through the Genie app or compatible hubs. Check compatibility with your hub before purchase.
It works with common platforms via the Genie app, but verify compatibility first.
Is Wi‑Fi required for basic opening and closing?
Basic operation may work via remotes or keypad; Wi‑Fi enables remote access and app features.
Wi‑Fi enables remote features, but the door can still function locally.
How do I reset the Genie opener if it stops responding?
Power cycle the unit and re‑run the in‑app setup to re‑sync with your account. If issues persist, consult the manual.
Try a power cycle and re‑setup; check the manual if needed.
What should I do if a remote won’t pair?
Ensure you’re within range, replace batteries, and follow the in‑app pairing steps. Remove old pairings if necessary and retry.
Make sure the batteries are fresh and follow the pairing steps.
Are Genie openers safe to use around pets?
Yes, when installed with proper sensors and safety features, but keep pets clear of the moving door during operation.
Genie openers are designed with safety features, but supervise pets near the door.
Watch Video
Quick Summary
- Securely install with proper safety checks and sensor alignment.
- Connect Wi‑Fi and the Genie app for remote control.
- Program remotes, keypad, and voice assistants correctly.
- Test safety features and perform maintenance regularly.
- Keep firmware updated for best performance.