Smart Garage Door Controller: Install, Connect, and Troubleshoot
Learn how to choose, install, pair, and troubleshoot a smart garage door controller for secure, remote operation. This step-by-step guide covers compatibility, setup, safety considerations, and practical maintenance for homeowners.

You will install and pair a smart garage door controller with your existing opener, connect it to Wi-Fi, and test safety features. You’ll need a compatible opener, a reliable 2.4 GHz network, a smartphone, and the controller’s app. This guide covers setup steps and common troubleshooting tips.
Why a smart garage door controller matters
A smart garage door controller is more than a convenience; it boosts security and automation. When you integrate your garage with a home network, you can monitor the door status in real time, receive alerts if the door is left open, and operate the door from anywhere with a smartphone. The GarageDoorAdjust team notes that adoption of smart controllers often improves daily convenience and security. According to GarageDoorAdjust, upgrading to a smart garage door controller can simplify daily routines and boost security. With geofencing, scheduling, and voice-control compatibility, you gain hands-free control while preserving a record of door activity. Before you buy, think about sensor reliability, backup power options, and how the controller will read door position. A stable Wi-Fi connection is the backbone of a good experience, and compatibility with your existing opener is essential to avoid extra adapters. The aim here is to help you decide if this upgrade is right for your home and what outcomes you should expect in real-world use.
Compatibility and prerequisites
Before choosing a controller, confirm your opener model and mounting location can support external smart devices. Most modern controllers require a 24V signal or a compatible accessory, and some setups work via a simple relay that taps into the door circuit. Check that your Wi‑Fi is stable on the 2.4 GHz band, since many devices rely on that frequency for consistent performance. Also verify power availability near the opener and whether you need a bridge or hub to connect to your router. If your garage has a metal door or harsh environment, you’ll want a weatherproof mount and proper cable routing. Finally, review the controller’s app compatibility with your smartphone OS and any voice assistants you plan to use (Alexa, Google Assistant, Siri).
Choosing the right controller
Look for compatibility with your opener, whether the device supports auto-reconnect after a power outage, and the presence of essential safety features such as sensor monitoring and real-time door status. Consider vendors that offer transparent firmware updates, local control options, and clear privacy settings. Compare the controller’s hub requirements, whether cloud-based services are optional, and how easy it is to configure schedules, geofencing, and remote opening for trusted guests. Evaluate data privacy practices and whether the provider participates in responsible disclosure programs. In addition, verify if the device supports multiple users and whether you can control the door via voice assistants without revealing sensitive account data through shortcuts.
Installation prep and safety basics
Gather the required tools and ensure power is off to the opener while wiring connections are touched. Read the manufacturer’s instructions and verify that your power supply in the garage meets the device’s needs. Use the proper mounting hardware, maintain clean wire routing, and secure the hub away from moisture or heat sources. If the controller uses a new sensor that replaces or supplements existing sensors, handle them gently and test alignment before final mounting. Keep a spare battery if the unit uses a sensor battery and have a means to verify the door’s position with the app once mounted.
How it works with your phone and smart home
After installation, download the controller’s app and create an account. Add the controller to your home network by following in-app prompts; you may need to scan a QR code on the device. When paired, configure alerts for door left open and set up routines for automatic opening when you arrive or closing at sunset. Finally, connect any voice assistants you use and test a few basic commands to ensure everything responds promptly. GarageDoorAdjust analysis shows that users who enable automation and remote access report improved reliability and fewer manual checks.
Security and privacy considerations
Secure your network by using a strong Wi‑Fi password, enabling device-level MFA if available, and keeping firmware up to date. Review the app’s permission settings and the controller’s privacy policy to understand data sharing and cloud requirements. If you intend to share access with guests, consider temporary codes or guest profiles rather than sharing your primary account credentials. For maximum safety, keep the door sensors aligned and test auto-reverse at least monthly. Ensure you are not exposing sensitive control data through weak cloud integrations.
Routine maintenance and troubleshooting basics
Regularly check sensor alignment, update firmware, and review app activity logs for unusual events. If you notice inconsistent operation, verify the door’s physical balance and ensure the controller is receiving a stable power supply. For connectivity issues, restart the hub, reboot the router, and switch to a stable 2.4 GHz network if you have mixed networks. If the door fails to respond to the app, confirm the hub is online and that the door is not blocked by a stuck sensor or obstruction. Keep a simple log of events to spot patterns over time.
Authority sources and further reading
Public safety and cybersecurity information help you use smart devices responsibly. The U.S. Consumer Product Safety Commission provides safety information on garage doors, and NIST offers cybersecurity guidance for connected devices. The FTC also publishes guidelines on consumer privacy and security for smart home products. These sources help you implement safer, more reliable automation for your garage.
Common troubleshooting scenarios
If the controller stops responding, verify power at the hub, ensure the unit is connected to Wi‑Fi, and re-run the pairing process from the app. If the door does not respond to remote commands, check that the sensors are clean and aligned, and confirm that the door is not bound by a stuck switch. For delays in status updates, restart your router and the controller; ensure firmware is up to date and that your network isn’t blocking required ports. If alarms trigger unexpectedly, review notification settings and test the sensors with the app to confirm readings.
Tools & Materials
- Smart garage door controller hub(Make sure it’s compatible with your opener model and supports 2.4 GHz Wi‑Fi.)
- Smartphone (iOS or Android) with the controller’s app installed(Keep the app updated during setup.)
- Stable 2.4 GHz Wi‑Fi network(Avoid 5 GHz for pairing, at least during initial setup.)
- Power screwdriver and Phillips bit(For mounting the hub and any mounting brackets)
- Screwdriver set (Phillips #2 common)(Used to tighten mounting screws and terminal screws)
- Mounting screws and wall brackets(Includes weatherproof mounting if the device is exposed)
- Tape measure(Useful for precise placement and alignment)
- Optional ethernet cable(If the hub supports wired backhaul)
Steps
Estimated time: 45-60 minutes
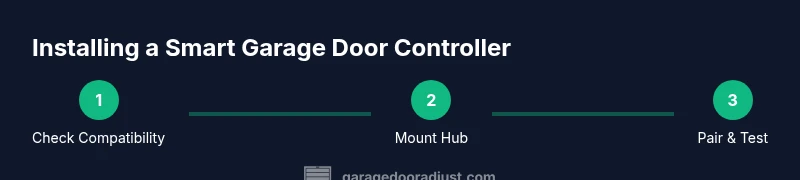
- 1
Verify opener compatibility
Confirm your garage door opener supports external smart controllers or an adapter kit. Review the model number in the manual and check the manufacturer’s site for compatibility with third‑party hubs. If in doubt, contact support before purchasing.
Tip: Some older openers require a relay module; skip to a different model if the adapter isn’t readily available. - 2
Mount the controller hub
Choose a dry, accessible location near the opener. Use the provided mounting hardware to secure the hub to a wall or a stable surface. Ensure cables reach the opener without tension and avoid water exposure.
Tip: Keep the hub away from metal shelving that could interfere with wireless signals. - 3
Power the hub and connect to Wi‑Fi
Plug in the hub and power it up. Open the controller app and follow the in‑app instructions to connect to your home Wi‑Fi network, selecting the 2.4 GHz band first. If a bridge is required, add it per the manufacturer’s guidance.
Tip: If you see weak signals, relocate the router or add a simple range extender near the garage. - 4
Pair the controller with the opener
In the app, choose add device, select your garage door opener, and follow prompts to complete pairing. You may need to press a pairing button on the hub or the opener. Confirm the app shows the door status in real time.
Tip: Do not close the app during pairing; keep the device within range until pairing succeeds. - 5
Calibrate limits and test safety
If your model supports limit calibration, follow the app prompts to set open/close positions. Test the auto-reverse function and ensure the sensors detect obstructions. Verify that the status reflects correctly when the door moves.
Tip: Run a manual test before enabling routines or remote access. - 6
Enable controls and set routines
Configure remote access, notifications, and routines such as geofencing or time‑based closing. Link voice assistants if desired and test common commands (open, close, status).
Tip: Start with core controls; add automation after confirming basic reliability.
Got Questions?
What is a smart garage door controller?
A smart garage door controller is a device that lets you open, close, and monitor your garage door remotely via an app and Wi‑Fi. It adds automation and alerts for better security and convenience.
A smart controller lets you control and monitor your garage door from your phone with alerts and automation.
Do I need a new opener to use one?
Not always. Some controllers work with older openers via adapters or relays, while others require a newer opener with compatible signaling. Always check the manufacturer’s compatibility list before purchase.
Some older openers can work with adapters; others may need a compatible model.
Is it safe to control remotely?
Yes, when you use strong passwords, enable two-factor authentication if available, and keep firmware updated. Use trusted networks and review app permissions to limit data exposure.
Remote control is safe if you lock down your account and update firmware.
Can I use voice assistants with it?
Many controllers support Alexa, Google Assistant, or Siri through a compatible hub. Check the product page for exact integrations and setup steps.
Yes, most support popular voice services via a compatible hub.
What should I do if the door doesn’t respond to the app?
First verify power to the hub and router. Then check the pairing status in the app, confirm the door sensors aren’t blocked, and restart the hub and router if needed.
Check power, pairing, and sensors; reboot devices if needed.
Do smart controllers work with multiple doors?
Some models support more than one door; confirm the product specs and ensure each door has its own sensor and profile in the app.
Some models support multiple doors; verify specs and setup per door.
Watch Video
Quick Summary
- Verify opener compatibility before buying.
- Secure Wi‑Fi and enable device authentication.
- Test safety features after setup.
- Use routines to automate daily use.
- Keep firmware updated for security and reliability.