Garage Door Smart Opener: Upgrade, Install, and Master Your Setup
Learn how to upgrade or install a garage door smart opener, connect it to Wi‑Fi, and set up app control and safety features. Practical steps, safety tips, and maintenance guidance for homeowners.

This guide helps you upgrade or install a garage door smart opener, connect it to Wi-Fi and a companion app, and set up remote access and voice control. You'll need a compatible door, standard tools, a power source, and a little patience. A typical upgrade or install takes a few hours.
Why upgrade to a garage door smart opener
A garage door smart opener changes how you interact with one of your home’s most-used systems. Instead of pulling a remote or pressing a wall switch, you can open or close the door from your phone, set schedules, and receive instant alerts if the door is left ajar. You can also integrate the opener with voice assistants and other smart home devices for hands-free control. According to GarageDoorAdjust, homeowners who upgrade report greater convenience and improved security through real‑time notifications and tamper alerts, especially when the door is tracked by a companion app. Before you buy, confirm compatibility with your existing door and ensure your garage has a solid Wi‑Fi signal near the mounted unit. In this section we’ll examine why a smart opener is valuable, what features matter most, and how to plan the upgrade so you avoid common pitfalls like misalignment or incompatible rails.
What to look for when choosing a garage door smart opener
Selecting a smart opener isn’t just about the gadget. Look for compatibility with your door type, rail system, and mounting space, plus a dependable app and steady Wi‑Fi connectivity. Important features include remote access, activity logs, and safety sensors that detect obstructions. A good opener should support backup power, secure pairing, and easy pairing with your preferred smart home platform (such as Alexa or Google Assistant). Also check compatibility with voice control, smartphone notifications, and geofencing for automatic open/close when you arrive or leave. GarageDoorAdjust analysis shows that openers with strong app support and clear status indicators tend to deliver higher homeowner satisfaction and fewer miscommunications about door state.
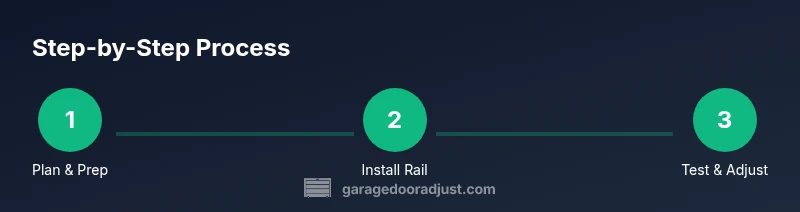
Planning and preparing for installation
Preparation pays off during installation. Start by measuring your door height, track width, and ceiling height to determine whether the chosen opener will fit your garage. Confirm there is a dedicated power outlet nearby and that you have a clear path to route the rail. Sketch a simple layout: where the motor will mount on the ceiling, how the rail will extend toward the door, and where to place safety sensors. Having these details ready helps you avoid repeated trips to the toolbox and keeps work organized. If you’re unsure about rail length or door balance, pause and reassess before you start the lift.
Compatibility and wiring basics
Smart openers typically include a ceiling rail, mounting bracket, power input, and sensor wiring. Attach the new bracket to the ceiling beam, then connect the rail and motor as instructed by the manufacturer. Install safety sensors on either side of the door so the opener can auto-reverse if something blocks the path. Wire the wall control switch and any external keypad to the opener per the manual. While the wiring can be straightforward, always follow local electrical codes and manufacturer directions to avoid shock hazards and ensure safe operation.
Safety, maintenance, and troubleshooting
Safety must guide every step of a garage door smart opener project. Disconnect power before handling any components, and verify the door balance to avoid too much strain on the motor. After installation, test the auto-reverse function and sensor alignment several times. Regular maintenance—lubricating moving parts, tightening hardware, and replacing worn sensors—extends the life of the system. For troubleshooting, check the app’s connection status, re-pair the remote, and reset the opener if the controls seem unresponsive. If you notice abnormal noise or binding, stop and recheck track alignment and balance rather than forcing movement. The GarageDoorAdjust Team emphasizes safety checks and incremental testing to prevent injury.
Tools & Materials
- Ladder(Stable, tall enough to reach ceiling mounting area)
- Screwdriver set (Phillips and flathead)(Include variety of sizes)
- Cordless drill/driver(Bits for wood and metal; include drill bit for pilot holes)
- Measuring tape(At least 3 meters (10 ft))
- Level(To ensure rails and brackets are plumb)
- Wrench set(Open-end or socket for mounting bolts)
- Stud finder(Locate ceiling joists for secure mounting)
- Pencil/marker(Mark drill points clearly)
- Wire nuts & electrical tape(Secure wire connections)
- New garage door smart opener kit(Includes rail, brackets, sensors, and controller)
- Safety glasses(Eye protection during installation)
Steps
Estimated time: Estimated total time: a few hours
- 1
Prepare workspace and safety gear
Clear the area, unplug the circuit, and secure the door for manual operation. Put on safety glasses and ensure a helper is available for lifting heavy parts. This step reduces the risk of injury and keeps the install aligned with the rail plan.
Tip: Always have a helper when lifting the motor and rail sections. - 2
Power down and remove old opener
Unplug the existing opener and disconnect the trolley from the door. Remove any mounting hardware from the ceiling, labeling wires if needed so you can reattach correctly.
Tip: Take photos of wire connections before disconnecting. - 3
Install new ceiling bracket and rail
Find a solid ceiling joist, mount the bracket, and attach the rail according to the manufacturer’s instructions. Check that the rail is level and that clearance above the door is sufficient for full travel.
Tip: Pre-tighten fasteners so you can fine-tune later. - 4
Mount the opener and align the track
Lift the opener unit into place and secure it to the ceiling bracket. Connect the rail to the trolley and verify smooth movement along the track when manually moved.
Tip: Ensure the trolley moves freely without binding. - 5
Install safety sensors and wire connections
Mount safety sensors on each side of the door at the proper height and route sensor wires to the opener. Verify sensor LEDs indicate proper alignment and that wiring is neat and secured.
Tip: Do not place sensors behind weather stripping. - 6
Program remotes and pair with app
Follow the opener’s pairing sequence to connect remotes and the mobile app. Test opening/closing from the app, then set up any desired schedules or geofencing.
Tip: Keep the remote in a consistent location for easy access.
Got Questions?
What is a garage door smart opener?
A garage door smart opener connects to your home's Wi-Fi and app, enabling remote opening, status alerts, and voice control. It replaces or upgrades a traditional wall switch with smart features for convenience and security.
A smart opener lets you open your garage door from your phone and check its status anytime.
Do I need a professional to install a smart opener?
For most homes, a straightforward upgrade can be done by a handy homeowner. If your door is old, unbalanced, or you’re unsure about wiring, consider a professional installer to ensure safety and proper function.
Most people can install it themselves, but consult a pro if the door is heavy or wiring is unclear.
Will a smart opener work with my existing door?
Smart openers are compatible with many standard sectional doors, provided the rail and mounting space fit your garage. If your door uses a nonstandard track or has balance issues, you may need adjustments.
In many cases yes, but check compatibility with your door type and rail.
How do I pair the opener with a smartphone app?
Install the manufacturer app, create an account, and follow the on-screen pairing steps. You’ll usually press a learn/pair button on the opener and confirm the connection in the app.
Open the app, follow pairing steps, and test from your phone.
What safety features should I expect?
Look for auto-reverse sensors, rolling code security, and integrated alerting. Regular tests of the sensors and auto-reverse help prevent injuries and vehicle damage.
Expect reverse safety sensors and secure remote access.
Can I reset or reprogram the opener after installation?
Yes. Most openers have a reset or learn mode to re-pair remotes or phones. Follow the manual and re-check app connections after reset.
You can reset the system and pair devices again if needed.
Watch Video
Quick Summary
- Choose a compatible opener that fits your door and rail.
- Pair the opener with the app and test all controls.
- Position and test safety sensors for reliable operation.
- Maintain the system with regular lubrication and checks.
- When in doubt, consult a pro for complex installations.