How to Make My Garage Door Opener Smart
Learn how to convert your existing garage door opener into a smart, voice-controllable system. This guide covers compatibility, setup steps, security, and practical automation ideas for homeowners.

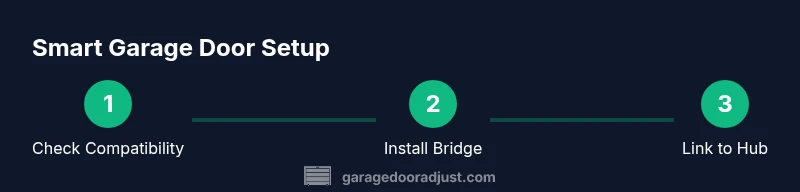
You can turn a standard garage door opener into a smart hub by adding a compatible Wi‑Fi bridge or hub, installing a mobile app, and enabling routine-based automations. This quick guide covers compatibility checks, setup steps, and key security tips to get you started. According to GarageDoorAdjust, start by confirming model compatibility, then install the bridge, connect to Wi‑Fi, and configure your first routine.
What "smart" means for your garage door opener
Smart simply means you can open, close, and monitor the door from a phone or voice assistant, even when you’re not home. If you’re curious about how to make my garage door opener smart, the door status can be updated in real time, you can receive alerts, and you can automate actions based on your routine or location. According to GarageDoorAdjust, turning a traditional opener into a connected device begins with understanding what your current opener can support and choosing a compatible bridge or hub. This foundation informs the rest of the setup, including network requirements, app configuration, and security settings. While the hardware is the backbone, the real value comes from well-designed automation that fits your daily life. In practical terms, you’ll gain remote access, status updates, and the ability to trigger routines using a single app or voice command. Always remember: safety features like door reversing and edge sensors must stay in place and functional, even after you upgrade to smart control.
As you plan, think about who will use the system (family members, guests, service providers) and how you’ll manage access. A robust setup is not only about convenience; it’s about reliability and security. Don’t rush the pairing process; take time to verify each connection twice and test the door in a controlled environment before relying on it during a commute, rainstorm, or party with guests present.
Compatibility and prerequisites
Smart upgrades hinge on compatibility. First, confirm your opener supports a bridging device or has an official integration with your chosen platform. Most homeowners should ensure a 2.4 GHz Wi‑Fi network is available, as many bridges and hubs do not support solid connections on 5 GHz networks. Next, locate a power source near the opener and confirm that your internet connection is stable, with a strong upload speed for remote commands. If your unit includes built-in Wi‑Fi or a dedicated bridge port, you may be able to skip extra hardware; otherwise you’ll need a bridge that sits between the opener and your network. Decide on your control ecosystem (Google Home, Amazon Alexa, or Apple HomeKit) early so you don’t juggle apps. Each platform has its own setup flow and routine options, and sticking with one simplifies day-to-day use.
Practical checks you can perform now: verify model compatibility with external bridges, verify that the bridge is rated for garage temperatures and dust, and review how the opener pairs with a hub—some require physical button presses on the bridge or opener. If you’re unsure about model support, consult the manual or manufacturer’s website, or reach out to customer support before purchasing a bridge. A well-matched system saves time and reduces the chance of misconfigurations later.
Security and privacy considerations
Connecting a garage door to the internet introduces new security considerations. Use strong, unique passwords for your smart hub and any cloud accounts that control the opener, and enable two‑factor authentication whenever possible. Keep firmware up to date on both the bridge and the opener to patch vulnerabilities. If you can, place smart devices on a dedicated IoT network or a separate guest network to limit exposure in case a device is compromised. Turn on activity logs and push notifications so you know when the door opens or closes, and review who has access to your door controls.
When enabling voice control, ensure commands require a wake word and, if available, a PIN or biometric verification for sensitive actions like door control. Be mindful of permissions that apps request, such as camera access or status reporting, and disable any features you don’t plan to use. Finally, plan for power outages: ensure the wall button still works and that you can manually operate the door without the app.
Smart routines and automation ideas
Automation elevates convenience without sacrificing safety. You can generate routines such as: open on a specific schedule when you’re expected home, or close automatically if you’ve left town and the geofence detects departure. Geofencing can be powerful when paired with location-based rules, but test it to prevent doors from opening unintentionally when you drive past your home. Combine door actions with other smart devices for a more cohesive experience, such as turning on exterior lights when the door opens at night or pausing playback on your smart speaker when the door closes. The key is to design triggers that are predictable, non-conflicting, and easy to audit. Start with one routine and expand gradually as you verify reliability.
Troubleshooting common issues and maintenance
Even a well-planned upgrade can encounter hiccups. Common issues include delayed commands, inconsistent door status reporting, or the door failing to respond to the hub. Begin by confirming the bridge stays online and that the hub and app can communicate. Check for and install firmware updates on both the bridge and the opener during a time when the garage can be quiet. If you notice intermittent responses, try moving the bridge closer to your router or using a different Wi‑Fi channel to improve signal strength. Keep a manual override accessible for safety and reliability.
Real-world setup checklist and next steps
Before you start, ensure you have the right bridge, a compatible opener, and a stable network. Create a plan for which routines you’ll enable first, then follow the step-by-step setup in the next block to install the bridge, pair it with the hub, and configure your first automations. After the initial setup, perform a test cycle with the door in a safe area and verify you receive notifications when the door opens or closes. Finally, review your security settings and establish a brief maintenance schedule to keep firmware up to date and to refresh access permissions as needed.
Tools & Materials
- Compatible smart hub or bridge(Choose one that supports your preferred ecosystem (Google Home, Alexa, or HomeKit).)
- Smartphone with updated OS(Install the hub/app and ensure you can receive notifications.)
- Garage door opener with remote or compatible interface(Ensure it’s in good working condition and accessible.)
- 2.4 GHz Wi‑Fi network(Most bridges require 2.4 GHz; ensure strong signal at the opener.)
- Power outlet near the opener(Adequate clearance and safe routing away from moving parts.)
- Optional: Smart speaker for voice control(Helpful for hands-free control if you already own one.)
- Ethernet cable (optional)(Useful for stable bridge setup in hard-wired networks.)
Steps
Estimated time: 45-90 minutes
- 1
Verify compatibility and choose platform
Check your opener’s manual or manufacturer site for bridge compatibility and supported ecosystems. Decide whether you’ll use Google Home, Amazon Alexa, or Apple HomeKit to control the setup, and confirm that the hub you plan to use supports your chosen platform.
Tip: Pro tip: keep the original remote as a physical backup during transition. - 2
Mount and power the bridge
Install the bridge or Wi‑Fi module in a safe location near the opener, avoiding the track and moving parts. Plug the bridge into a power outlet and ensure it has a clear, unobstructed path to your router.
Tip: Pro tip: avoid metal obstacles and large metal surfaces that can interfere with signal. - 3
Connect the bridge to power and network
Power up the bridge and connect it to your Wi‑Fi network using the bridge’s app. Use 2.4 GHz for reliability and enter your network credentials accurately to prevent connectivity issues.
Tip: Pro tip: test the bridge’s network connection on a mobile device before proceeding. - 4
Pair the bridge with your opener and hub
Open the hub/app, add the bridge, and then pair the opener with the hub according to the manufacturer’s pairing sequence. Keep the door closed during pairing to avoid accidental opens.
Tip: Pro tip: record the pairing steps in a note for future troubleshooting. - 5
Create your first routine
Set up a basic routine such as “Open when I return home” or “Close at bedtime.” Link it to a voice command if desired and test with a safe open/close cycle.
Tip: Pro tip: start with a simple routine to verify reliability before adding more complex automations. - 6
Test and verify status updates
Confirm that the opener status updates in real time on your phone and that notifications trigger as expected. Confirm you can open, close, and view live status from the app.
Tip: Pro tip: enable push notifications for both open and close events. - 7
Secure and maintain
Update firmware for both the bridge and opener, set up two-factor authentication, and manage user permissions. Schedule periodic maintenance to keep the system reliable.
Tip: Pro tip: limit account access to trusted family members and guests; revoke access when no longer needed.
Got Questions?
Is it safe to connect a garage door opener to a smart hub?
Yes, it can be safe when you use strong passwords, enable two-factor authentication, and keep firmware up to date. Always keep physical controls available and verify that safety features remain active. Regularly review permissions for linked apps and devices.
Yes, it can be safe if you secure your accounts, keep firmware updated, and maintain the safety features. Always test regular backups and ensure physical controls remain accessible.
Can I use any smart hub for this project?
Not every hub supports garage door integrations. Check compatibility with your model and read the setup guide for supported ecosystems. Choose a platform and stick with it to avoid configuration conflicts.
Not every hub supports garage door integrations. Check compatibility and choose a platform to avoid conflicts.
What happens if the Wi‑Fi goes out?
If the Wi‑Fi goes out, the smart functions may be unavailable, but the wall button and remotes should still operate normally. The bridge and app will regain control once connectivity is restored.
If Wi‑Fi drops, smart functions may pause, but the door still works via the wall control. Reconnect to restore full smart features.
Do I need to replace my opener to go smart?
Not necessarily. If your opener has a compatible bridge port or is designed for smart integration, you can retrofit it with a bridge. Some older models may require upgrading to a newer, compatible opener.
You might not need a full replacement; a bridge can retrofit many models. Some older units may require upgrading.
How can I prevent accidental door openings with geofencing?
Tighten geofence boundaries, require manual confirmation for critical actions, and test the routine at multiple locations to ensure it only triggers when you intend.
Tighten the geofence, require confirmation for security, and test the routine in different locations.
What ongoing maintenance should I plan for?
Schedule periodic firmware updates, review access permissions, and test safety features monthly. Keep backups and have a manual override ready for emergencies.
Plan monthly firmware checks, review permissions, and test safety features. Have a manual override accessible.
Watch Video
Quick Summary
- Plan compatibility before buying hardware.
- Secure your network and enable 2FA.
- Test routines thoroughly and start simple.
- Maintain firmware and review permissions regularly.
- Keep a physical backup and manual operation as fallback.