Reprogram Garage Door Opener: Step-by-Step Guide for 2026
Learn how to reprogram a garage door opener, sync remotes and keypads, and verify reliable operation with a safe, homeowner-friendly approach. This guide covers steps, safety, troubleshooting, and maintenance for peace of mind.

Learn how to reprogram your garage door opener and securely sync remotes, keypads, and smart devices. This step-by-step guide covers safety checks, brand variations, and quick verification to ensure reliable operation. By following these procedures, you’ll regain seamless access without guessing which buttons to press. It's written for homeowners, not technicians, and uses plain language and clear visuals.
Why reprogram garage door opener matters
Reprogramming your garage door opener is about more than convenience. It helps ensure only trusted remotes and devices can control your door, which is a core part of home security. Over time, remotes and keypads can drift from known codes due to battery changes, device replacements, or new security features. By reprogramming, you reestablish a clean, current set of authorized devices and reduce the risk of unexpected openings. The GarageDoorAdjust team emphasizes that reprogramming improves reliability, minimizes accidental operations, and supports smoother integration with modern smart-home ecosystems. When you reprogram, you also create a clear audit trail of which devices are currently paired, giving you better control over access for family members, house sitters, or contractors. Keep in mind that brand-specific steps may vary, but the core concepts stay consistent across models.
According to GarageDoorAdjust, the basic flow remains the same: erase old codes, enter Learn mode, and teach the new devices. This consistency is what makes the process approachable for homeowners who want to avoid technician visits. As you proceed, maintain a calm pace and verify each remote or keypad before moving on to the next device.
If you’re upgrading your opener or replacing remote hardware, reprogramming is a good opportunity to review your security posture: remove forgotten or unused remotes, update PINs for keypad access, and check for firmware/app updates if your model supports them.
Safety prerequisites and tools
Before you begin, prioritize safety. A garage door is heavy and can move unexpectedly, so always work with the door fully stopped and the opener powered down when required by your model. Keep children and pets away from the work area, and wear eye protection if you’ll handle any wiring or sensors. A stable step stool or ladder is essential for reaching the Learn button on the opener unit or wall control.
What you’ll need: a flat, clear space; access to the motor head where the Learn button lives; your remotes and keypad; fresh batteries if any remote uses replaceable power; and a small notebook to record which devices you’ve programmed. Optional but helpful: the user manual or model number for quick reference in case your unit uses nonstandard terminology or button names. As you work, avoid pressing the Learn button repeatedly in a closed sequence—this can reset other settings or confuse the system.
The GarageDoorAdjust team notes that many issues arise from attempting to reprogram while the door is in motion, or when there’s a safety reverse sensor fault. Confirm the door is fully closed and all safety features are functioning before you begin the programming steps.
Understanding programming options by device type
Garage door openers offer several ways to reprogram devices, and the method varies by device type:
- Remotes: Most remotes communicate with the opener via a learning button or a fixed code on older systems. You’ll typically erase existing codes, enter Learn mode, and press the remote button to teach it a new code.
- Keypad: A wall-mounted keypad uses a PIN and Learn sequence. You’ll set or reset the PIN, then train the opener to recognize the keypad’s input.
- Smartphone/app: Some modern openers support pairing through an official app. Pairing generally requires the app to be in pairing mode and the door in a ready state. Apps may provide additional security features like two-factor authentication or device-specific codes.
- Universal remotes or third-party devices: Compatibility varies. Always check your model’s manual or the manufacturer’s support site for compatibility notes and programming steps.
Brand variations mean button order, LED indicators, and exact timing can differ. The key is to follow the core workflow: enter Learn mode, trigger the device you want to enroll, confirm enrollment, and test. GarageDoorAdjust analysis shows that most brands share this same rhythm, even when the button labels differ. Prepare to adapt to small differences, but the sequence remains familiar.
Additionally, consider labeling each device as you program it—“Main remote,” “Guest remote,” “Family keypad”—so you know what’s currently authorized if you need to troubleshoot later.
Step-by-step: reprogram a remote control
Reprogramming a remote is one of the most common tasks. The steps below describe a typical sequence you’ll use across many models. If your manufacturer’s instructions differ, prioritize the official steps, but you’ll see the general approach mirrored here:
- Locate the Learn button on the opener head or wall control and prepare to enter Learn mode. The Learn light will blink or glow.
- Erase existing codes by holding the Learn button for several seconds until the indicator blinks or stops blinking. This clears previously enrolled remotes and prevents old devices from triggering the door.
- Trigger the reprogramming sequence on the remote by pressing and holding the desired button while the Learn light is on. Some models require you to press the button twice or hold it for a moment for timing accuracy.
- Release the remote button and wait for a confirmation blink or tone indicating the device has been learned. If no confirmation occurs after several seconds, repeat the previous steps.
- Repeat for other remotes you want to enroll, ensuring each one completes enrollment before moving to the next. Label each remote in your notes for clarity.
- Test the system by opening and closing the door with each enrolled remote multiple times to ensure consistent operation and no unintended triggers.
Tip: If the Learn indicator is dim or unresponsive, check power to the opener and verify there are no sensor faults that could be blocking Learn mode.
Estimated time: 15-25 minutes depending on the number of remotes and model complexity.
Step-by-step: reprogram a keypad or smart device
Keypads and smart devices usually require PIN setup or app pairing. The process is sometimes different from remotes but follows a parallel logic: enter Learn mode, enroll the device, and test. Here’s a reliable approach that works for many models:
- Access Learn mode on the opener according to your model’s instructions. The Learn LED should respond by flashing or lighting up steadily.
- If you’re using a keypad, enter a new PIN and confirm it as directed in your manual. If you’re pairing a smartphone or smart device, enable Bluetooth or Wi‑Fi pairing in the app and choose the door opener from the available devices list.
- Complete the enrollment by following the prompts on the keypad or app. Some devices require you to press a button on the keypad or within the app to finalize enrollment.
- Test the keypad or app by locking/unlocking the door and verifying that the action is reflected on the door and the opener’s status indicators.
- If a PIN or app pairing fails, verify the device is within range and that the opener has not reached its device limit. Try clearing old codes if the device supports that option and re‑enroll from scratch.
Pro tip: Keep a brief log of which PINs or app accounts are active to minimize confusion during future maintenance.
Troubleshooting common issues after reprogramming
Even after careful programming, issues can pop up. Here are practical checks and fixes to keep things running smoothly:
- No response from enrolled remotes: Confirm the device is within range, the batteries are fresh, and you enrolled the correct button. If necessary, erase all codes and reprogram from scratch.
- Intermittent operation: This can indicate weak batteries, interference from other devices, or misaligned safety sensors. Replace batteries, relocate devices away from metal or cordless phones, and re-test.
- Keypad won’t unlock: Double-check the PIN, confirm the keypad is wired and powered correctly, and ensure the Learn mode was completed on the opener. Some keypads require a hardware reset or a new PIN to be configured.
- App pairing fails: Ensure your phone is on a compatible network, the app version is current, and the opener firmware supports app pairing. Rebooting the router and the opener can help resolve connectivity hiccups.
If you suspect a hardware fault or a sensor issue, avoid forcing the door to operate and call a professional. The newer smart‑home features add convenience but may require expert support for complex integrations.
Brand-specific quirks: Some models need a longer Learn‑mode pulse or a slightly different button sequence. Always refer to the user manual for the exact timings and the correct Learn button location. GarageDoorAdjust’s experience shows that getting the basics right reduces the need for repeated attempts.
Maintenance tips to keep remotes synced and updated
Regular maintenance helps prevent remotes from falling out of sync and keeps your system secure:
- Check batteries twice a year and replace proactively to avoid mid‑instruction failures.
- Keep remotes clean and away from heat sources, moisture, and strong magnetic fields that can affect performance.
- Update firmware or app integrations when available to maintain compatibility with new devices.
- Periodically review which remotes and keypads are active and remove any you no longer use.
- Document the programming dates and device IDs so you know when to refresh codes in the future.
A small, proactive approach reduces frustration and makes future reprogramming faster. The goal is a tidy, well-documented set of authorized devices rather than a growing list of unknown controllers.
From a security perspective, consider rotating PINs or re‑pairing smart devices after a security incident or if someone unauthorized has had access to a remote.
When to call a pro and safety boundaries
Many homeowners can successfully reprogram a garage door opener, but there are times when professional help is prudent. If you encounter persistent Learn‑mode issues, sensor faults, or unusual noises during operation, a trained technician can diagnose wiring faults, faulty logic boards, or sensor misalignment. If your opener uses a nonstandard or newer security protocol, a pro can ensure your entire system remains compliant and safe. In safety-critical scenarios—like doors that reverse incorrectly or fail to stop when encountering an obstacle—do not rely on trial and error. Shut off power to the opener and contact support.
GarageDoorAdjust recommends starting with the basics: verify power, confirm Learn mode is accessible, and test each enrolled device methodically. If you continue to experience problems after following these steps, a professional assessment will save time and reduce risk. Remember: security and reliability come first, and professional service is a smart investment when things don’t behave as expected.
Authoritative sources you can consult
- Official safety and guidance: https://www.osha.gov
- Energy efficiency and residential guidance: https://www.energy.gov
- Standards and measurement guidance: https://www.nist.gov
Tools & Materials
- Stepladder(Stable, 2-3 ft tall for reaching Learn button safely)
- Owner’s remote controls(Have all remotes you plan to reprogram)
- New batteries(For remotes with replaceable power)
- Smartphone or keypad (optional)(For app pairing or keypad PIN setup)
- User manual or model number(Helpful for exact Learn button location and timing)
- Notebook and pen(Record device IDs and PINs after programming)
Steps
Estimated time: 15-25 minutes
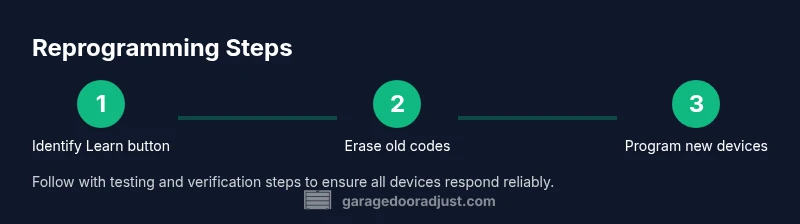
- 1
Identify Learn button and prepare
Locate the Learn or Home button on the opener unit or wall control. Confirm the door is fully closed and the area is clear before entering Learn mode. This initial step sets the stage for a clean enrollment of devices.
Tip: If your model uses a state LED, watch for a steady blink to confirm Learn mode. - 2
Clear existing codes
Press and hold the Learn button until the indicator blinks or goes off. This erases previously programmed codes so you won’t have conflicts when enrolling new devices.
Tip: Only clear codes if you intend to reprogram every device; otherwise you may lose access. - 3
Program the remote
With Learn mode active, press and hold the desired button on the remote until you see a confirmation (flash or beep). This couples that remote to the opener.
Tip: Complete enrollment for each remote before testing the next one. - 4
Test and confirm
Exit Learn mode and test each enrolled device by opening and closing the door several times. Confirm consistent response and ensure no unintended movements.
Tip: If a remote doesn’t respond, repeat the enrollment step or replace the remote battery. - 5
Program keypad or app
If using a keypad, enter the PIN and follow prompts to enroll. If pairing via app, follow the on-screen steps to add the door opener to your account.
Tip: Keep the PIN in a secure location; label keypad units to avoid confusion later. - 6
Document and secure
Record which devices are enrolled and note any limits or security settings you enabled. Store this information with your household manuals.
Tip: Regularly review and prune devices you no longer use.
Got Questions?
Can any remote be reprogrammed to work with my garage door opener?
Most standard remotes can be reprogrammed, but some newer devices require app pairing or manufacturer-specific steps. Always check compatibility with your model before starting.
Most remotes can be reprogrammed, but some newer models need app pairing. Check your opener’s manual for compatibility.
What should I do if the Learn indicator doesn’t blink?
Verify power to the opener, make sure the door is closed, and retry the Learn sequence. If the light still won’t blink, consult the model’s manual for alternative steps or a different Learn method.
If the Learn light won’t blink, check power and retry with the door fully closed. See the manual for model-specific steps.
Will power outages affect programmed remotes?
Codes typically persist through power outages, but some models may reset after long outages or battery issues. Always test after any outage to confirm devices are still enrolled.
Most codes stay after outages, but it’s wise to test afterward to confirm enrollment.
How do I remove an old remote from memory?
Erase all codes by holding the Learn button until the indicator blinks, then reprogram only the remotes you want to use. This prevents old devices from triggering the door.
Erase codes and reprogram only active remotes to keep your system clean.
Do I need to reprogram after replacing the opener?
Yes. When installing a new motor or receiver, reprogram all remotes and keypad if applicable to ensure secure operation.
A new opener usually requires full reprogramming of all devices.
Can I reprogram from a smartphone app?
Many modern systems support app pairing; the process varies by model. Follow the app’s prompts and ensure your device is compatible.
Yes, many newer openers pair through an app—follow the app instructions for pairing.
What if the keypad PIN won’t work after reprogramming?
Double-check the PIN, confirm Learn mode completed, and ensure the keypad is powered. If issues persist, reset the keypad and re-enroll.
If the PIN fails, verify it and retry enrollment. Resetting the keypad can help.
Should I consider security risks when reprogramming?
Yes. Reprogramming creates a fresh access list. Remove unused devices, use strong PINs, and keep hardware away from unauthorized users.
Reprogramming improves security by trimming old devices; keep PINs strong and monitor access.
Watch Video
Quick Summary
- Reprogram garage door opener devices in a controlled sequence.
- Always test each enrolled device before concluding.
- Document PINs, device IDs, and enrollment dates for future maintenance.
- Use official manual guidance when brand-specific steps differ.
- Safety first: verify the door is stationary and sensors function before starting.