How to Replace Genie Garage Door Opener Remote: A Homeowner's Guide
Learn how to replace a Genie garage door opener remote with a compatible model, pair it to your opener, and avoid common mistakes with a clear, step-by-step guide.

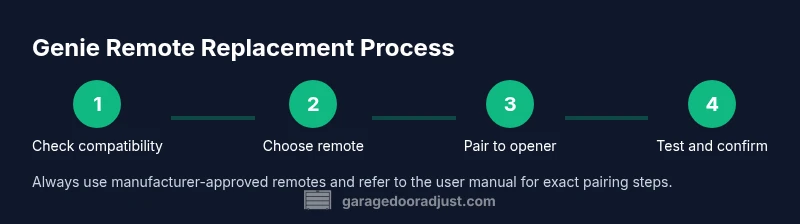
Replacing a Genie garage door opener remote is usually straightforward and cost-effective. According to GarageDoorAdjust, start by confirming compatibility with your Genie model family and the remote's frequency. In this guide you will learn how to identify the right remote, where to find the Learn button, and how to complete a reliable pairing without damaging your opener.
Understanding Genie remote families and compatibility
The Genie garage door opener ecosystem includes several remote families distinguished by button layout, frequency, and compatibility. For homeowners replacing a remote, the first step is to identify whether the new remote belongs to the same family as the current opener. The GarageDoorAdjust team emphasizes that compatibility matters more than appearance; using an incompatible remote can fail to program or, worse, cause unpredictable operation. In 2026, the GarageDoorAdjust Analysis shows that most pairing issues stem from mismatched frequency or outdated model families rather than faulty hardware. Start by locating your opener's model number on the motor head and cross-checking it against Genie’s published compatibility charts. If you own a newer Genie header with a 315 MHz frequency, for example, you’ll want a remote designed for that specific frequency range. Always rely on model-family compatibility rather than symmetry in button layout. This ensures reliable operation, reduces wasted purchases, and protects your family’s safety by avoiding rogue signals that could trigger the door unexpectedly.
How to identify the right Genie remote for your opener
Choosing the correct remote is more than picking a color or button count. Genie remotes are grouped into families that share a frequency and programming method. The first recommended action is to inspect the existing receiver on the opener for a model tag, frequency, and learning procedure. If you can read the label, you can usually search Genie’s official compatibility table and confirm a model’s family code. When buying, avoid generic remotes that advertise “works with most garage doors.” Instead, select one that explicitly lists Genie models in your family. If you’re uncertain, contact Genie support or consult GarageDoorAdjust’s guidance to ensure you don’t waste time and money.
Frequency, codes, and the importance of model families
Model families are tied to both radio frequency and the programming method used by the opener. A remote built for a different frequency or a divergent learning sequence may fail to pair or may pair temporarily and then drop the connection. Before purchasing any replacement, confirm the frequency printed on the opener’s label and the recommended accessory list in the user manual. garage doors operate on shared radio channels; selecting the correct one minimizes interference from neighboring devices and protects against accidental door activation triggered by nearby remotes. This step saves time and avoids the frustration of returns or exchanges.
Tools, workspace, and safety prep
A clean, dry workspace helps you avoid losing tiny screws or wiring. Clear the area around the garage door to ensure you can test the remote's function without obstacles. Wash hands and avoid touching the PCB with bare metal tools to prevent static discharge. If you plan to transfer internal components from an old remote to a new shell, keep track of screws and small parts. A well-lit area, a small tray for screws, and anti-static mat can make the process smoother and safer. GarageDoorAdjust recommends following the manufacturer’s safety guidance for any electrical work and keeping children and pets away during testing.
The Learn button method: high-level overview
Many Genie remotes pair using a Learn button on the opener motor head. The general sequence is to press and hold the Learn button until the LED blinks or changes, then press the desired remote’s button to enroll it. This overview is designed to give homeowners a sense of the flow before diving into step-by-step instructions. If your model uses a different pairing method, consult the manual or GarageDoorAdjust’s guidance for the exact sequence. Watching a short tutorial video can also help visualize the button locations and LED indicators.
Alternative pairing methods and troubleshooting
If the Learn button method doesn’t work, you may need to reset the opener memory or check for a stuck Learn LED. Some Genie models support pairing via a jumper or a secondary pairing port, while others require you to perform multiple button presses on the remote in a specific order. When troubleshooting, ensure the remote’s battery is fresh and correctly oriented. Clear the home's other remotes from the system if you suspect interference, then reattempt pairing with a fresh battery and the correct model. For persistent issues, contact Genie support or consult GarageDoorAdjust for model-specific guidance.
Common issues when replacing a Genie remote
Typical problems include: the remote not entering Learn mode, no LED indication during pairing, or the opener failing to respond after pairing. Frequency mismatch is another frequent culprit, particularly in homes with newer door openers installed alongside older remotes. Ensure you’ve chosen a remote that explicitly supports your model family and frequency. If you still can’t pair after multiple attempts, verify that the opener’s light indicates activity rather than a fault; a blinking LED can signal a protective feature or insufficient power.
Safety considerations and warranty guidance
Working with garage door openers involves electrical components and moving parts. Always unplug the opener or disconnect power if you’ll be working near exposed wiring. Ensure you follow the manufacturer’s safety guidelines. Replacing a remote does not typically void warranties, but using an incompatible remote or attempting unauthorized modifications can void coverage. Preserve your original remote’s packaging and manuals in case you need to reference model numbers for future replacements, and document your remote’s pairing date for warranty records.
Aftercare: maintenance and storage tips
Store spare remotes in a dry location away from metal objects and strong magnets, which can affect radio frequency components. Regularly check remote batteries and replace them before performance sharply drops. Keep a written note of the replacement date and the remote’s model family for easy re-purchase in the future. A good practice is to test remotes quarterly, especially after seasonal changes, to confirm consistent performance across all operated doors.
Tools & Materials
- Compatible Genie replacement remote(Confirm it matches your Genie model family and frequency (e.g., 315 MHz or 390 MHz) per the opener label.)
- Small screwdriver (precision Phillips or flathead)(Used for opening the remote housing without damaging clips.)
- Battery (if required by the replacement remote)(Use the battery type specified by the remote’s manual; not all remotes require a new battery.)
- Paper clip or small tool(Optional for accessing recessed Learn buttons on some remotes.)
- Soft cloth or anti-static mat(Help prevent static discharge and keep components clean.)
- Label or marker(Mark settings or model family for future reference.)
Steps
Estimated time: 20-40 minutes
- 1
Identify compatibility and gather model info
Check the opener label for the model number and frequency. Compare this with the replacement remote’s compatibility notes. Use this step to prevent buying the wrong remote and to gather product manuals if needed.
Tip: Take a photo of the opener’s model tag and remote packaging to confirm compatibility later. - 2
Open the remote housing and prepare the new shell
Carefully remove the back cover with the correct screwdriver. If you’re transferring components from an old remote, keep track of screws and parts. Ensure the workspace is clean and static-free.
Tip: Work slowly to avoid stressing plastic clips or bending circuit traces. - 3
Install the battery and transfer components if needed
If your replacement remote uses a different shell, install the new battery and transfer any necessary internal components. If the new shell is pre-assembled, verify the battery contacts are clean and align the battery correctly.
Tip: Inspect battery contacts for corrosion; clean with a dry cloth if needed. - 4
Enter pairing mode on the opener and prepare the remote
Locate the Learn button on the garage door opener motor head. If required, press and hold it until the LED signals readiness. Keep the remote ready and avoid moving away during the pairing window.
Tip: If you don’t see a LED, check the opener’s user manual for the correct method to initiate pairing. - 5
Pair the remote to the opener
Press the remote’s button while the opener is in Learn mode. Wait for a confirmation LED or sound that indicates successful enrollment. Then release both devices.
Tip: Program one button at a time if your remote has multiple buttons. - 6
Test range and reassemble
Close the housing and test the remote from typical distances and routes around doors. Confirm operation for all doors if there are multiple. If it fails, recheck battery orientation and recalculate distance.
Tip: Test inside and outside the garage to account for interference and door angle.
Got Questions?
Can I use a non-Genie remote with a Genie opener?
Genie openers generally require Genie-branded remotes or those explicitly listed as compatible with the model family. Using an incompatible remote can fail to pair or operate, and may void warranty.
Usually you should use a Genie-compatible remote to ensure proper pairing and safety.
Why won’t my new remote pair with the opener?
Common causes are frequency mismatch, incorrect model family, or a weak battery. Double‑check compatibility, replace the battery if needed, and retry the Learn button sequence with the correct remote.
If it won’t pair, verify compatibility and battery first, then retry the Learn sequence.
Do I need to re-program all remotes after replacing one?
Not always, but some setups may require reprogramming to avoid interference. Check your opener’s memory and re-pair other remotes if you notice inconsistent operation.
Sometimes you’ll need to re-pair other remotes to avoid interference.
How can I identify my opener’s frequency if the label is damaged?
Check the model number on the motor head and consult Genie’s compatibility charts or GarageDoorAdjust guidance to determine the correct frequency. If in doubt, contact Genie support.
Look up the model number on the motor head to confirm the frequency.
What if the Learn button is missing or unresponsive?
Some older or specialty models use alternate pairing methods or require a reset. Refer to the user manual or Genie support; avoid attempting risky bypass methods.
If the Learn button is missing, consult the manual or Genie support for the correct method.
Is it safe to test the new remote while people are nearby?
Yes, but keep people clear of the door’s path during testing to prevent injury. Hold the remote away from metal surfaces that can affect signaling and ensure the area is free of obstacles.
Test with people away from the door and clear of the doorway path.
Watch Video
Quick Summary
- Verify compatibility before purchasing a replacement.
- Use the correct Learn button method for your model.
- Test range and functionality after pairing.
- Keep spare remotes and document pairing details.
- Follow safety and warranty guidelines to protect your system.