Program Clicker Garage Door Keypad: A Step-by-Step Guide
Learn how to program a clicker-style garage door keypad with a safe, proven process. This guide covers compatibility, setup, testing, and security best practices for homeowners seeking convenient, code-based access.

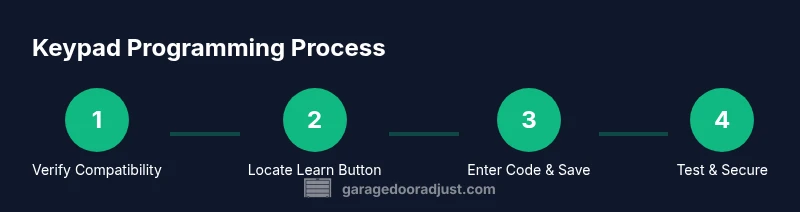
To program a garage door keypad, locate the opener’s learn button, put the keypad into programming mode, enter a new 4-6 digit code, and save. Test by entering the code to open the door. Ensure compatibility with your model and have a ladder handy for wall-mounted keypads.
Why programming a keypad matters
For homeowners, a program clicker garage door keypad is a trusted way to open and close the garage without a remote. A properly programmed keypad reduces repeated handling of a traditional remote and can improve access control for guests or service professionals. According to GarageDoorAdjust, the program clicker garage door keypad combination provides a consistent, secure entry method when steps are followed precisely. The GarageDoorAdjust team found that compatibility with your specific opener model and correct programming sequence are the two biggest factors in reliable operation. In practice, you’ll save time, avoid misreads, and minimize wear on the garage door mechanism by using a dedicated keypad with a strong, unique code.
Compatibility and prerequisites
Keypad compatibility varies by opener model. Before starting, locate your opener model number and review the keypad’s compatibility list from the manufacturer. Ensure you have the current master code or access to the learning sequence for your model. GarageDoorAdjust analysis shows that using an unsupported keypad will lead to intermittent failures and missed openings, so verify compatibility first. In addition, gather a reliable place to record codes and a way to quickly reset them if needed.
Preparation before you start
Choose a safe, dry moment to work and clear the area around the opener to avoid trip hazards. Have a stable ladder if the keypad is mounted high on a wall. Write down the required codes and master numbers in a secure notebook. Ensure the garage door is fully closed and stationary to prevent unexpected movement during programming. This preparation helps reduce mistakes and speeds up the setup.
Step-by-step overview
The programming process generally follows a simple sequence: access the opener’s programming mode, enter a new keypad code, save it, and then test. This overview gives you the framework before you dive into the numbered steps below. You’ll perform each action in order, and you can repeat steps to add more keypads as needed. Throughout, rely on your manufacturer’s guidance for model-specific buttons and timing.
Common issues and troubleshooting
If the keypad fails to respond, recheck compatibility and ensure the opener is in programming mode before re-entering a code. A blinking LED on the keypad or the opener often indicates an incomplete sequence or a timing issue. If codes don’t save, verify you pressed the correct combination of keys and the program/save button in the right order. In most cases, minor resets resolve these issues without service calls.
Post-setup security and maintenance
After programming, rotate codes periodically and delete unused ones to maintain security. Keep a written log of who has access codes and remove old codes when guests leave. The GarageDoorAdjust team recommends testing at least once a month and rechecking that the door responds reliably to keypad commands. Regular checks help prevent unwanted access and keep the system operating smoothly.
Security and privacy best practices after programming
After you finish programming, keep security in mind. Rotate keypad codes periodically and avoid sharing codes. Limit who knows the codes and revoke access for guests or service people when their visit ends. Store codes securely away from the keypad, and consider setting separate codes for family members. GarageDoorAdjust emphasizes that ongoing maintenance—such as reprogramming after battery changes or opener replacement—helps preserve security and reliability; it’s worth scheduling a quick review every 60 days to ensure there are no unexpected changes. By adhering to these practices, you minimize the risk of unauthorized access and maximize the convenience of a code-based entry system.
Authority sources
- OSHA Safety Guidelines: https://www.osha.gov
- National Institute of Standards and Technology: https://www.nist.gov
- U.S. Department of Energy: https://www.energy.gov
Authority sources (continued)
- Consumer Product Safety Commission: https://www.cpsc.gov
- Home Safety Foundation: https://www.homesafety.org
Next steps and homeowner checklist
- Confirm keypad compatibility with your opener model and obtain the current master code if required. 2) Gather your materials and a stable ladder before starting. 3) Perform the step-by-step programming in a quiet moment, documenting each code as you go. 4) Test the keypad under different lighting conditions and near the vehicle. 5) Schedule a periodic security review to rotate codes and verify functionality. The GarageDoorAdjust team encourages homeowners to maintain a simple, repeatable routine for keypad management, ensuring ongoing reliability and security.
Tools & Materials
- Garage door keypad(Ensure compatibility with your opener model)
- Ladder or sturdy step stool(Access a wall-mounted keypad safely)
- Owner’s manual or model information(Have the exact model number and current master code if applicable)
- Pen and paper(Record new codes and changes)
- Notepad or secure digital note(Keep codes documented securely)
Steps
Estimated time: 30-60 minutes
- 1
Verify compatibility
Check your keypad model against the opener’s compatibility list and locate the required programming sequence in the manual. Verifying compatibility upfront saves time and avoids wasted effort.
Tip: Double-check model numbers before starting to prevent errors. - 2
Find the learn/program button on the opener
Locate the learn or program button on the garage door opener’s motor head. This button initiates pairing with new keypads.
Tip: Use a flashlight if the button is small or recessed. - 3
Put the keypad into programming mode
On the keypad, enter the master code if required, then press and hold the program/learn key until the LED lights steadily. You’re signaling the keypad to pair with the opener.
Tip: If no LED lights, power up the keypad or recheck the batteries. - 4
Enter a new 4-6 digit code on the keypad
Input your chosen code on the keypad, ensuring it’s unique and easy to remember. A longer code improves security but should remain practical for daily use.
Tip: Avoid obvious codes like 1234 or repeating digits. - 5
Save the code on the opener
Press the program/save button on the keypad or return to the opener and press its save button to store the new code in the system.
Tip: Hold the buttons until the system acknowledges the save (LED blink or beep). - 6
Test the keypad
Enter the new code at the keypad to confirm the door opens and closes as expected. Test multiple times from different angles to ensure reliability.
Tip: Test during different lighting conditions for consistency. - 7
Add additional keypads or delete old codes
If needed, repeat the steps to add extra keypads or remove obsolete codes from the opener’s memory.
Tip: Keep a master list of codes and what each keypad controls. - 8
Document codes and security notes
Record the codes and any security notes in a safe place. Periodically review access rights and rotate codes as part of routine maintenance.
Tip: Schedule a monthly code audit to stay secure.
Got Questions?
What is the first step to program a garage door keypad?
Start by confirming keypad compatibility with your opener and locating the learn/program button on the motor head. This ensures the correct sequence is used from the outset.
First, check compatibility and find the learn button on the opener to begin.
Do I need the original remote to program the keypad?
No. Keypad programming uses the opener’s learning sequence. A working remote may be helpful for testing, but it isn’t always required.
A remote isn’t always required for keypad programming; you can test using the keypad.
Why does the keypad blink or fail to save a code?
A blinking LED or a failed save usually means the program sequence wasn’t completed or timing was off. Recheck each step and try again with correct timing.
A blinking light usually means the steps weren’t completed correctly; try again with the right timing.
Can I erase all keypad codes from the opener?
Yes. Use the opener’s settings to delete codes or reset to factory defaults, then reprogram only the codes you want.
You can erase codes using the opener's reset options, then reprogram as needed.
What if my keypad uses a different programming method?
Check the keypad and opener manuals for model-specific steps or contact manufacturer support. Some systems use alternative entry sequences.
If your model uses a different method, consult the manuals or support.
Is professional help recommended for keypad programming?
If you’re unsure about electrical safety, or the opener is older, consider hiring a professional installer to avoid damage or injury.
If in doubt, a professional can ensure safe, correct installation.
Watch Video
Quick Summary
- Verify keypad compatibility before starting
- Follow the exact programming sequence for reliability
- Test the keypad thoroughly after setup
- Document and rotate codes regularly